Indoor and outdoor, stone and brick, with floor to ceiling Windows and polozhennye veranda have been transformed from a small structures playing a role of outbuildings in a spacious and functional spaces. If desired, additional space becomes an outdoor dining room, and a refuge on a hot day, and, with careful warming, winter garden. It’s hard to say exactly what should be porch: with his hands with the same success it is possible to create a modest extension, and luxurious hall.
The contents
The types of structures and the correct location
The veranda is never considered as a separate structure: this part of the house, which is attached to the main building in process of construction or at a later time. Most often they are attached to the front or end side, that is, to the wall, which is built into the door. Thus, to get into the house, you first need to go to the veranda.
Traditionally extensions are divided into two types:
- open – the upper half of the walls missing, and the roof rests on beams;
- closed – free from the walls of the glazed space (in some cases, the area of the glass coverage prevails over the area of the wooden parts).
Designing the placement and appearance of the extension, you should be aware of harmony: porch should blend with the house to match his style, to be built of similar materials to suitable size. The optimal length of the room – 4-7 m, width – 2.5-3.5 m. a Smaller area is not enough, and most will look awkward.

Veranda open type comprising a porch and a place to relax. Wooden furniture, railings, floral decor make a home, although the structure is, in fact, on the street
A small covered porch performs the function of a hallway or dining room, especially in the summer. Here you can not only to meet guests and chat with them over a Cup of tea, comfortably ensconced in an armchair

Open porch — a perfect place for a summer vacation. It has everything to have a great time: fresh air, nature, comfortable furniture and a saving shade
Usually, even in closed rooms not heated, so the veranda is often used in warm time of the year. Before you begin construction, you must spend a number of preventive measures.
Preparatory stage: documents and recruitment materials
About the future should take care in advance. It is possible that in a few years will have to sell, donate or lease a vacation home, and then need to have the documents that confirm the legality of the extension. Otherwise you will have to pay the fine and get the same paper, but more difficult and long way.
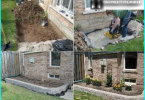
The first step is to contact the project organization, to be provided by the sketches made the drawing and design of future buildings. In this case it makes no difference how built a porch in the country with their hands or with construction companies. With project, application, passport and documents confirming the right of ownership, will have to visit several important levels and wait for approval, after which you can start building. The last legal touch – a new check of the house upon completion.

Before visiting the project, the organization should create a sketch of the proposed porch, where you specify the exact dimensions and location of doors and Windows
In addition to the documentary side is financial — the purchase and preparation of building materials. The main principle is consistent. For example, if the house is built of laminated veneer lumber, an extension should also do hardwood. Porch attached to a brick building must be totally or partially made of brick. Totally unacceptable such a combination as brick and concrete blocks or wood and siding.
The main stages of construction
One of the options available for self-construction – wood-frame porch is gated. Installation of foundations, construction of walls, roofing work does not require large material investments and the use of construction machinery.

Diagram of the components of porches: 1 – stand; 2 – the pillars of the Foundation; 3 – the bottom rail; 4 – drain; 5 – zabirka; 6 – window; 7 – sheathing lining; 8 – top rail.
Hand-made drawings verandas will help provide any details and avoid mistakes. For example, you should calculate the number, size and location of glazing.
Step #1 — the construction of pier Foundation
Once removed the top layer of the soil and produced the markup, begin construction of the Foundation. Well, if it is analogous to the Foundation of the house, but it is not always possible. The easiest and fastest option is columnar.

To install the columns use different building material: red brick, white calcium silicate bricks, concrete blocks, reinforced concrete beam, self-made concrete structures
The sequence of operations:
- perimeter (necessarily in the corners) future extension dig holes for poles with a depth of 1 m;
- at the bottom of the pits satisfied with gravel-sand bags;
- produce waterproofing (bitumen);
- make a 15-centimeter concrete Foundation;
- erect the pillars of conventional masonry bricks.
The height of the pillars is calculated from the height of the floor of the house. At the end of the construction of the roof of the porch will fit under the overhang of the roof, the porch floor is approximately 30 cm lower than the floor of the building.
Step #2 — mounting frame
A strong and stable frame for fixing wall elements is an important stage in the construction of the wooden veranda with his hands. Perform upper and lower piping, the material for which serve the beam (diameter 12 cm) or bars (8 cm x 8 cm, 10 cm x 10 cm). The connection occurs via «direct lock».

The construction of the frame of the extension it is better to start with a more powerful angular elements, gradually moving to the rest of the details — vertical and horizontal beams
Arranging a bottom dual harness, cut the joists at the level of 2 logs and set the bar, which is fixed with metal staples and nails. In the upper part equipped with a second harness and install rafters. The upper ends of the rafters connect with the beam under the roof slope of the building. For the connection of horizontal elements and racks use bolts.
Step #3 — building the walls and roof
How to make upholstery of the walls of the veranda to the frame withstood the weight of the structure? For this purpose, relatively light materials, such as clapboard or Board. Each kind of wooden material has its own peculiarities of installation. For example, the horizontal arrangement of the elements (which is preferable) lining adjust strap close to the strap, and the connecting Board overlap.

If the porch is erected simultaneously with the construction of the home, use one-piece roof covering: the roof of the house smoothly into the porch roof
On the inner side lay the insulation material, which is sold in slabs or rolls. Decoration can be performed with plasterboard or chipboard panels. Decorating options interior a lot: the design depends on the purpose of the veranda.
The configuration of the roof of the extension has a few options, but the most popular is the lean-to type of roof – simple in execution and, as a rule, perfectly with the roof of the house. Rafters are the inclined upper ends are fixed under the slope, rest on the bottom wall.

There are two version of the design of the ceilings: in the first case, they sew up the boards in the second — to leave in the clear
As the roofing uses the same material that was used for equipment building roof. It is important to match the texture and color. Usually, when building a veranda with your own hands, apply the material, easy to install, for example, soft tile, metal or tar paper.
The order of stacking of roofing material:
- to the rafters attach the Board this way to get a tight deck;
- lap rolled roofing fabric, securing the edges with galvanized nails;
- in addition fix covering the strips positioned at the same distance from one another;
- the lower edge of roofing to buckle and nail.
Step #4 — the formation of sex
The best material for the floor is wooden handled Board with a thickness of about 30 mm.

Choosing the tone of for painting the wooden floor, often stopping by the semi-transparent paint compositions, preserves the natural graining of wood
The width can vary, but usually take the product of about 85-120 mm. Boards lay on the joists, using the insulating layer. The upper surface of the floor must be flat and smooth. Every detail is treated with a protective agent, and after laying ink or varnish.

Porch-enclosed type — full housing, protected from weather trouble. Thinking through appropriate interior design, it can be turned into a study, lounge, dining room or playroom for children
The verandah on the cottage can be constructed using finished Windows. Their sizes depend on the total area of the premises and the degree of illumination. The more glass, the easier it looks the building. Particularly good sliding design, allowing the warmer to turn a covered porch into the open.