Old wooden Windows, which have served the century and gave way to plastic, are usually sent to disposal. But the cottagers this material might suffice to create a temporary or permanent greenhouses. Factory design polycarbonate money is not always enough, and here – free, sturdy and highly advantageous to the plant material. Glass transmits light well and has high strength. So your greenhouse of window frames will resist any sediments and miss the inside the most part of ultraviolet rays needed for plant growth.
The contents
From the window frames can be created as a temporary collapsible version of the mini-greenhouses for growing seedlings and a stationary design. It all depends on the crops you plan to grow there, and the local climate. If the weather is warm in summer, and the majority of plants survive well in the open ground, it makes sense to restrict myself to a few greenhouses, which after transplantation of the seedlings will go into the barn until next spring. But in cold climates will have to build a greenhouse «for centuries», to neither the wind nor the snow in the winter didn’t ruin it, but spring is not podmilj floods.
Regardless of the construction of the greenhouse you choose, the window frames need to prepare for new functions. All metal Arsenal – latches, hooks, handles, etc. in the greenhouse is not required, so they dismantled.
To make it easier to capture the frame to the frame, glass is better to be taken out and folded to one side, indicating marker number (to then just paste in the same frame). So you will be easier to handle the installation, and the glass will not crack during operation. If necessary, replace cracked rails and rusty beadings.
Once the window was in use, the paint in them, of course, polushilos. All the layers of varnish and paint to clean off, because the tree needs protection from humidity. The climate is greenhouse adverse for wood, and it rotted for a year, the frame should be treated with antiseptic.
On top of good paint over a coat of white paint. The sun will be less to heat the carcass and reduce its service life. However, for the hotbed is not necessary to do so.
Create a mini-greenhouse for growing seedlings
While the frame dries, take care of the design. For starters, you can practice creating a mini-greenhouse, and then decide on a greater, non-separable.
Layout and preparation of material
In greenhouses window frames are usually roof mounted on a wooden base. On the day the roof open, giving the seedlings some air. So think about the size of a mini-greenhouse so that its width coincides with the width of the frame. The length is calculated from the number of Windows that will give everything to the roof. Most often they are 2-3.
For the frame will need 4 boards and timber. Bars dig in at the corners of the future hotbed, and of the boards bring down the shields. Since the greenhouse must have a sloping roof for sliding precipitation and maximum passage of sunlight, the front shield down 3 boards, rear – 4, and is also used in side 4, but the top Board is cut an angle along the length to create the desired transition height from front shield to rear. Prepared shields are fixed to the beams using screws.

For the hotbed is usually the Foundation does not do this, but if the ground is marshy, you can put under the bottom row of single brick
Create a roof from the window frames
Since the greenhouse is easy to build, glass from the frames is usually not removed. Therefore, proceed directly to the installation.
- Frame stack across the length of the greenhouse and is fixed to the rear (the highest) wall frame. For this purpose, window hinges.
- It is best to leave all the Windows mobile, not bonding with each other, and tightly-docking. Then for ventilation and care of the seedlings will be possible to reveal any part of the roof.
- For reliability each frame is fixed on the short side of the frame using the door hook, and the top tie handles to easily raise the window.
- Stuffed with the inside of the front shield bar, lowering it to 2-3 cm below the top edge of the Board. She will be a support stick or bar that lifts the roof for ventilation.

The handle is fixed to the edge of each frame with screws, to make it easier to lift one of the parts of the roof to ventilate the seedlings
Technology installation of stationary greenhouse
If enough greenhouse or climatic conditions do not allow to grow the plant outdoors, you can create a more durable design that will sort it out for winter and will last 3-5 seasons. But stationary greenhouse out of old window frames – the most severe of all variants of such facilities. Therefore, it requires a well-fortified Foundation.
Foundation work: options and technology fill
The need for Foundation for the greenhouses is also due to the fact that the height of the window frames does not exceed 1.5 meters. It is an awkward size for normal movement inside. Ideally, if the height of 1,7-1,8 m, because caring for the plants, mostly women. Therefore, the missing centimeters need «to increase» with the help of the Foundation. Another plus – tree, get rid of direct contact with the ground, and hence will rot less.

The height of the aboveground part of the Foundation is calculated based on the total height of the structure, below the frame together with the concrete walls created, within which you can move without bending down
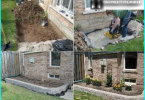
The best is considered to be a strip Foundation made of concrete. It is made in the following way:
- Carried out a breakdown site so that the greenhouse stood from North to South (due to the location of the plant there will be a day in the sun). Hammered in the corners of the pegs, pull the twine.
- Dig a trench with a width of 15-20 cm, depth – up to half a meter. If the level of freezing in your area deeper, it prokatyvaja to 70 cm. This will make the greenhouse nepronitsaemo and allow you to plant the plants very early, in early spring.
- To strengthen the Foundation poured a layer of gravel and 10 cm of sand.
- The sand shed a layer of concrete, throw stones and pour the remaining to the ground space a concrete.
- The next day, put the formwork to raise the Foundation above the ground. The height of the formwork depends on what the final height size of the greenhouse you want to. Usually covered 15-25 cm.
- Fill with concrete, strengthening it with stones and armature, and leave to ostyvaya.
Some owners do without formwork, laying the aboveground part of the Foundation beam 15X15 cm to 30 cm in height, bricks laid in pairs, on each other. Thus will need 8 wooden boards that are pre-lubricated with antiseptic or spent oils. Tied between the brackets and the edges reinforce metal corners. Between the timber and concrete part of the Foundation necessary to pave the waterproofing of roofing material.
For small greenhouses it is sufficient to dig a trench 30 cm, cover it with gravel, and then sand it just to lay the lumber. However, this design can freeze.
Technology installation frame
Between pouring the Foundation and mounting frame must be at least 2 weeks so the concrete ostil and finally settled in the land. So to calculate the timing of the construction of the window frames in advance to have time to mount it to transplanting.
The frame is a strut, and the upper and lower harness. They can be run in two ways: either from boards and beams, either from metal parts.
If you use metal corners, then the lower harness create at the stage of pouring the aboveground part of the Foundation to apply the metal to the substrate. The side stands of the same parts of the weld or connect with the lower part by bolts. The top rail must be very accurately calculate the height that the window frames were not above or below the line of the frame.
If you use wood, you will need beams of 10X10 cm, which is put on the Foundation, 8 boards for strapping (thickness 4 cm), 4 side plates from a bar (5X5 cm) and the intermediate, the number of which is calculated based on the number of frames that will be installed. For example, if the length is set to 4 frames, and 2 in width, you will need 3 racks on one side, 3 on another, and one on the side. On the other end there will be a door that say later..
When mounting using metal angles and screws.

Bars between connecting metal parts, pre-nasverliv the holes for the bolts, and all metal parts are treated with rust inhibitor
Progress:
- Ten timber attached to the Foundation using anchor bolts.
- Put the side stand while controlling the vertical level.
- Nailed Board bottom trim using Urubko vpoldereva and nails. Can also be bonded furniture parts, taken on the screws.
- Mounted in the frame intermediate the rack with a step equal to the width of one window.
- Nailed Board top binding.

Side stand of timber, it is desirable to mount using building level and for better preservation of tree cover antiseptic composition
The frame for the gable roof is better down on the ground, and then install on the structure. His knock also of timber. Central risers use wood thicker and rafters, ridge and intermediate truss legs can be made of timber 5X5 cm.

The roof frame to collect on the ground is easier, as is the support and screw the screws in the ridge and rafters much easier
Than it is better to cover the roof?
In the construction of greenhouses from the window frames the roof is usually covered with foil or polycarbonate. The window frames are rarely used, because weight is too large, and to fix the glass in an inclined position difficult. Besides, film or plastic for the winter can be removed. The window as one does not disassemble, and in the winter they will gather in their caps of snow, reducing the service life of the greenhouse.

Intermediate rafter feet can be produced not from a bar, and a narrow thick Board. Their step is usually equal to the width of window frames
Pull the tape better together, from different sides. It is easier to control the tension level. Fix the polythene to the roof frame with wooden slats and small studs.

If the Gables of the roof stud is not a film, a breathable material like mesh construction, you can use window frames with no panes
Anchoring frames in the frame
Once done the frame and the roof, ready to install window frames.
- They are fixed with screws on the outside of the frame.
- The gap between the Windows develop foam with foam, and the top closed thin straps for full tightness.
- Insert the glass, securing not only the bead but also lubricating the edges with sealant to prevent air movement.
- Check, looked whether the vents.
- Beat hooks, which will hold the window in closed position, and think through the clamping elements to the open as they are not hanging.

Each window is necessary to provide not only a hook that will hold it in the closed position, but to think that she is not hanging out in the open
Installation of doors
The last step will be installation of doors in front of the greenhouse. If the design is narrow, this end is generally not recommended to stitch frames, because they simply will not fit. The easiest way to all the space between the door frame and the frame to upholster film.
Door frame made of timber. For hanging the door leaf, you can use the furniture out of the Windows. Left to fill the floor of the greenhouse fertile ground to break up the beds and planting plants.