The contents
- The General structure
- Typical properties
- Preparatory stage – the construction of Foundation
- The process of laying
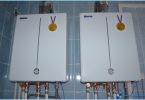
The relevance of owning a comfortable house to stay outside the city is not reduced over time. When addressing the issue of heating the scales often outweighs Dutch oven. This applies to both newly constructed buildings and in need of retrofitting old buildings. The reason for such popularity, what are the key advantages of Dutch ovens and how to make design your own hands according to the order, we consider in detail.

The General structure ↑
The classic design of the Dutch oven is a rectangular design, is laid out in one brick, which has long smoke channels above the furnace. This provides a good warm-up with economical consumption of fuel material. The result is achieved due to the transfer to the walls of the furnace Dutch thermal energy from the hot smoke. Design he leaves almost in a refrigerated state. The exit flue of the furnace Dutch, in accordance with the classical variant is positioned to the side. Such kind of design due to the need to pay to the Netherlands tax of smoke, so the chimney pipe that simultaneously serve multiple furnaces.
The main purpose of the Dutch oven for a long time remained the only heating function. As a popular cladding tiles. Over time, the situation gradually changed. It concerned the following parties furnishing ovens Dutch:
- Form. In addition to the rectangular structures, appeared round, trapezoidal and triangular oven Dutch.
- Function. There are advanced models, equipped with a stove (which will be described in detail hereinafter), a fireplace, a couch, a tank for heating water and other variations.
- The location of the chimney oven Dutch, mostly vertical, side exit is almost never used.
- Veneer. The tiles now are extremely rare. Often the design is a lack of quality brick or tile from a natural stone. The budget option involves a simple plastering.
The lining of Dutch with a stove is straightforward, therefore, to lay out the oven with his own hands quite accessible to the person skilled in masonry.

Typical properties ↑
Before starting work it is useful to learn the advantages and disadvantages of the structure with a stove for cooking. Among the advantages of the stove experts note the following features:
- Compactness. The minimum size is 0,5×0,5 m, at such a scale, Dutch is able to heat an area of 20 mTwo. If you increase designs to heat you room 60 mTwo, known use cases for two – and three-story buildings.
- Compared to the traditional Russian stove material for the Dutch with a stove consumed less almost twice.
- Due to reduced material consumption, lightweight stove with oven less demanding on the strength of the Foundation.
- Feature design equipped with a stove, is the possibility of its adjustment without loss of effectiveness of the indicators, most importantly – keep proportions.
- Dutch is not demanding to the quality of brick with the exception of the masonry of the furnace, which requires a refractory material.
- After long periods of standing oven with stove does not need a slow warm-up to worry about the appearance of cracks should not.
- Dutch girl with a stove is ideal for installation in a suburban house where vacationers will appreciate the possibility of its rapid heating followed by slow cooling.
Numerous positive sides of the Dutch oven accompanied with certain negative characteristics:
- Restrictions on used fuel. Quickly flammable material in the form of reeds, straw or sawdust is not appropriate. Oven with hob requires the use of wood or coal because the efficiency is based on the process of decay. The smoke from burning firewood instantly evaporate with the same speed, not having to transfer thermal energy to the walls of the furnace with a stove.
- Additional requirement apply for Dutch fuel – moisture level. If the oven with a plate load of wet material, the channels rapidly overgrown with soot and require frequent cleaning.
- This design of oven is characterized by low efficiency, not exceeding 40% threshold.
- The low heat capacity of the Dutch with the plate due to the small number of bricks necessitates frequent firing. To maintain the optimal temperature add the fuel must be at least two times per day. ?Warning! To peretaplivanii oven is prohibited because of the risk of the allocation of carbon monoxide.
- Should be care in the process of laying the fuel. If you do not close the view after the firing, the heat will quickly leave the flue channels.
The nuances of fuel and firing process minor and more than cover the important advantages of the design with stove.

Preparatory stage – the construction of Foundation ↑
Despite the relatively low weight of the Dutch with a stove, oven needs to be pre-equipment of the Foundation. You can do it two ways – from the bricks or mortar. Each option has its own characteristics:
- In the presence of free components in the form of sand and gravel, pouring cement mixture will be cheaper. Although the process is characterized by high complexity, even when using mixers.
- The Foundation for Dutch brick will cost more, but make it much easier.
Let us consider the method of formation of the basement for the furnace based slab of concrete. You need to do the following steps:
- To prepare the pit depth of not less than 0.5 m. The area of the Foundation should exceed the size of the future Dutch oven.
- Make a bed of gravel with a thickness of 10-15 cm, which will require carefully compacted.
- Install the formwork and make a reinforcing frame made of metal rods with a thickness of 1 cm.
- To prepare cement-sand mortar, and gradually pour reinforcing design.
- At the completion of the Foundation of Dutch covered with cement powder.
Depending on the region and weather conditions, the Foundation for oven with stove, you should gain strength. The period may last from one to four weeks.

The process of laying ↑
The main function of the Dutch oven is heated, so the examples porjadovki design with stove is not very much. We offer the following options:


Preparation of the solution ↑
An important component of the qualitative stage of the masonry oven with Dutch oven, based on the selected scheme is the preparation of a clay solution. Depends on the tightness of the furnace, its strength and temperature resistance during a set period of operation. The proportions of the constituent elements of the solution provokes cracking of the Dutch with a stove and even carbon monoxide leaks. What is the ratio of binding elements to make in the overall composition of the mixture depends on its purpose: to furnish or masonry work. The task of filler – to give the hardened mixture stiffness, so a slight excess will not affect the quality of masonry of the furnace. The right consistency of masonry mortar for Dutch with oven has a viscosity and plasticity. It should not be liquid or crumble.
Make a solution is easy, the process consists of the following steps:
- The clay is placed in a trough, add a little water and leave to soak for 6 to 48 hours.
- Throughout the period the material is thoroughly mixed, you can even stomp in rubber boots.
- After adding the sifted sand the optimal consistency should slowly slide off the shovel.
Having achieved plasticity are transferred directly to the masonry with a Dutch oven.

Masonry ↑
In addition to bricks and clay mortar to make a Dutch girl with a stove, will need to have the following components:
- cooktop (one burner);
- grate;
- the doors and the damper;
- steel corners 50×50 mm, thickness 3-4 mm.

Consider the example of a simple porjadovki oven with stove, how to spread own hands Dutch:
- Prepared for the Foundation you need to make a quality waterproofing. As a material suitable roofing material.
- The first three levels of Dutch bricks laid in a continuous layer. As with the formation of the Foundation, are required to monitor compliance with the vertical and horizontal. In addition, be sure to apply the weights, they are more clearly indicate the deviations.
- The blower door of the furnace with a plate fixed on the fourth row, its floor is on the sixth row with bricks, sawn lengthwise. Here the bricks are adjusted to the installation of grates.

- The furnace door of the furnace Dutch is located between the seventh and ninth next.
- Overlaps furnace door in the tenth row. The bricks here requires additional processing to mount the plate. Similar fastening of the grate, a cavity under the slab is needed to make more of its dimensions is 5 mm. This provides a free place during the expansion of the metal in the heating process. The gap is made using asbestos cord, protected with a paper carton. In the operation of the Dutch oven with the cardboard burns out and the cord continues to compensate for the expansion of the metal parts furnace.

- After installing the plate, its edges are made with metal corners protecting the brickwork from damage. ??It is important! The brick masonry of the furnace is necessarily acquired refractory.
- The next four rows of elevated area above the stove Dutch. 14 a number of fixed metal area for laying bricks, overlapping niche over the stove.

- Door to clean is in the 16-18 range.
- Strips for the ceiling brass camera installed in a 21 row.
- The damper for the flue duct located 23 a number of.
- The bricks 24 are the number of edges 3 cm, the next row are formed similarly 23.
- To the formation of the chimney start on 26.


Veneer kiln ↑
After the construction of the furnace, you can make it tiling. If the brick was new, undamaged and masonry was carried out carefully, the extras do not have.