The contents
- What is the escutcheon and what are its types
- The types of enclosures
- Preparatory work
- Installation in concrete
Without reliable transaction life in the apartment or house immediately loses its comfort. To conditions were the most comfortable, you should care about everything related to electricians. Not the exception and escutcheon. Without them it is simply impossible to install the socket, which will withstand the maximum load.
What is the escutcheon and what are its types ↑
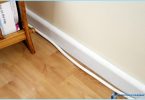
The escutcheon is a special boxes, which are made of different materials (usually plastic or metal). The main goal of this tool is plugging a hole in the wall and install it in the socket.
The best material for manufacture is plastic. Socket it rests confidently and securely. Metal escutcheon (also called liners) are typically used only in wooden houses, because it is required safety. The decrease in demand for casings due to the fact that such devices have a weaker bond with the outlets (compared to the plastic counterparts). In addition, their sharp edges they can damage the important wires.

The types of enclosures ↑
For installation will not fit any escutcheon. You need to choose them depending on the wall into which they are installed. There are only 2 data groups:
- On the concrete wall. From the name it is obvious that the installation of such enclosures is in the concrete wall. But other than that they are suitable for foam – and aerated concrete, brick, and concrete coatings.
- For drywall surfaces, and also for structures made of plywood and particleboard used the tools of the other group.
Preparatory work ↑
After buying the escutcheon should undertake special preparatory work. A lot of time for this is not required. Importantly, a qualitative assessment of the wall.

Installation in concrete ↑
When the escutcheon is purchased, the preparatory work carried out, you can move on to the installation. However, to carry out the installation of enclosures in the concrete wall with his bare hands it is unlikely someone will succeed. So be sure to need the following tools:
- A drill bit for concrete;
- The perforator;
- Special core bits for drilling concrete. Their diameter should match the size of the mounted device;
- A pencil and a ruler,
- The chisel with the hammer;
- An angle grinder with a special blade for concrete;
- Spatula;
- Gypsum. Suitable construction, and health;
- Paper knife
Tools such as a grinder or drill is required. If there is a personal tool, can be rented at the specialized building shops.
When the Arsenal is assembled, you can proceed to the next stage.
Marking and drilling a hole for the escutcheon ↑
Before installation, be sure to follow the exact layout of the place in which you will install the escutcheon. The height of future outlets and switches is selected individually, but you can use the following professional standards:
- In the living room sockets are placed at a height of 30 cm from the floor covered;
- In the kitchen, for convenience, the height from the floor up to 120cm;
- Height of switch – 90 cm.
After determining the optimal height to the right place puts the escutcheon. The loop is encircled in pencil.
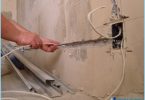
Now before you install it only remains to drill the desired hole. For this purpose, the punch is a special round crown. It resembles a small section of pipe with sharp teeth, which will drill the wall. Drilling should be until the crown is fully seated in the wall. After that Central part, with the use of chisels, it is being studied in depth.

In the absence of the crown, and there are other ways. A total of 2 and each is radically different. In the first case, you use a drill or a drill with a special drill (for computers). The contour of the marked circle drilled the holes with the greatest possible depth. They must be close to each other. After that, the Central part out with a chisel. The advantage of this method is speed. The use of crowns quickly heats the tool, so it periodically needs to rest. Therefore, for making 12-15 of the grooves can go all day. In this case, such disadvantage no.

Also prepare a place for the escutcheon, you can use the grinder. To do this, again use the pencil and ruler. Circled round the loop must be transformed into a square, dragging on each side, one smooth line. Then straight lines should go grinder. Also, as in the previous embodiments, the middle stands out with a chisel.
Depth adjustment ↑
After the hole is done, you should check whether it includes the escutcheon. Ideally, the device should be clearly flush against the wall. In this case, future socket or switch will be flush to the wall.
After that wall is done in the chase, which will bring the wire. He, in turn, is inserted into the escutcheon from the back side. After threading the wire tool inserted in the holes.

The final stage ↑
Almost all the work is done, it remains only to secure the escutcheon with a special solution. To prepare it in small quantities and just before sealing, as it begins to harden after a few minutes. To make it in plaster, you must gradually add water. Mixture while constantly stirring. In the end it should be mass, which in its consistency resembles thick cream.
When all the moisture is absorbed, a hole with a trowel laid out the solution that is inserted into the escutcheon with wire. Install it carefully so that he did not speak, or in the future will be visible obvious defects. Thereafter, the remaining solution sealed all the cracks.

Installation in brick wall ↑
Mounting escutcheon in a brick wall is no different from the above-described embodiment. That is, will need all the same tools. The way the hole will fit any of the above mentioned. But mounting escutcheon in drywall is somewhat different. This will go further
The escutcheon in the plaster wall ↑
Before installation should carefully prepare the surface. In the process of drilling it did not crumble and did not break, you should treat the wall with plenty of primer, which will strengthen its structure.
When the drywall has dried, you can is transferred to the drilling holes. Use this as a special crown, and a simple drill installation with the use of a knife. It is important that the hole was the same diagonal line, and the installation box. To achieve this, it is recommended to start to make the layout the same way as in the case of a concrete wall.

When the holes are ready, they inserted a box which you must remove all jumpers that do not allow me to put in a cable. To ensure the strength, the escutcheon should tighten the screws. Also the seat (before you commit) can be further luted. It will also strengthen the design.

Installation of a socket ↑
Installation of outlets in the escutcheon is the final stage. This procedure takes only a few minutes, but at the same time should adhere to the following rules:
- From the outset it is necessary to remove the top cover. For this center, Unscrew the bolt.
- After that one should relax the contacts in which are inserted wires. In order to avoid overheating, the contacts should be tightened as tight as you can.
- The socket is installed on the box, the top cover is closed and twisted.
This procedure is not difficult, so deal with it even novice craftsmen.
To further understand the equipment installation box in the wall, no harm will be viewing this video.