History the first well-the crane starts at the times of New Kingdom Egypt (1550-1069 BCE). The most ancient form of this well was called shaduf and it is also used to irrigate land. But the principle of operation of this structure has remained unchanged and is still.
The lowering of the bucket and the rise of water is due to the lever with a counterweight on the other end.
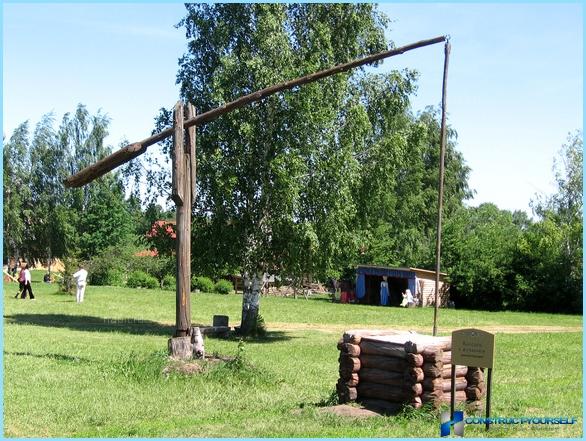
The first wells tried to set beside the tree using it as a prop for balance bar.
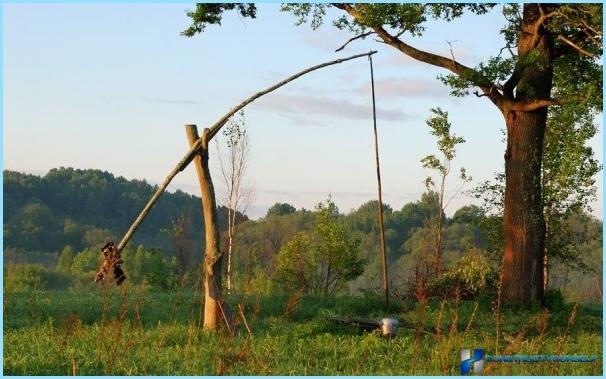
The design of the pit-the crane consists of the following parts:
- balancer (otherwise called the boom, rocker);
- strut for the jib (prop);
- pole;
- circuit;
- bucket;
- cargo;
- support counterweight (optional);
- well.
Advantage «crane» that it is much easier and faster to raise the water than on the well with the winch. But unfortunately, it can be used on wells with small depth, otherwise the design will become too bulky.
Because of this lack of such wells already largely built, if only as a decoration.
Before you begin construction, you must make all payments for the installation of a well-crane.
- Determine the location for the construction of the well and installation of the rocker.
- The well should be kept away from sources of pollution (25-30 m).
- The distance from the main buildings shall be not less than 10 m.
- It is best to install a well on an elevated site.
Build a well ↑
The well consists of three parts:
- headroom (will protect the well from debris and will not allow to freeze);
- mine;
- intake part.
Mine dig in the place where groundwater is closest to the surface of the earth (to find the optimal place better to invite a specialist). The depth of the burial in the aquifer is typically less than 1 m.
A hole you can dig all at once or gradually.
The frame for opening into the shaft made of wood, brick, stone, concrete. Most importantly, he must not be allowed to crumble to the ground into the well and into undrinkable ground water from the upper layers of soil.
The shape can be either round or square, and multifaceted.
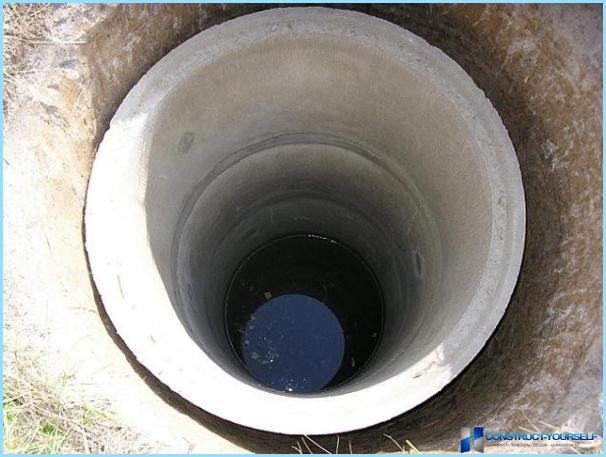
A well from concrete rings ↑
The diameter of the hole should be larger than the diameter of the rings 20 cm, for easy lowering, and also to sleep outside with gravel or sand.
For a well from concrete rings recommended to choose the ring marks the COP 10-9 with a lock, which will allow you to firmly fix them together. This framework will be waterproof and will last for decades.
If the pit is already fully dug and pumped water, begin to lower ring at a time, securely fastening their lock or special braces. The last ring should rise above the ground at least 20-30 cm.
If the hole decided to dig gradually, first otkatyvaetsya deepening the size of one concrete ring, but that’s a little played out (20-30 cm). After it is lowered, the pit digging further, but without leaving the internal space of the ring. As soon as the height of the recesses becomes equal to the height of the next ring, begin to remove the ground from under the edges of the first, for that it began to settle and sink deeper. Set the second ring and so on.
Well wood ^ the
The most common material for the construction of the well is a tree. Use oak, alder, aspen, pine, larch, birch, Linden, willow. Oak is better to take a bog, then it will not give the water a bitter taste and color and will last 20 years longer raw.
It is not recommended to use the fir, because in the water it quickly rots.
Wood must be dry and free of rot, mold, and dust, and carefully inspect for bark beetle. With the logs removed bark and twigs, but the top layer should remain intact.
The diameter of the logs is not less than 180-200 mm.
Wooden well you can start to build in already ready-to-pit or by gradual immersion.
In the first case on the bottom is installed first the crown and then fix the next and so on.
In the second case escapes the pit depth 1-1,5 m and installed three crown. Then the depth of the mine increased to 25 cm and removed the ground under the middle of each side of the crown. Establish backup and remove the ground from the corners, and after that their vibivat and the frame begins to settle.
The bottom of the well is first covered with a layer of coarse sand, and then poured a layer of gravel (for the best water filtration).
The surface of all wooden parts must be cleaned to completely absent splinters.
After the completion of the construction of the well, you need to constantly for several weeks to pump water from it to all the construction finally cleared. Drained water can be used for technical purposes.
Safety during the construction of the well ^ the
Digging holes for wells are very dangerous job. In any case, don’t do it alone. At least one person should always be there.
For insurance to someone who is on the depth of the well shall be attached a rope, in case of a collapse of soil.
The head must be wearing helmets.
Sometimes you need to climb out of the mine, and also check the amount of oxygen in it (if the candle is lit, it means there’s enough). In the event of dizziness or nausea you should immediately get out of the well.
When digging the pit comes to the aquifer, start pumping water by pump or bail bucket, to avoid collapse of soil.
Installation «crane» ↑
First of all, you need to determine the size «crane» for the well. And it depends on the depth of the mine.
It is very important to determine the length of the short and the long arm of the well-crane.
The table below indicates the sizes «crane» given the depth of the well.
| The depth of the well h, m | The height of the B-axis, m | Distance hOne, m | Long shoulder L, m | The short arm LOne, m | The mass m of the counterweight, kg |
| Ten | 5,8 | 5,6 | 7,5 | 2,5 | Thirty |
| Nine | 5,3 | Six | 7,5 | 2,5 | Thirty |
| Eight | 4,8 | 4,5 | Six | Three | Twenty |
| Seven | 4,3 | 4,9 | Six | Three | Twenty |
| Six | 3,8 | 3,3 | 4,5 | 2,3 | Twenty |
| Five | 3,3 | 3,5 | 4,5 | 2,3 | Twenty |
| Four | 2,8 | 2,2 | Three | Two | Fifteen |
| Three | 2,3 | 2,1 | Three | Two | Fifteen |
That is, if a well depth of 7 m, the short arm should have a length of 3 m.
The picture shows a complete design of a well-crane.
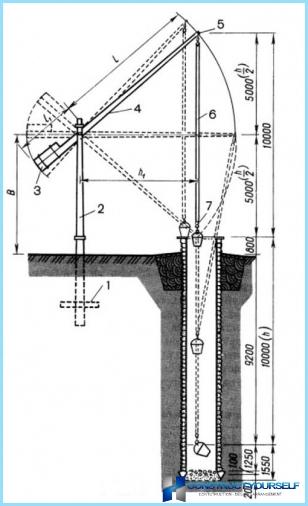
- 1 – crossbar support (excavation in the ground about a meter);
- 2 prop (strut);
- 3 – the load (counterweight);
- 4 – the balancer;
- 5 – ring circuit;
- 6 – pole (length of pole equal to the depth of the well);
- 7 – chain with attachment for bucket.
First, you need to set the prop. It can be made of timber (50?100 mm). To the timber as little as possible exposed to moisture, it is recommended to set it using two steel channels, concreted into the ground at 80-100 cm the distance (free space) from beams to the ground after installation should not be less than 20 cm.
The boom attaches to the front swivel hub (two steel angle and stud M10). Corners fixed to the support studs M8.
To the boom by a chain fastened to the pole, and to the other free end of the pole hangs on a chain with bucket.
On the short arm of the boom installed load (you can also fasten with studs M8).
To the well do not fall precipitation and debris, should be done either a wooden lid or install a special door.
Make a well-the crane can with your hands, most importantly, to follow the calculations and to observe safety precautions, especially while working with pit.
The design of the well ↑
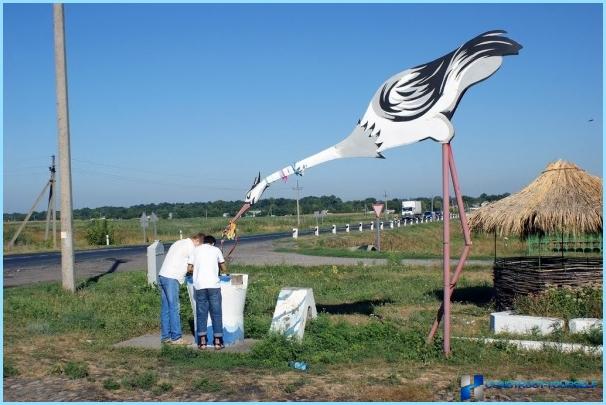
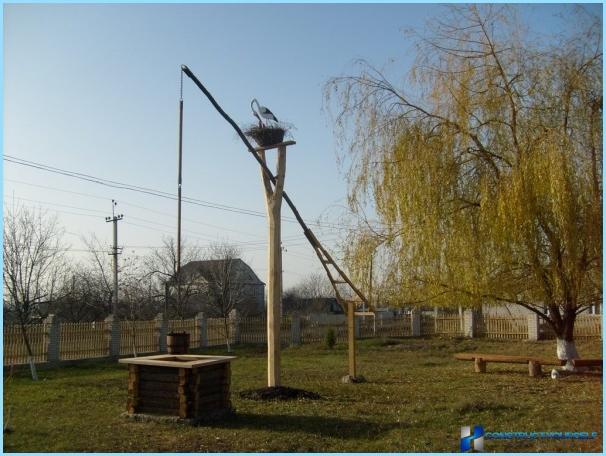
Options, how to make a well-pie in the country a lot. They all fully depend on your imagination and possibilities. For example, an arrow can be done in the form of birds (crane, Heron) or any other character.
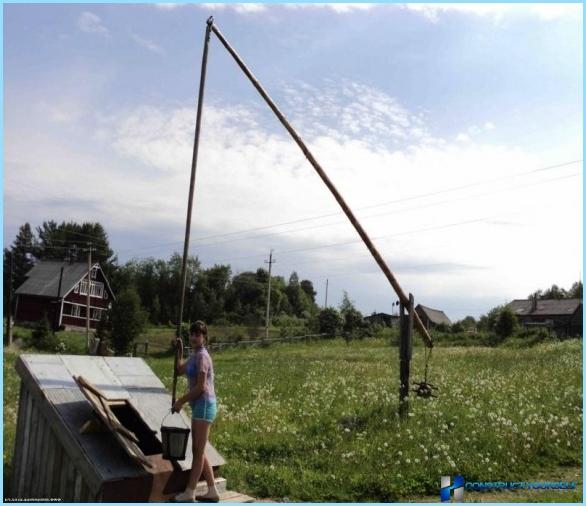
Around «crane» you can sprinkle gravel and put vases with flowers.
If a well from concrete rings can be painted in one color or more, and also to draw an unusual figure.
And decorative well-the crane even more design options. You can completely around him to plant flowers, and even curly, or install a lot of pots with flowers.
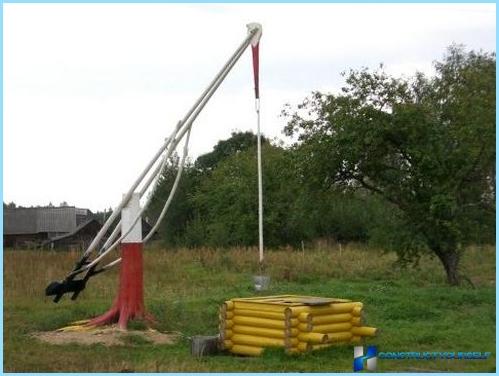
The well crane not only can provide water, but to make the design of the yard interesting addition, decorating it, and it is always a nice touch.


