When planning the arrangement of garden paths on your garden, you always want to create a functional and beautiful elements of landscape design. Material for garden paths can serve as a wood saw cut, natural stone, gravel… But still the most popular among owners of country houses as a covering for playgrounds and pathways is paving slabs with attractive appearance and excellent quality characteristics. Paving their own hands will be an original addition design the site in keeping with the style of the house and garden.
The contents
What are the benefits of homemade tiles?
Manufacture of paving their own hands – quite time-consuming and rather long, but quite a fascinating process. The result of the work become exclusive items that are successfully combined in the scenic paths.

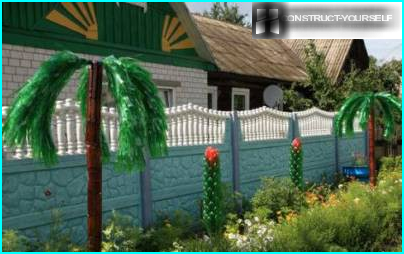
Such unusual tracks are worthy backdrop for flowering plants of the garden
Additionally, the manufacture of paving their own hands will save a lot of money in the family budget, because purchase of the finished coating is a few times more expensive.
Tiles, made at home may not be suitable to cover sites that are designed to accommodate heavy structures or vehicles, but would be a great solution for walkways in the garden. With proper manufacturing of concrete and exposure of all stages of production technology, it is possible to obtain products having 100% durability.

Using color and pigment dyes, you can create tiles of various shades
Experimenting and painting with callers solutions, you can get incredible combinations and patterns. The process of making and arranging the tracks – an interesting exercise that allows you to unleash creativity by bringing fun and positive.
The process of making the steps
Select materials and tools
In order to make the original paving slabs with their hands, we must first acquire the material production and stock up on the necessary tool. The tile is created from a mixture of cement, sand and water exposure ratios that depend on the function of the product and the brand of cement used. For making sturdy garden paving slabs it is desirable to use cement grade M 500. To save on the quality of the material not worth it, so you do not stumble on crumbling track.
Sand and water for mortar should be cleaned from dirt and foliage. Not terrible, if the sand contains pebbles. Availability concrete quality will not suffer. But the product will become unusual texture.
Tip! With the help of plasticizers can increase the strength of the paving and its resistance to temperature.
Plastic mold for pouring in a wide range presented in specialized stores. They may have very different shapes and sizes. Each of them designed for 200 fills. To speed up the process of manufacture it is advisable to buy in sets of ten of each shape.

Combining 2-3 configuration items to create unusual ornaments and fancy «snake»
As the molds it is also possible to use plastic containers for food products, which have sufficient flexibility, softness and durability. With containers uncomplicated shapes with flat sides and right angles, you can make a rectangular «bricks».

Such tiles when laying easily dovetail with each other
Preparation of the solution
The necessary components are ready, you can begin to make exclusive paving slabs with their hands. Mix sand-cement mixture is possible as manually, and with the gun having a nozzle mixer. Planning to create coverages, calculated in dozens, or even hundreds of tiles to facilitate the process it is advisable to stock up on mixers. Well, if she is already in the Arsenal of the host. Because such construction equipment can be used for many purposes, ranging from concrete the Creek bed in the garden and completing the mending of the fence posts.

In a container, which can be used in a basin or bucket is filled with 1 part cement and 3 parts sand
Kneading the solution in the mixer to obtain a homogeneous mass, first you need to fill up the sand, and then in continuously rotating the receptacle is filled with cement.
Water is added to the mixture gradually, continuing to mix the solution. Excess amount of water in the solution can reduce the strength of the finished concrete. To prevent this, at the stage of mixing and pouring to the solution are added water-repellent additives and reinforcing fiber.

The consistency of the mixture should be pasty: some liquid, but not the sliding of the trowel
Paint the tiles in the most unusual colored using inorganic pigments, which have a high resistance to light and atmospheric phenomena, as well as alkaline environment. The amount of dye solution is selected «method sample», starting with 30-50 grams and gradually increasing the proportion. A homogeneous coating composition takes after 5-7 minutes. The willingness of the composition is determined by the absence of lumps and uniform coloration of the entire volume of material.
Fill in the form
Before casting it is desirable to lubricate emulsion or any oil (even used the machine). It will in the future facilitate rasfasovka frozen products.

Forms filled with mortar and compacted with a trowel
To increase the strength of the product is possible, paving filled up half the concrete form of a metal mesh, a rod or wire, and then adding the solution to the brim.
In order to compact the cement mass and to expel from the solution, excess air bubbles, you must create the vibration of the concrete. For this purpose, a vibrating table. In the absence of this design alternative can serve as a rack or shelf. To create vibration sufficient to perform a few taps with a mallet on the table.
Drying and removal of goods from containers
Poured concrete forms are covered with plastic film and kept for 2-3 days. During this period, it is important to maintain an adequate moisture level. This solidifying of the product it is advisable to periodically moisten.

A place where dry harvesting should be hidden from direct sunlight
After 2-3 days after casting of the tiles can be reformulate, slightly pushing back the sides and shaking. To dry the product in the shade you need another 3-4 weeks. During this time, the tile will gain sufficient strength, and it can be used to cover garden paths and rest areas.