When it comes time to pave the track, most often in the suburban areas using paving slabs. It is much more aesthetically pleasing than concrete or asphalt, and in strength not inferior to them. The easiest way to hire artists who have the technology installation, but if you can not pay about $ 10.e. per square, it is possible to retrain on vacation in mostowice and put their hands. The main thing – to observe technology that is not so difficult to find the necessary tools and to define «pillow», you will be putting the finishing material. It can be created from a sand-cement mixture of gravel and concrete. Consider, in some cases, laid paving slabs on a concrete base and what nuances should be considered when installing and operating.
The contents
The concrete base is stained and ostyvshuyu flat area, which will be laid paving slabs. This method provides much greater strength than the sand-cement cushion, so that it is used in places where the tile will continue to weigh heavy machinery or frequent traffic congestion. In addition, to align all the tiles at one level are much easier if the bottom is not moveable, the mixture, and a solid Foundation. It will not shrink in the solidification process, there will be failures and other problems related to poor compaction. Therefore, owners do not have building experience, but decided to do tracks on their own, this method of installation simplifies the alignment coverage in a single plane.
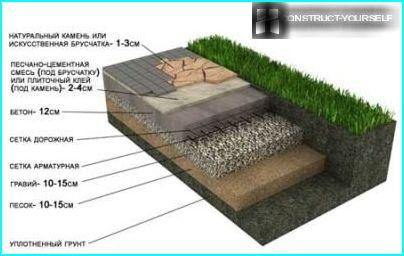
A concrete base under paving stones provides increased strength but you can create it more complicated than laying out the tiles on a sand and gravel mixture
And yet, the laying of paving tiles on concrete is rarely used, because this technology has its own nuances related to the removal of moisture from the surface of the tiles. In the usual sand-cement method, precipitation go through the hygroscopic base in the soil and do not harm the coating is no harm. If poured concrete, the water that seeps under the pavement, can not go deeper, as a solid basis its just do not miss. In the end, she gets stuck between the base and tile, intertiled seams, and as soon as frosts begin to expand, pushing the cover up. As a result, the paving can, in some places, Slough, split edges, etc..
Therefore, when pouring the concrete Foundation pay special attention to sanitation: create Lenevka, point blagopriyatnye, lay paving stones with a bias in a certain direction, etc.
If all correctly to organise, the generated paths will be much more durable than sand-cement cushion. You will be able to put the most complicated fancy patterns with perfect clarity the horizontal surface.
Site preparation for construction work
The first thing to carry out breakdown sites, which will pave: drive in the pegs and put the so-called red label. This term builders represent a tightly stretched string, which delineates the boundaries of the future height of your site. Take the usual twine, tied it to pegs at the height where it will end tiles. Don’t forget to make the slope of the threads at 5 degrees to the location of future inlets.
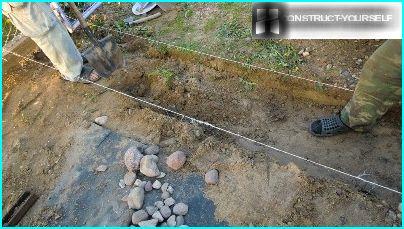
Even when laying a narrow track of red marks still present, to get a smooth edge, perfect horizontal and the right angle to drain water
Next, check how many centimeters free space from the thread to the ground. If less than thirty – shoot shovel all the excess and taken in a wheelbarrow out of the way. Fertile soil can be put directly into the garden or in places where planned flower beds.
Edge of finished excavation «nothing» it is necessary to strengthen borders. Some masters curbs put in after the pouring of concrete, but in this case it is necessary to protect the edge of the area from the shedding of the soil, i.e. to put the formwork. Therefore for the inexperienced mostovshikov the first option is preferable.
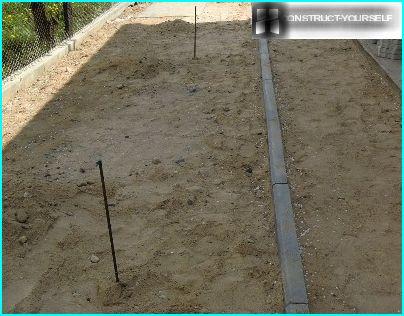
If you just set the borders, you don’t have to spend time creating the formwork, and then its dismantling, and the concrete will fill in the area without cracks
If you use a curb, with a height of 50 cm, then:
- dig a trench for another 30 cm deep;
- covered with layer of gravel (about 10 cm);
- put cement (not less than 1.5 cm);
- it put the curb so that the top edge after installation was 2-3 cm lower than the edge of the pavers. This is to ensure that the border was not detained at the site of the water, and helped her abstraction.
At a lower height of the curb to the depth of the trench decreases.
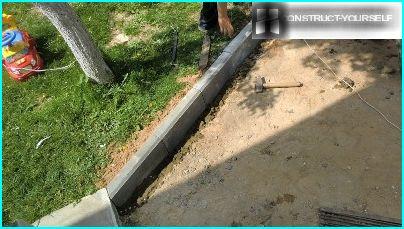
The height of the curb should be slightly lower than the surface of the pavers to provide a rapid precipitation runoff from the site and not allow moisture to stand too long
The process of pouring concrete
A day after ostyvaya the curb, you can start pouring the concrete. If you create a platform on which to drive equipment, especially large-sized concrete base should be reinforced. For this suitable valves (not thicker than tens), which is knit with a mesh size of 15-20 cm If the track will be exclusively pedestrian, you don’t need to reinforce.
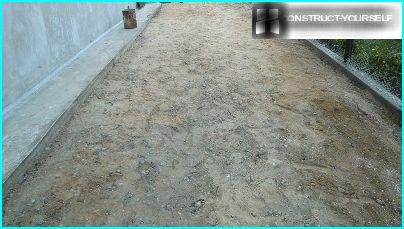
The concrete is preferably poured into sand, which will be an additional drainage for seeping moisture and allow her to leave quickly in the ground
So the moisture is trapped through the paving tiles on concrete could seep further and not stand inside, you have to create a special drainage holes. For this purpose, asbestos pipe, cutting it into pieces with a height of 15-20 cm (height should match the height of the concrete layer, which you then pour). Pieces of asbestos laid throughout with the expectation of one sq. m. After pouring the concrete they are not removed. You can create holes and boards in the form of squares, but after Ustawienia concrete tree should be removed.
Now preparing conventional concrete using cement grade 150-200. Fill it with a layer of 15 cm — if there is no reinforcement, 20 cm — if the armature is laid. If a large area is filled, then every three meters it is necessary to create a so-called expansion joint. It is necessary to prevent winter cracking of the Foundation. Seam the easiest thing to do, going into the concrete Board edge, with a thickness of half centimeter. After pristavny them removed, and voids filled with elastic filler. The top seam coat with concrete to level with the rest of the surface.
A day later removed the wooden shuttering of the drainage holes and fill them flush with the edge of the concrete fine gravel.
Create a sand-cement cushion
The order of operations here is:
- Proseven sand and mix with cement 6:1 (easiest in a mixer);
- Sleep pad layer up to 10 cm (taking into account the thickness of the pavers), i.e. the thickness of the cushion + the thickness of the tiles needs to play for the red mark about 2 cm (cover in shrink).
- Tamp with a plate compactor or Tortugas (the log on which the bottom nailed wide Board, and the top is Packed full of strap-handle).
- Check the tension of the red marks to go the slope. By the way, remember that the pegs better to put often, because even a very tight thread gives sagging of 1 mm in one meter.
- Lay on the ground beacons (pipes with a diameter of 20 mm). They should firmly press down the pillow to make the lace to the lighthouse remained a distance equal to the thickness of your tile, + 1 cm seal. The distance between the beacons is slightly less than the length of your rules.
- Then take a rule and contractible, focusing on lighthouses, the excess sand-cement cushion, to obtain a perfectly smooth surface.
- First take out the beacons, where you will begin laying tile (on a pillow to tread it!), fill in the furrows of the same mixture and begin laying tiles on concrete base.
That’s how it looks:
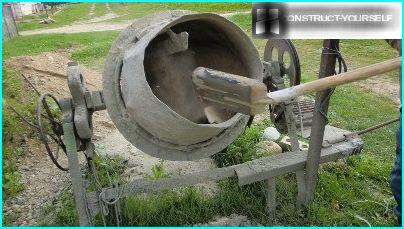
If a site is created is large, it is easier to mix sand and cement in the mixer, and then a ride in a wheelbarrow ready mix
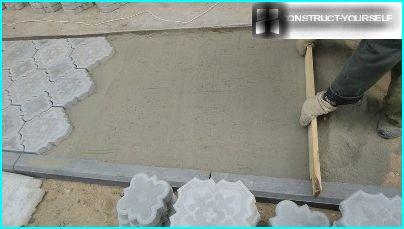
On the narrow tracks, rule can be a flat Board in which the cut edges, and as the beacons are on the edge of the established curb
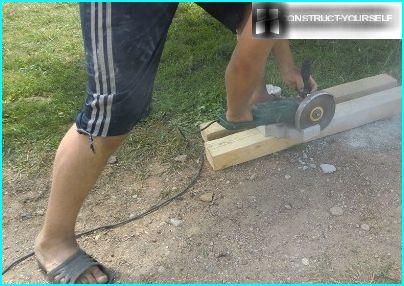
When laying pavers extreme tiles will fit, therefore please look for the grinder and install the diamond wheel, to make perfectly even slices
Tricks styling: how to do without the plate?
If all the previous stages you have completed on the conscience, to lay the pavement would be easy. Tiles not put back to back, and with stitches about 5 mm. They will not allow the tiles to crack when the coating is to be «walking» temperature changes and moisture.
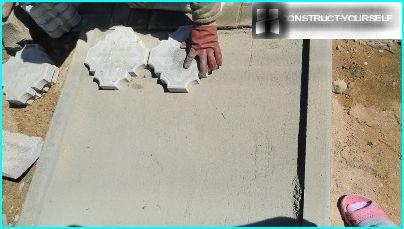
Some owners start laying tiles from the most visible side of the site to all of the slices and the fit turned out in places that are least noticeable to the eye
Start laying from the curb. Usually moving label from top to bottom, in the direction the water will drain.
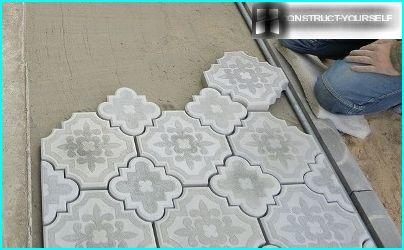
Try between the tiles to leave smooth seams, not less than 5 mm below the cover looked symmetrical, and in the winter when the extension tiles are not squeezed one another
Level the surface of each tile, pristukivaja mallet (rubber hammer) and checking the level of horizontal. In the future we need the entire surface to pin the plate to the tiles sit exactly on the stretched thread, but if not, then immediately when styling use a wide piece of Board. Put it flat on a few tiles and beat with a mallet to the desired height.
Tile joints can be filled the same mixture that you have created a pillow, or fine sand. The first option creates a monolithic coating that is weaker let moisture inside. Besides, in the seams rarely grows grass and moss. But if you call in on the tile in the winter heavy vehicles, and the seams and edges of the tiles can crack as there is no termosol. Any material, including paving, at low temperatures is expanding. And clearance for this extension is missing. There is a strong pressure in the joints, and if in this time the coating will pass something heavy, the concrete can not withstand the load.
Seams sanded, perfectly retain the integrity of the coating, but they immediately fall precipitation under the tiles. So that the water discharge should be made at the highest level.
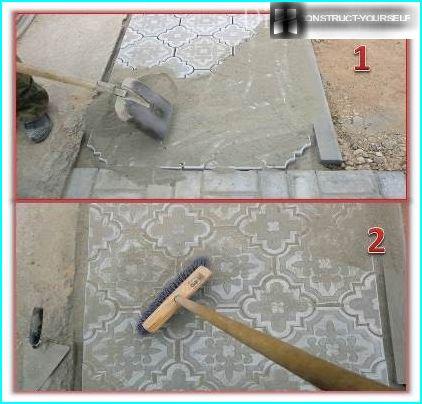
First of all sift the sand or sand-gravel mixture, and then gently sweep it into the joints between tiles
For filling joints with a mixture of sand or use a regular household broom. Composition dispersed on the surface of the coating and gently sweep into the joints, and extra – delete.
The site is ready. It is advisable for her not to go three days, the pillow soaked from the ground moisture and otvergla. Better to put a Board or plywood, not to move under pressure of the body of the tile edges.


