How nice after a hard day, retire to the garden or unwind on the lawn near the pond to relax, rest and enjoy the sounds of nature. And what item of garden furniture most associate with comfort? Yes, a garden sun lounger! Convenient portable elongated seat in addition to the direct functional values will act as a striking element of the exterior that accentuates the style of the suburban area. How to make outdoor chaise with his own hands, there is nothing difficult. We selected for you several options are simple to manufacture sun loungers. Among them will not be difficult to choose the right model, to build which, under the power of anyone.
The contents
Option #1 — the lounge of a wooden lattice
This lounger can be safely used instead of bed: smooth surface, adjustable back. What else do you need for an afternoon of relaxation?! The only drawback of this design is that it is very problematic to move the plot.
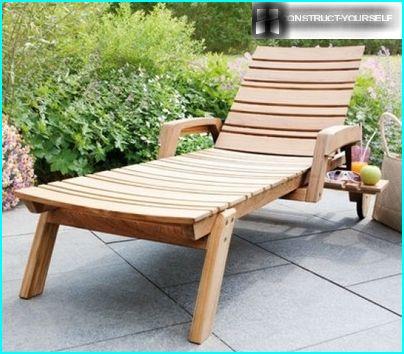
The loungers of this design are very popular among tourists on the coast, and among owners of country houses
But there is a solution! We offer you to consider the option of loungers, equipped with rollers. For the manufacture of lounger you need to prepare:
- Plate thickness 18 mm laminated spruce wood;
- Wooden beams 45×45 mm (for the frame);
- Boards 25 mm thick for covering sidewalls;
- A jigsaw and a screwdriver;
- Drill diameter 40 mm for wood;
- 4 mounting area for beds;
- Screws with countersunk head;
- 4 rolls 100 mm;
- Sanding sheet grit 120-240;
- Varnish or paint for the woodwork.
Plate of the required size can be purchased in the carpentry shop or construction market. Choosing a plate, is better to give preference to products made of softwood, because they possess greater resistance to atmospheric agents.
The dimensions of the chaise longue will depend on the willingness of its owner. In most cases, the design makes the size 60х190 see having Defined the dimensions of the chaise lounge, wooden bars do two long and two short sides. Of them collected the frame design, clipping together by means of clip angles. Outside of frame sheathed with boards.
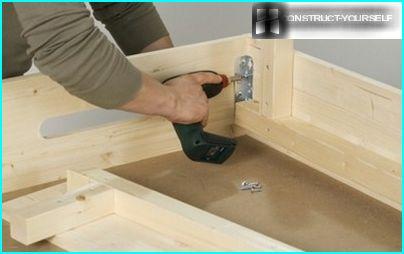
On the long bars at a distance of 5-8 cm from the corner, fasten the legs of the deckchair, the material for the manufacture of which served as sticks 5-10 cm long
Fix the legs to the boards using screws with a length of 60 mm.
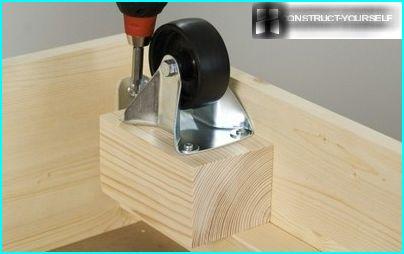
Mounted wheel: at the center of the short legs of the chaise lounge set rollers, fixing them with screws with a length of 30 mm, equipped with round head with a diameter of 4 mm
For the manufacture of wooden lattice using the jigsaw cut from slabs Board size 60х8 cm.
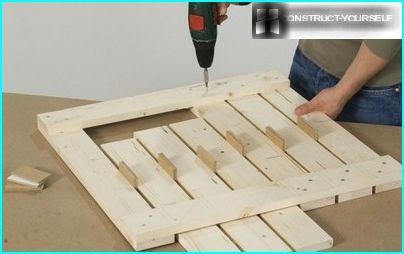
Straps attach to the sun lounger on the screws, leaving a gap of 1-2 cm To meet the gap is most convenient to use special spacers
Planning to make a sun lounger with adjustable back, grid should be divided into two parts: the bed and the headboard. Both parts put on the connecting Board and fastened to each other using door hinges.
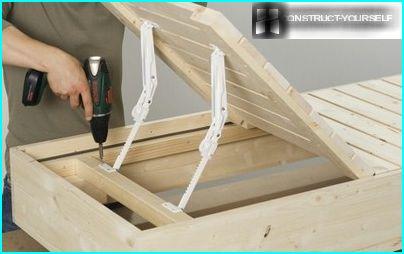
For the arrangement of the straps between the long frame beams of the deck chair, fix cross rail. On the nut plate fasten the support leg, fixing it with two screws
Ready-made lounger can only process, having a grinding machine and lacquering or paint.
Offer you to view a video showing how is going the model of chaise longue:
Option #2 — deck chair fabric on the frame
Another popular model of sun lounger, which can be folded, giving a practically flat shape.
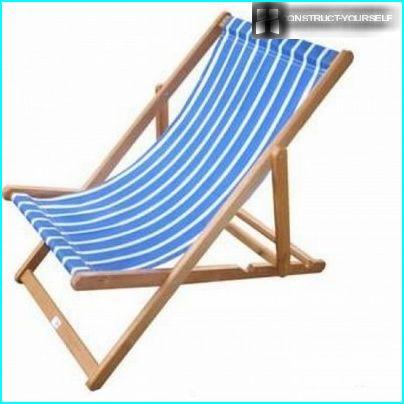
Easy chair easy to move around the area, choosing to stay open Sunny glades, or, on the contrary, shaded and hidden from prying eyes, corners in the garden
To make a folding sun lounger you need to prepare:
- Reiki rectangular cross-section with a thickness 25х60 mm (2 pieces with a length of 120 cm and two at 110 cm, and two for 62 cm);
- Rails of circular cross section with a diameter of 2 cm (one piece with a length of 65 cm and two at 60 cm and two 50 cm);
- A piece of durable fabric size 200×50 cm;
- Nuts and furniture bolts D8 mm;
- Fine-grained sandpaper, and needle file round;
- PVA glue.
Reiki is best done from the rocks with solid wood, including birch, beech or oak. For the manufacture of chaise lounge it is better to use fabrics that are characterized by high strength and resistance to abrasion. For example: canvas, tarpaulin, denim, mattress teak, camouflage.
Cut strips of the required length. Using the sandpaper thoroughly zashlifovyvajut surface.
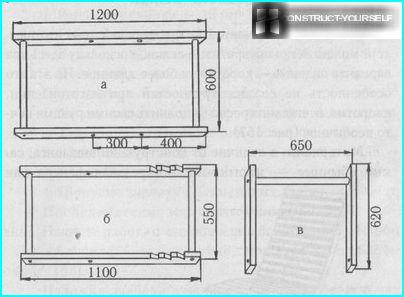
According to the scheme, where A and B denote the main frame is In focus-controller, collected the main design elements
In the long rails of the main frames at a distance of 40 and 70 cm from the corners of the design holes with a diameter of 8 mm, then using a round needle file zashlifovyvajut them.
To the lounger, it was possible to change the position of the back, in the frame B do 3-4 cut on distance of 7-10 cm For the arrangement of the seat drill a hole with a diameter of 2 cm, departing from the two ends of the rails. Into the holes crossbar set — round strips, the ends of which are pre-greased with white glue.
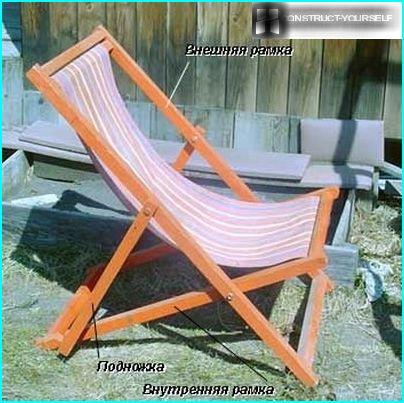
Proceed to the Assembly of the lounger: parts A and b with the screws, push through the top hole. On the same principle parts A and B only through the bottom holes
The frame is assembled. It only remains to cut out and sew the seat. The length of the cut is determined by the possibility of folding. Too short a cut will not allow the lounger to be too long and will SAG in the disassembled position. To determine the optimal length, to fold the sun lounger and measure out the fabric: it should be slightly snug but without effort.
A piece of cloth with finished edges nailed to the round rails that are located on parts A and B. For this purpose the edge of the cut wrap cross member, and then fix them with small nails with thick heads. The variant in which the edges of the cut do «loop» and put them on the crossbar.
Option #3 — foldable chair Kentucky
The original chair is assembled entirely from bars. If necessary, the seat can always be folded and put away for storage.
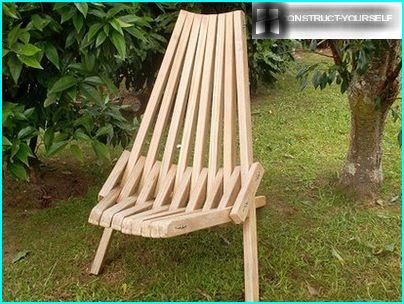
The advantage of this garden chair that disassembled it takes up a lot of space, while the design is designed in a way that allows you to completely relax the muscles
For the manufacture of chairs we need:
- Wooden cleats, 45х30 mm;
- Galvanized steel wire D 4 mm;
- 16 pieces of galvanized brackets for fixing the wire;
- A fine-grained emery paper;
- A hammer and pliers.
For the manufacture of the chair is also quite suitable cleats 50х33 mm, which can be obtained, sawn into three equal parts Board 50×100 mm. the Total length of the bars shall be 13 metres.
Is galvanized wire and clamps, you can use galvanized studs, the edges of which fasten using eight nuts with washers.
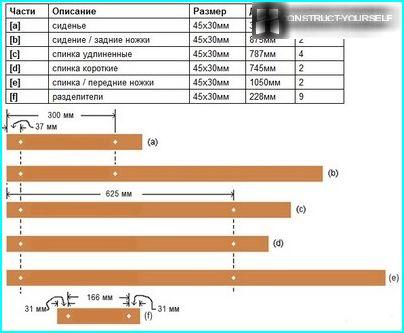
To determine the required number and long wooden bars convenient to use a PivotTable. According to the drawing performed through holes
The diameter of the holes should be 1.5-2 mm greater than the thickness of the wire used. Prepare the necessary number of bars should be carefully treated all faces tuskuru with fine-grained sandpaper surface.
Proceed to the Assembly design.
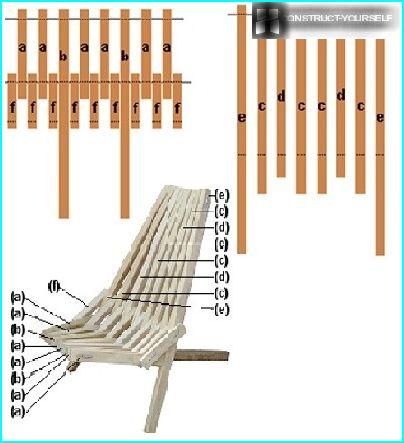
For clarity, we use the scheme of Assembly of the seat dividers and the seat back. Dashed lines indicate locations of through holes with threaded through them with wire
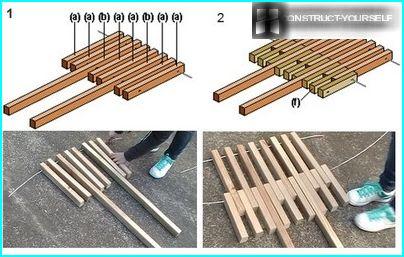
On a flat surface according to the diagram lay out the sticks for the arrangement of the seats. Through-hole and passes wire
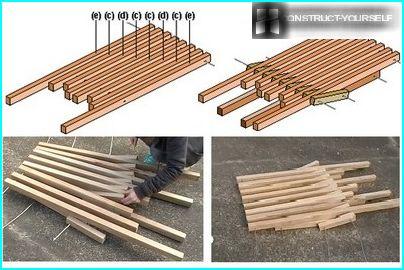
On the same principle collect seat dividers, joining pieces of wood lengths of galvanized wire
Key elements are collected. Take the wire ends, holding the flanks of the structure, and gently raise the chair.
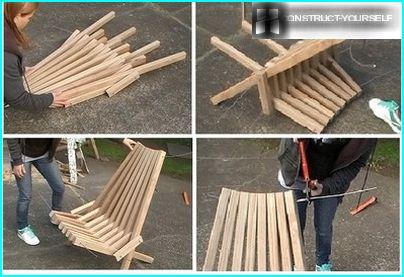
It remains only to trim excess wire with wire cutters and then bend and fasten the ends by galvanized staples
Garden chair ready. If desired, it is possible to cover semi-Matt varnish to woodwork. This will greatly extend the life of such a popular item of garden furniture.


