The contents
- Kinds of greenhouses
- The choice of location for the construction of the greenhouse
- Preparation of the soil for future rainfall
- What to build a greenhouse?
- The construction of a country greenhouse with their hands
- Simple curved (like a tunnel shelter)
- Wooden greenhouse
- Metal greenhouse
- The greenhouse of window frames
To make a greenhouse with his own hands to protect various vegetable crops against adverse weather influences, is quite a feasible task for anyone familiar with tools. For its construction will need a minimum of time and effort, in contrast to the greenhouse is a small structure, underneath which, in most cases, it is not necessary to prepare the Foundation. You will need to choose where to place the greenhouse, to prepare in a certain way the ground and assemble the frame. Materials and methods of Assembly can be very diverse. This will be discussed further.
Kinds of greenhouses ↑
Conventionally, the greenhouses can be divided into several varieties, though they are all fundamentally similar.
On heating they are:
- Cold, heated only by sunlight.
- Poluteplym – heating is performed by means of biofuels, such as dung. The most effective option is to mix the horse manure with sawdust, leaves, straw and earth. This mixture stick a pitchfork in a layer of 40-45 cm, ramming natural «heater» otherwise the amount of the generated heat will be reduced significantly.
- Warm – facilities are heated with electric cables laid on the perimeter under a small layer of earth. The air was not too dry, need to take care of more frequent watering plants. These greenhouses are suitable for heating especially heat-loving plants in cold climates.
As a material for the frame of the greenhouse can be used wood, plastic, metal, on top of the film frame is stretched or installed glass.
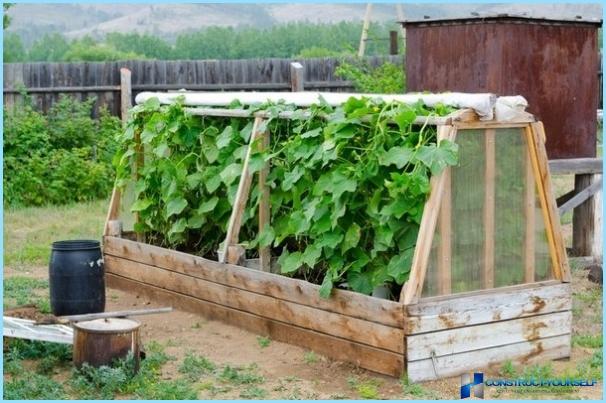
To protect the sprouts made use of portable mini greenhouses that are easy to remove when the plant is gaining enough strength to develop into normal outdoor conditions. Portable design can be mounted in any parts of the garden. A greenhouse can be built for growing spring plants: seedlings of tomato, cucumber, pepper, later transplanted into soil. Such a structure is great for forcing Luke on the pen or parsley. In the autumn in a greenhouse can grow cauliflower, celery and other greens.
In type design there are the following types of greenhouses:
- Frameless – the most simple variant. Planted in the ground plants covered with foil, pulling it, the edges pressed against the bricks. The film can be lifted as required: watering, ventilation, etc.
- Shed performed as follows: dig a pit depth of about 70 cm and 150 cm wide, length is determined by the width of the frame. Performing excavation work, the wall of the pit under greenhouse need to do a narrowing down to the soil did not slip down. Around the sides of the structure are made of logs tying. It is important that the North side was above the South at 10-12 cm Then the plants will be quite enough sunlight, and the greenhouse will be protected from the ingress of rainwater. Usually, the straps are made of pine sticks (55х47 mm) and partitions (38х47 mm). For their connections use the spikes and the mount was more solid, apply the glue. As glazing is the best option – glass thickness 1,5-2 mm. But this is somewhat heavy, the frame is quite possible to fit plastic film. A good alternative to traditional tape, you might consider polycarbonate. It is a reliable and durable material, under which the plants will feel much more comfortable.
- Gable is used for a large number of cultures. This is the most complex design, mostly it is made of tunnel type and covered with foil.
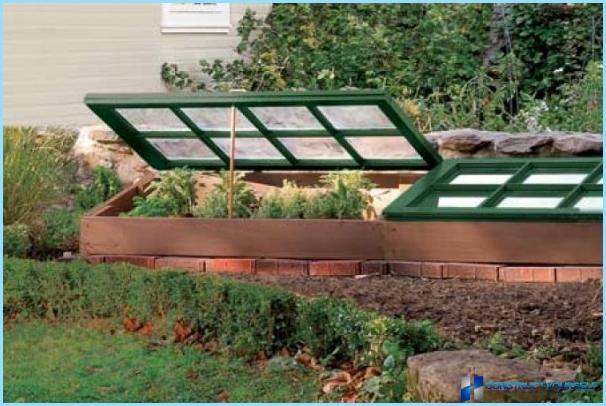
To provide access to the plants, you can make a hinged lid or a removable frame, etc. set the frame in the open position, so it’s not knocked over in the wind, you can substituting a support by providing a special bracket to which the frame is attached by a rope, to drive staples into the side edges.
The choice of location for the construction of the greenhouse ↑
To assemble greenhouses with his own hands is not so difficult, much more effort is required to prepare the space for their installation. Basic rules for site selection for the greenhouse and the basic rules for its installation:
- Construction should be placed in an open area, away from trees, other buildings, to provide a good lighting. It is recommended to install it in the direction from West to East, then the lighting will be of the highest quality.
- For additional lighting you can use bulb.
- Mandatory, even in the small greenhouse, it is necessary to provide ventilation.
- The entrance to a greenhouse on the South side, and the slope design is performed under a bias of 30 degrees. Under the ridge at intervals of 2.5 meters set the bar.
- The soil in which you intend to erect design, should be dry and flat, not swampy, the installation location of the greenhouse should not accumulate water. Do not install it in the lowlands and on the slopes. If there are no other options, and you have to build a greenhouse in a place where stagnant water pre-settling the drainage of the land. The drainage system on clay soil can be arranged so: pour gravel cushion, and the top layer of sand.
- You should choose a place protected from winds.
- To the greenhouse is necessary to provide a user-friendly approach. Make a smooth, compacted trail, to make it easy to navigate, including with cargo. It is also necessary to not accumulate water.
Preparation of the soil for future rainfall ↑
The next phase of construction of greenhouse – soil preparation. It is very easy to do by selecting one of the most appropriate options:
- Take peat land in the proportion of 5-6 parts, to it add one part ordinary earth from the garden and cleaned river sand, 2 parts compost, 3 kg of lime.
- To five parts of sawdust are added three parts of peat soil and a straw – cutting and wood ash. Immediately prior to planting plants in the mixture add 10 g of wood ash. Instead, you can get potassium sulfate and superphosphate (20 and 30 g), which is the norm at 1 mTwo soil.
- Take two pieces of decomposed peat and mix with a sharp straw and horse manure at the rate of one part each. One cube prepared mixture is added urea (300 g), superphosphate (3 kg), potassium chloride (2 kg).
What to build a greenhouse? ↑
For the construction of the greenhouse will need cheap available materials. As a material for the frame can be used with wood blocks, metal fittings, polypropylene pipes, also used old window or balcony frames. The form of the basis is performed in a «house», arcuate, triangular, etc. Cover the frame more often plastic film. Relatively recently began to use material of non-woven fabric such as spunbond or lutrasil, can also be used polycarbonate. Window frames with glasses gentle treatment provide optimal conditions for growing plants.
The construction of a country greenhouse with his own hands ^ a
Now let’s look at how to build a greenhouse with his own hands, depending on the variety.
Simple curved (like a tunnel shelter) ↑
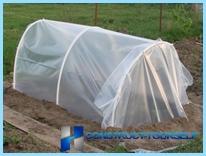
Arc greenhouses is the simplest, most common, familiar to every cottager. First you need to make the arc for the frame: cut and bend to the desired angle polypropylene tube. To strengthen the design and to give it hardness, it is possible to use a horizontal strap or a vertical support under extreme arc. The basis strengthen or prikopa his land, or securing additional base, metal or wood.
To install the arc recommended at a distance of 50 cm from the Top design of the arcs is served by plastic film or other material which is reinforced along the perimeter of construction bricks.
Such variants are seasonal, and their main advantages in simplicity of construction and small cost of its installation. If there is a need to access the plants, the tape can be removed and put on again.
Wooden greenhouse ↑
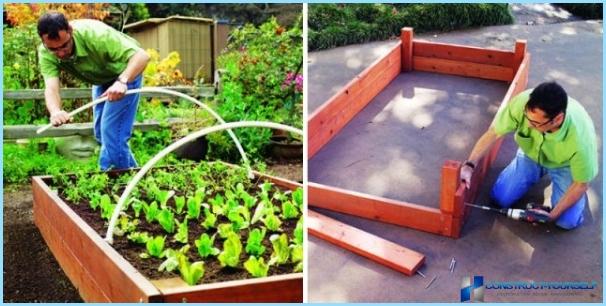
To build a wooden greenhouse, you will need boards, pre-treated with preservative, special plastic film for greenhouses and wooden slats. The only tools required will be hammer, saw and nails. Consider the order of operations when assembling the greenhouse size 3х1х0,6 m. For this purpose the Board section 2,5×15 cm.
- The Assembly of the side walls. Board size 3×0,6 m stacked on a flat surface close to each other, departing 3 cm from the edge, is nailed perpendicular to Board length 1.4 m. the Vertical Board should speak with one edge at 20 cm, the other with 60 see the same Board nailed from the opposite side of the shield, again stepping back from the edge 3 cm, the Third Board is nailed in the center.
- The second shield is made similarly. Then both of the shield is placed vertically at a distance of 1 m, the positioning so that the Board protruding 20 cm, was at the bottom.
- The meter manufacturer side walls. Is the same as described above, but the vertical boards are nailed to their edges was performed at 3 cm Only one shield will need four boards.
- Manufacturer of rafters. You will need six planks, a length of 55 cm, they should be washed down from one side at an angle of 60 degrees, with the other 30. On each side of the design set vertically with three rafters, they are connected. Between the rafters as a ridge roof Board set, 3 m long.
- All components are strengthened.
- The next step is painting the wooden frame.
- Waiting until the paint is completely dry, should be nailed to the frame with a polyethylene film, using a special wooden planks and nails.
This type of greenhouse is more durable and reliable than the arcuate.
Metal greenhouse ↑
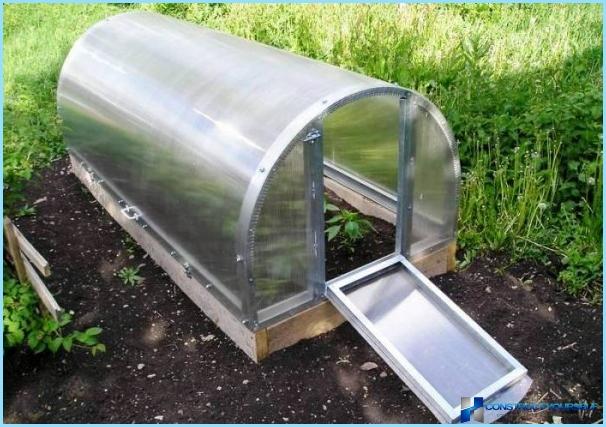
To build a greenhouse from metal – the perfect solution for those who want to provide a reliable structure to protect plants for one year. As a frame using metal pipes and parts. You can connect them in two ways: by welding or to make a folding design. The second option is convenient because a greenhouse can be relocated if necessary. As a coating it is possible to use film, cell polycarbonate. This design is based on century, but its construction will need to spend a decent amount.
The greenhouse of window frames ↑
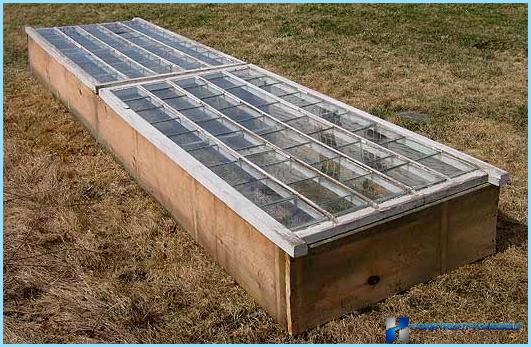
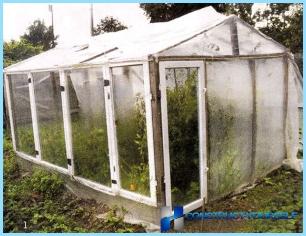
Left after replacing the old window frames are quite suitable for the construction of the greenhouse. The result is a practical and reliable design, the size of which is limited only by the number of frames. The most optimal variant – greenhouse medium length. The only condition which is presented to the material to frame fit each other in size. You will also need bricks for installation of the Foundation, some are not too thick logs and long planks.
Procedure when assembling the greenhouse with their hands out rum to the following:
- Brick laid the Foundation for future construction.
- Board and timber of the required size are treated with bitumen mastic or spent oils.
- The prepared bricks are laid beams.
- Inside the timber boards are installed, they are placed closer to each other than the width of the window frames.
- To installed boards with the outer side attached other boards, thus aligning the ends of the vertical supports with the top edge horizontal boards.
- To ensure a good water drainage from the roof, to the ends of the boards fasten rafters.
- With screws of the frame are attached to a prepared frame.
Erecting such a structure, one should leave the frame opening, installing hinges on one side and the latch or hook on the other.
Greenhouses for seedlings ↑
Greenhouses for seedlings can be accomplished in several ways. This small structure, usually sufficient dimensions 2×1 m and 50-70 cm in height. You have the following options:
- from Doug and plastic film.
- wood greenhouse with glass. It is a wooden box, mounted on bricks, its top covered with glass.
- out of any available materials such as old Windows, fridges and other.
- polycarbonate is a fairly reliable and durable option, but not the cheapest.
Using the presented tips and recommendations, prepare the necessary materials and tools, you can choose the most suitable option greenhouse and to construct a strong stationary or lightweight portable design.
