Cellar is the best place to store home canned food and harvest vegetables. His aim to build the owners of rural and country houses, the owners of apartments in apartment buildings. This storage helps in optimal conditions to preserve the vegetables and harvesting in winter. In a well-designed cellar is maintained year-round temperature is +2-4on, which ensures the safety of products.
Types of cellars ↑
Types of cellars a lot, they are distinguished by material of construction, degree of penetration into the ground, the location of.
- According to the materials of construction: excavation, brick, stone, wood, concrete, metal,
- The degree of penetration: surface and polusekretnye, buried on the slope, bulk,
- Location: on the balcony, under the house, terrace, summer kitchen, garage or detached.
Cellar on the balcony with their hands in the apartment apartment building just to build. It is a wooden box the right size with a tight lid, lined with a heat insulator, such as foam or mineral wool. The temperature is maintained by a incandescent bulb that turns on via the relay and contact thermometer.

Cellar under the house with his hands or under other building on the site is easiest to do during their construction. It is less time consuming, allows you to do the job quickly and efficiently. In this case, the walls can be the Foundation, roof and ground floor. This is especially practiced in the construction of garages.
The construction of all types of cellars are produced according to the classical scheme of construction of cellars.

We consider the construction of a detached cellar.
A detached cellar ↑
This store is convenient because you can build it slowly. During the construction all the dirty work is done on the street, dust and dirt does not get into the house.
The choice of location ↑
How to build a cellar with his hands, not having much experience in construction? First of all, you need to determine the location and size of the future object. It is built on the highest point of land. The optimal size of the basement for a small family (4-5 people) 2×2 m, depth 2.5–3.0 m, can be building larger, deeper — it all depends on the needs of the Builder.
If the water table close will require a drainage system and careful waterproofing of the bottom and walls. The drainage pipe is laid around the perimeter below the level of the bottom. Pipes are placed with a slope in the direction of a specially dug pit into which the water is going. You can dig ditches and fill them in large gravel.
As at close standing of ground waters in other ways to build a cellar with his own hands, videos from real masters.
Construction methods ↑
The construction of the repository at low level of ground waters is carried out in two ways: drop and trench.
The drop method is that the box of the future basement of concrete or bricks erected on the earth’s surface, and then gradually deepened, choosing from under him the ground. The method is similar to the construction of a well: slow and time-consuming, but minimally damage the landscape of the site, it is possible to bond two previously well outside the box.
The more popular method of construction in pre-dug pit. Excavator dig a pit depth of 2.5–3.0 m in size more basement about 0.5 m on all sides. The walls and bottom of the excavation is well leveled, choosing the ground manually.

In the pit build cellar.
In the absence of groundwater or deep their occurrence reinforced waterproofing is not required. In this case, more than just the construction of the cellar with their hands, video artists.
The construction of the pit ^ the
The construction of the store begins with training grounds across the bottom of the pit.
Substrate preparation ↑
- The bottom of the pit leveled, covered with a layer of sand, then gravel and broken bricks with a minimum thickness of 20 cm
- pour the hot bitumen so that the surface was smooth. Such basis will protect the cellar against moisture.
- On top of the gravel is placed a metal wire with a thickness of 6 mm or rebar and pour the concrete layer of 10 to 15 cm.
- After full preparation of concrete the size of the basement, put a box. The Foundation length and width must be greater than the outside dimensions of the walls 30-50 cm.
The construction of the walls ↑

Wall put the thickness of one brick, raked joint, alternating stretcher and bonder series. Used red brick brands M100 and cement mortar. Before laying the material is pre-moistened. Masonry using metal wire with a thickness of 4 mm strengthen in every fourth row, especially strong reinforced corners. Wire put on both sides of the masonry, retreating from the edges 5 cm.
Plastering ↑
Brick walls, carefully plaster cement-sand mortar with the outer and inner side. Masonry vpustoshovku necessary for finishing the grout is well kept. The plaster should be well dry. This requires about a month, during which the grout attains required strength.
Waterproofing ↑

Dry plaster on the outside cover with two layers of hot bitumen mastic and paste over roofing material impregnated with tar, in 2-3 layers. The roofing material should be pasted overlapping each other, alternating horizontal and vertical layers. Glue the roofing material should be molten bitumen. Pay special attention to the insulation at the junction of the base with the walls. The roofing material need to stick with the call of the leaves on the ground. Then you can fill up a ditch, previously lined the walls of the fat clay layer with a minimum thickness of 10 cm, the rest of the space to fill the earth.
Interior trim ↑
Interior walls convenient to do this to flooring ceiling. It may be different: asbestos-cement flat slate on wooden lathing, plastering and whitewashing, pasting tiles or other water-resistant materials. The bottom concrete layer covered with two layers of roofing material into hot bitumen by calling on the wall to 30 cm On the roofing, make screed laid tile.
The overlap ↑
Cover cellar can be a slab of monolithic reinforced concrete, concrete slabs, beam, beam, slab, thick boards — it all depends on the availability of materials and money.

The simplest option is a wooden shed roof made of thick boards. Board is pre-impregnated with an antiseptic 2-3 times, their ends, which will be in contact with the earth, coat with hot bitumen and covered with roofing material.
On the perimeter wall, put a frame of u-sections or weld area No. 65 area inside and put timber or timber with a step of 0.6 m, which are placed back to back, pre-impregnated with antiseptic compounds. Make the overlap of the slab in two layers or thick boards.
In overlapping arrange the hole size not less than 0.75 x 0.75 m (better 1х1м). The frame of the manhole is recommended to weld metal area so that there was a possibility to install two caps: one at ceiling level and another at ground level. This will provide additional insulation in winter. The lid can be hinged (the door hinges or removable), it is necessarily insulated insulation material.

In the cellar, set the ladder at an angle of 45on.
The insulation is made from glinosolomennogo layer thickness of at least 30 cm of earth layer thickness of 50 cm and more.
Installation of ventilation ↑
For the normal functioning of the cellar, it must have inlet and exhaust ventilation. To do this in opposite corners of the vault install two pipes, one end of which is located closer to the bottom of the cellar (20-50 cm from the floor) and the other closer to the ceiling.

This will provide air circulation. Pipe can be plastic, metal or asbestos. The diameter of the pipe should provide good ventilation. Storage area of 6 sq. m. is quite enough two tubes with a diameter of 12 cm In winter, vent pipe cover with burlap inside and outside the cellar.
Pogrebnitse ↑
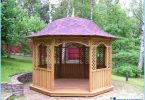
In regions with frozen soil up to 2 m, and landscape design of the area above the cellar is further set pogrebnitsu. It can be a simple gable or hipped roof, completely covering the cellar throughout the area and having a door on one side. The roof can be covered with insulation materials (clay, reed, cane), partially or fully covered with earth, providing the necessary microclimate in the cellar and beautifying the area. It protects the vault from water in the spring and in the rainy season. Sometimes above the cellar having a little shed.

To build with their hands good store on the site will not be easy, if each stage of the job responsibly and efficiently.