The contents
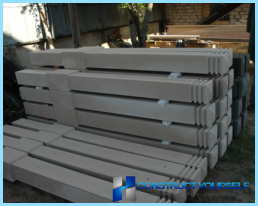
One of the most important aspects of decorating a rustic or country site is to install his fence. No matter what type of fence you choose, in any case he will need the support columns. One of the most reliable types of supports are concrete pillars. This kind of supports can be purchased in the construction market. But there are situations when transportation is difficult materials becomes very cost-effective (for self-fabrication of concrete poles you get a cash savings equal to 30-40%), moreover not always possible to find concrete pillars of suitable shape and size. In such cases you can try to make and install concrete pillars with his hands.
The main advantages and disadvantages of concrete poles for fence ↑
Before you start making concrete pillars, make sure to decide for yourself if this type of supports. For this we consider the main pros and cons.
Advantages:
- durability. Concrete pillars for the fence shall remain operational for not one dozen years. It is worth remembering that the lifetime depends on the quality of the material used in the manufacture of the supports. Professionals usually use these brands of cement, as the M-300, M-400, M-500;
- the ability to create various designs. So, using additional materials (plaster, paint, decorative stone, plastic panels, etc.), you can easily change the appearance of the concrete supports;
- easy to install. Installation of concrete poles do not require the use of special equipment and expensive materials. You can make it yourself, without resorting to professionals.
Concrete pillars have only one drawback is the need to build the Foundation for their setting, without which the fence can be bent and filled up.
Manufacturing of concrete poles for the fence with their hands ↑
The process of establishing concrete reference pillars for the fence consists of three main stages:
- fabrication of the formwork;
- installation арматуры4
- preparation of solutions and filling of the formwork.
Before you begin to create concrete supports, it is necessary to acquire and provision all the necessary tools and materials.
Tools:
- apparatus for welding;
- the perforator;
- hammer;
- screws.
Materials:
- wood planks or plywood;
- metal reinforced rods;
- polyethylene;
- plastic;
- crushed stone;
- cement;
- sand;
- water.
When all the materials and tools are prepared, you can go directly to the installation.
Manufacturer of formwork ↑
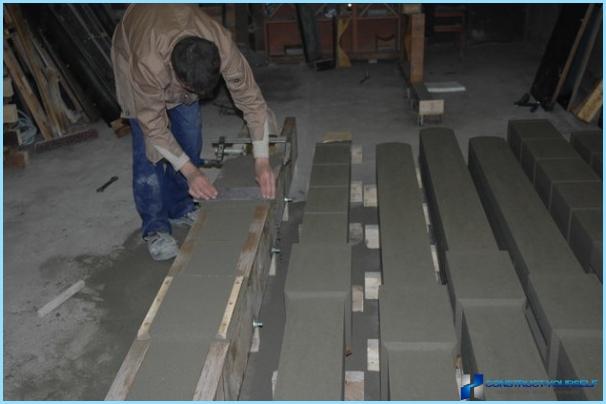
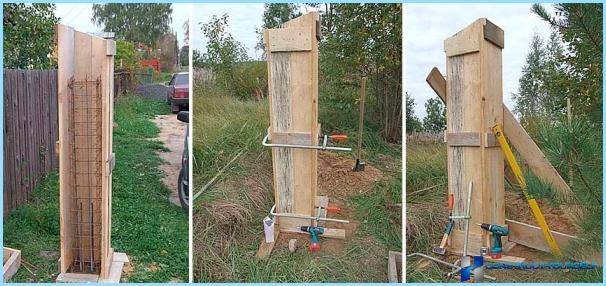
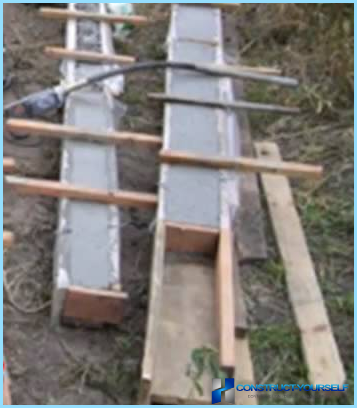
Quality formwork is the key to creating a smooth and strong concrete pillars. The better the mold, the more pillars of concrete you can make with it. The most primitive of formwork is a box made of plywood. In the absence of plywood, you can use ordinary wooden planks. Three sides and the ends of this box are bonded to each other, and one side is left open in order to pour the concrete through it. So the concrete is not leaking out of the formwork, it is necessary to seal all the parts as tightly as possible, and inside it lay a polyethylene.
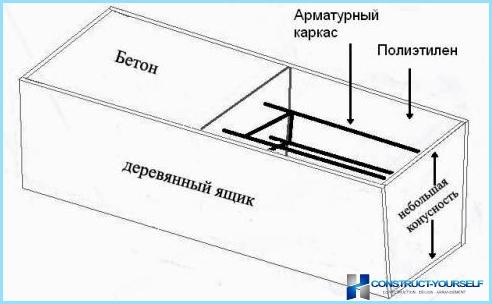
To this end, the formwork is often cased with plastic, which not only does not leak concrete, but also prevents swelling and warping of the walls of the formwork. And the smoother the wall, the easier it will be dismantled and removed from cured concrete. Part of the timbering is usually harvested using screws that will be easily removed without damaging the plywood or boards.
Installation of fittings ↑
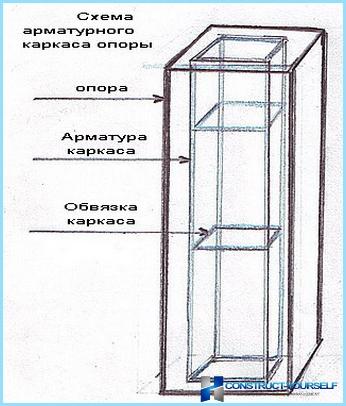
The quality will be made with metal rebar, the stronger will the support made of concrete. For installation of fittings with their hands need a welding machine. Armature is a frame of welded together metal-reinforced rods. Four of which are of greater length, lie along design and have a diameter of 12 – 16 mm, and eight shorter, are arranged laterally and have a diameter 8 – 10 mm. Distance between cross bars must lie in the range from 5 to 15 cm Mounting frame in a casing, leave a small gap of about two centimeters below the concrete completely surrounds the armature and thereby protect it from corrosion.
Preparation of solutions and filling of the formwork ↑
After the construction of the formwork and rebar is assembled, you can proceed to the preparation of cement mixture and its filling. The formwork is filled with fine gravel having a size of 5-10 mm. Then start to prepare a solution, its basic components are cement, sand and water. The mixture can be prepared manually or using a concrete mixer. First mix the sand and cement in proportion of two to one, then add the water, all mix thoroughly until a homogeneous consistency. In order for the solution to have any special properties such as high frost resistance or elasticity to the mixture add special additives.
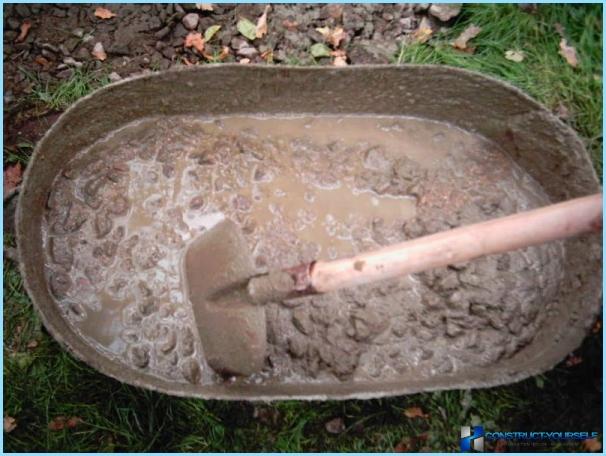
When the mixture is ready you can pour it in the formwork. Pour very carefully, so as not to form voids which reduce the strength of concrete structures. After the formwork is completely filled, is to create a small vibration to displace the air and to compact the mixture. For this purpose the hammer, in which is inserted a rod of metal with a platform to focus on the end. The hammer include and apply pad to multiple places in the formwork, thereby reducing the size of the solution. If the punch is not, then you can just poke the mixture in several places with a metal bar. After full fill the surface of the concrete level, spending on her object, having a smooth surface, leaving the design on the seven days before complete solidification. Then finished product is recovered and set about creating the following.
In order to consolidate their knowledge, we offer you to familiarize yourself with the following video:
Another method of manufacturing a concrete support ↑
You can create concrete columns of circular shape. In this case, the formwork will serve as a piece of pipe, a length of approximately one meter, which is cut in half. To each part is welded «ears», which have holes for bolts. Then both parts are bonded.
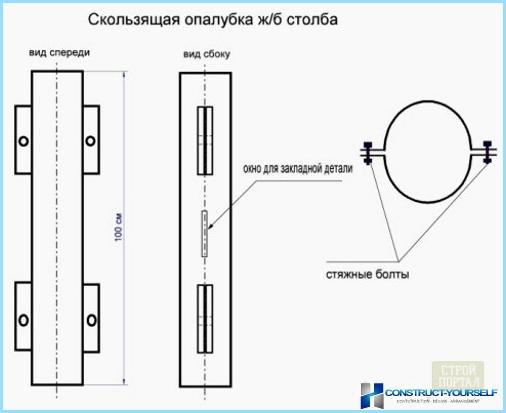
The armature frame is mounted directly in a hole where there should be bearing, and is filled to ground surface with concrete. Then make a concrete column by the method of sliding formwork.
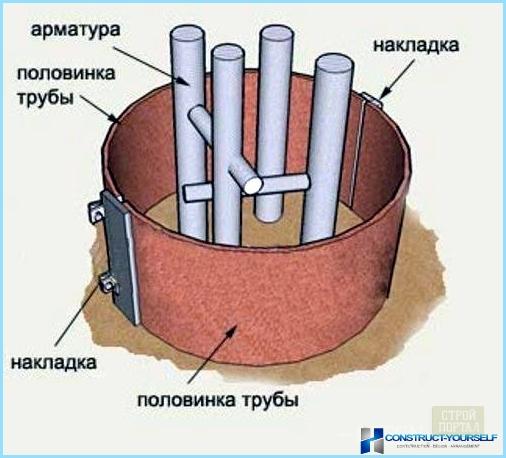
Made from pipe formwork lubricated with machine oil for easier disassembly it. Then set it on the ground, aligning the position by using a level, then fill with concrete. Design leave for three or four days. Next, loosen the bolts, move the mould in three quarters up, and again filled with concrete. And thus act until such time as the post will have the desired height.
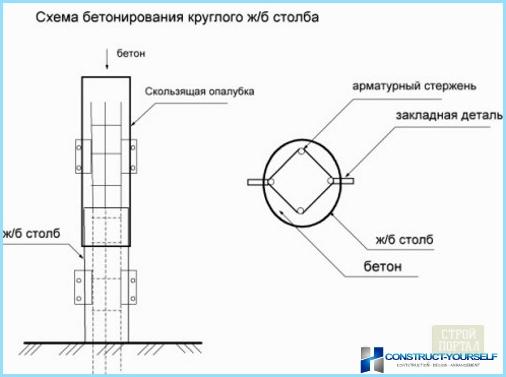
The video presents the production of concrete poles by the method of sliding formwork:
Mortgage details ↑
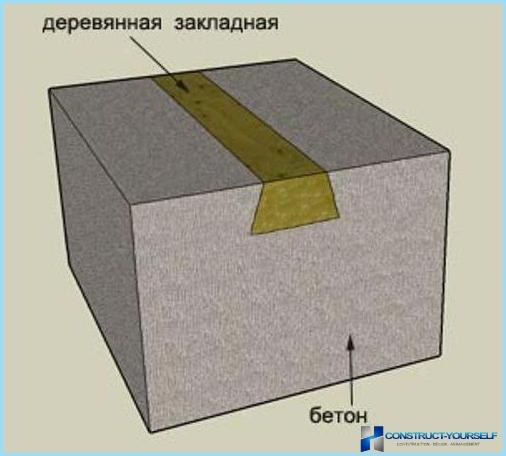
For subsequent mounting on concrete columns made of sections of the fence, it is necessary to provide fixings. To create them, most often, use wooden bars, having the shape of a trapezoid, which is treated with copper sulfate and linseed oil. Then, before pouring concrete, installed in the casing wide base inside and secured with clamps. After a concrete pole is ready, this wooden block to hammer in nails, screw or install other elements for attaching fence sections.
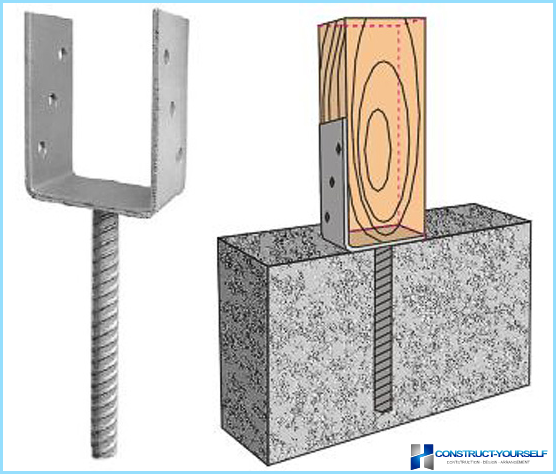
Another option fixings are metal to the anchor elements, such as lines threaded studs. In this case, the surface of the pole will act as studs to which you can attach the bar, and other fasteners.
Make concrete pillars for the fence with their hands once, you can do it at any time as needed. With this, you get not only economic benefits, but also confidence in the quality of the products.

