In some suburban cooperatives between plots impossible to install a fence made of slate and other materials, because they are very obscure small sites. In this case, a good option is the fence mesh netting – it does not prevent the ingress of the sun to the area and not hinder natural air circulation. Netting is an inexpensive material that can last a very long time. Its additional advantage is the possibility of use as a support for climbing plants. The author of this successful invention was Carl Rabitz. Mesh was used at the end of XIX century, and originally it was used during plastering work.
The contents
Netting – available material which can afford any owner of a suburban area. In order to create the fence netting with their hands, except for the mesh you will need thick wire, reinforcement bars, wire rope and supporting poles.
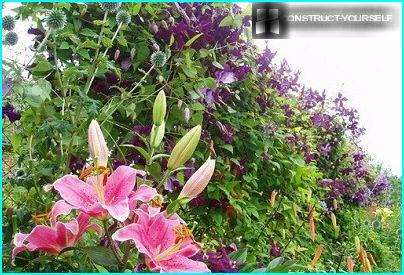
Fence netting can be beautiful hedges, serve as a support for climbing plants. In this case, the site will be much prettier
Today, manufacturers offer three types of mesh fencing:
- ungalvanized mesh relates to the cheapest, this option should be considered because after a few months it can rust;
- galvanized netting is the most common – the price is slightly more expensive than non-galvanized, but it is not rust;
- netting powder-coated – metal grid on top to protect against corrosion is covered with colored polymers.
The last option is very practical, and it looks so much more aesthetically pleasing metal mesh. Therefore, plasticized netting, though has recently appeared, is already actively used by our gardeners.
Selecting the grid should pay attention to the cell size, the smaller the size, the mesh is stronger and more expensive. Mesh of cells of 40-50 mm and a roll width of 1.5 m is fine as the fence of a suburban area.
Option #1 — «stretch» fence netting
Installation of the fence mesh netting can be various. The easiest way to make a fence to stretch the net between the posts. Pillars you can use metal, wood or concrete.
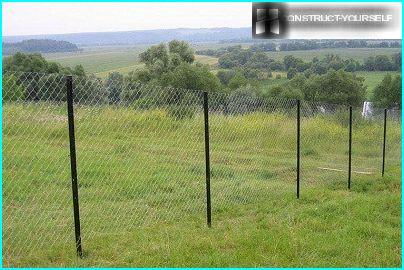
Easy way to make stretch fence netting without the use of rods of mesh stretched between pillars and hang up on hooks. Of course, over time it can SAG, but this fence will last long enough
The number of poles depends on the distance between them and the length of the fence. As practice shows, the best distance between the fence posts of metal mesh is 2.5 m. as the pillars, you can use the pipes used, are not affected by corrosion. Now sold and ready the poles for the fence has already been painted, with hooks. Wooden posts to the entire length before installation, handle with preservative. You can use the poles in concrete and attach the mesh with wire or a clamp.
Article topic: Setting poles for the fence: ways of assembling different designs.
The height of the pillars is calculated in the following way. When the clearance between the ground and the fence to the width of the grid is necessary to add 5-10 cm, and then another meter and a half, taking into account underground part. In the end you’ll have the average height of the pole required for installation of the future fence. The load on the corner posts will be a little more, they should dig in deeper, and therefore their length should exceed the length of regular poles about 20 cm.
The base of all poles for greater strength to concrete the better. The columns represent the frame of the fence, once you install them, you can begin to strengthen the grid. After the concrete has hardened, the posts are attached or welded (if metal post) hooks for fixing the mesh. As a material for the mounting holes fit the screws, rod, nails, wire, any material that is bent into a hook. Roll with mesh raspyleniem and set at a corner post, the netting hang on the hooks.
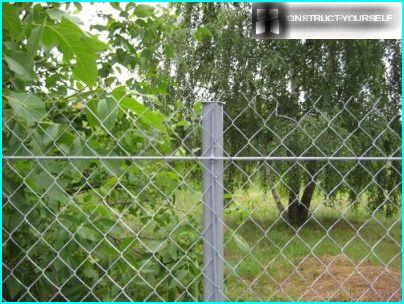
To provide good tension and strength of the structure, in the first row of grid cells vertically threaded rod or thick wire, a rod attached to a wooden pole or welded to metal. Fixed so the grid will not SAG and will not subside, as is often the case without such anchoring
Then roll otmelivaetsja to fly to the next pillar. A little on the places where the grid is connected with the column, similarly threaded rod. Hold the rod and pulls the net, if a rod does not use and pull up with your hands, you can pull the mesh unevenly. Best to do it together – one person at the bottom edge, one near the top.
Now the mesh is threaded rebar horizontally at a distance of at least 5 cm at both edges, top and bottom. The horizontal bars are welded or attached to the posts. If you pull the mesh without wires, over time it will SAG, and the bars will maintain its tension.
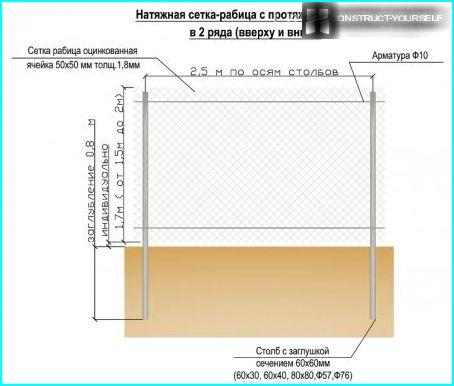
Diagram of fence made of galvanized mesh with wire reinforcement along the top and bottom side. Such a fence is a more sturdy construction
Likewise, there are more – we stretch the mesh, fix, stretch the wire or rod, fastened or welded.
The fence is almost ready, now you need to bend the hooks on the posts and paint the posts. The protruding wire «antennae» better wrap down so no one was injured. It is convenient to thread the wire through the top row of cells and wrap the protruding edge around it.
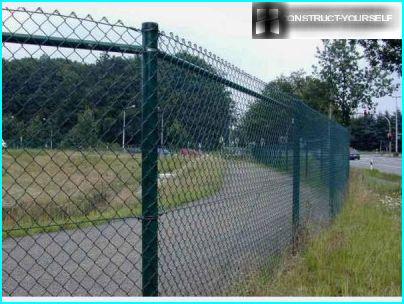
Here «antennae» are folded down to the rod, this fence can be dry things, the risk of injury missing
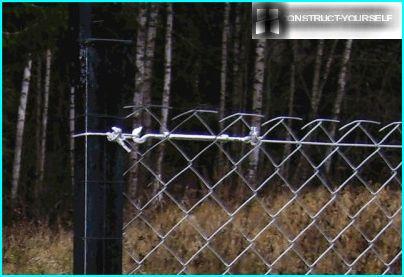
«Antennae» the upper cells have to bend to avoid accidental injuries. In this photo they are bent slightly, there is a risk of injury or tear clothing
Well, as they say, better to see once:
Option #2 — construction of fence sections
For the manufacture of fence of this type need a section where it will be mounted mesh. First, similarly to the device of a tension of the fence demarcated and established pillars.
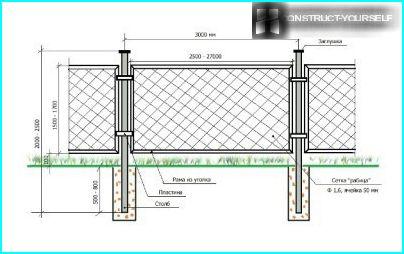
This scheme can be taken as a basis for determining the proportions of the size of future structures (click to enlarge)
Will need to buy an area the size 40/5 mm for the frame. The length of the frame thus defined: the distance between posts deduct about 10-15 cm is its length. Same number subtract the height of the column above the soil level – the resulting amount is the width of the frame. Angles welded together in rectangular design. Can the size of the partitions to make the calculation of the mesh size (1.5 to 2 m), it is possible to unroll the roll and, if necessary, to reduce the mesh size to the desired grinder.
Then to the posts horizontally welded strips of metal (length 15-25 cm, width 5 cm, cross section 5 mm). The edges of the post need to retreat to 20 cm, set a section between two pillars and using welding to attach it to the horizontal stripes. It now remains only to paint a new fence.
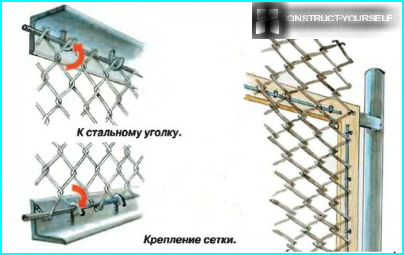
Rods with cross section 4 mm are passed through a mesh with 4 sides, first in the extreme range, then the top and bottom of the grid need to pull and weld the rods to the corners of the section. (Rods are welded to the horizontal parts). It turns out the section of the area with mesh netting, welded to the bars from the inside
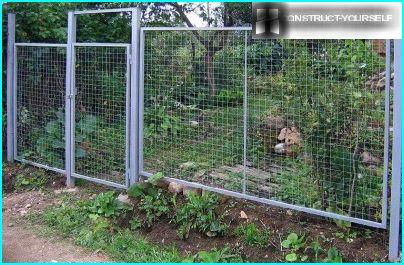
On a sloping plot do stretch the fence will not work, in an inclined position, the mesh cannot be pulled. For the sloping site it is possible to make sectional fence, installing on both sides of the columns section at different distances according to the soil level.
To make the fence mesh netting can each host that is familiar with welding. Work can usually handle 2-3 people over a relatively short period of time. Go for it!

