Want to diversify the rest of your children, making the improvised means in the field of creativity? Then engage in the regeneration of the Playground and the manufacture of gaming equipment obsolete farm implements and have not found application in agriculture and natural materials. Be sure that you have created with your hands a children’s Playground is always filled with laughter and voices playing on her children.
The contents
Option #1 — water maze
Playing with water is one of the favorite pastimes of kids of any age. They are not only able to entertain an inquisitive toddler, but also to serve as a means of learning about the world.
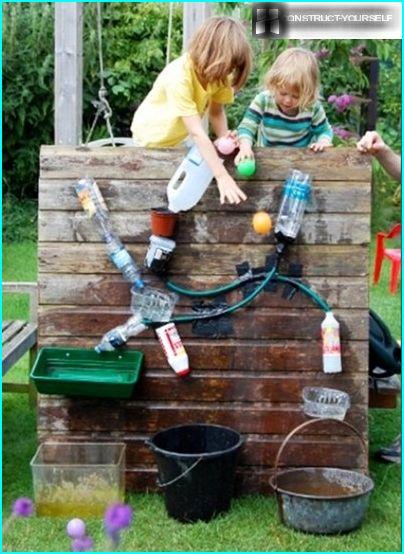
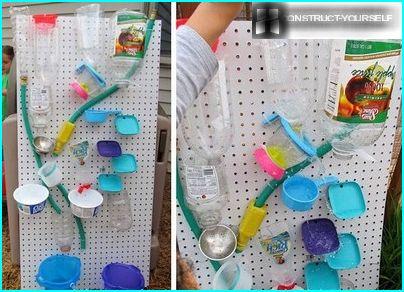
Get pleasure from communication with the water element you can, equip the grass in the play area of the Playground makeshift water maze
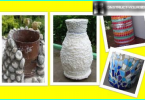
To collect the water maze from vessels of any size. For this purpose you can use:
- plastic bottles;
- old kettle with a spout;
- flower vases and pots;
- metal cups and bowls.
But still the most preferable to use in the regeneration of the maze plastic bottles. They are easy to cut both lengthwise and crosswise, giving the desired shape. Some of the bottles can not be screw the plastic covers, pre-drilled small holes.
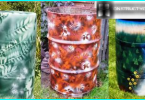
The container should only be placed on a vertical plane so that the water smoothly flowed from one to the other, descending to the foot of the structure. To create the grooves and tunnels is convenient to use rigid or corrugated polypropylene easy bending pipes of different diameters.
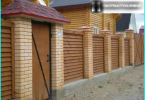
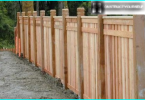
As a reliable, but lightweight support for the placement of the design is easiest to use the fence, firmly anchored trellis or the side of the building
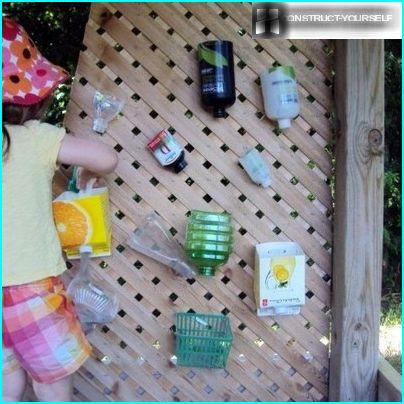
Strict technology of creation of the water maze does not exist: containers can be placed on a vertical plane in an arbitrary order. To secure the bottles and bowls on the shield is easiest with clamps and screws. Items can be done both stationary and removable. The second option is preferable because it provides an opportunity for children in the game to change the location of bowls, each time paving a new path for flowing streams.
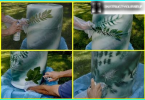
Suspended at different heights of the Cup remains only to connect pieces of pipes and route them to different angles so that when the runoff water created interesting twists and unexpected turns.
To make the process of overflowing water more spectacular, pre-touch up liquid watercolor or gouache paints to the desired shade.
This created improvised maze is sure to cause children sea of delight, giving a great opportunity to have fun in a compromising position
Playing with water will contribute to the development of coordination of movements of the system «eye – hand» and tactile-kinesthetic sensitivity, in parallel, relieving tension and providing psychotherapeutic effect.
Option #2 — natural designer
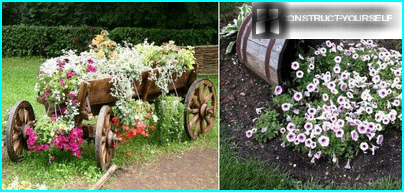
Small penechki, saw cut-kruglyashi remaining after cutting orchards branches can also find the application on the Playground. They serve as an excellent basis for the creation of natural building designer.
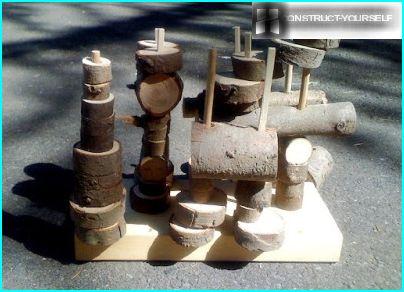
Neatly trimmed wedges child will be pleased to take up using for the construction of multi-storey towers and high castles
From penechki young designers would be happy to build forest houses for dolls and a reliable fortress for protecting their soldiers, and drunk-kruglyashey children to put pyramids and multi-level design.
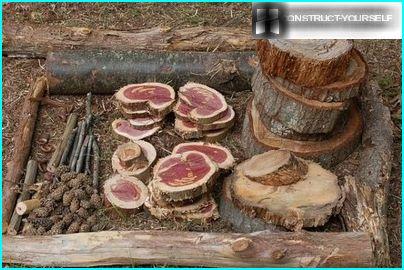
Thinner twigs and fir cones can be adapted for the material to upload puzzles on the grass or to create geometric patterns
To protect kids from scratches and splinters when playing with natural material, each workpiece must be carefully cleaned with sandpaper from chipping and sharp edges.
Option #3 — Twister on the grass
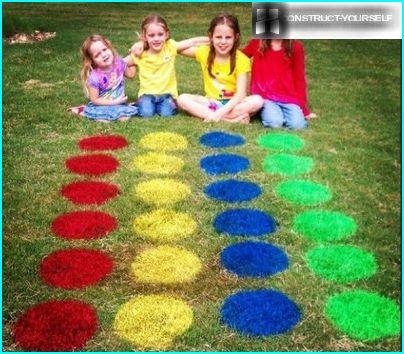
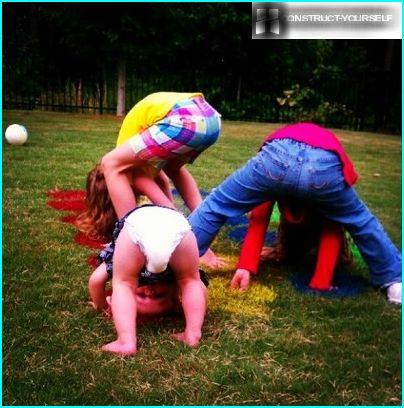
Young children will appreciate the offer to play an active game of Twister. The main task of the game is to keep the balance, uperevshis feet and palms in circles painted on the playing field at a certain distance from each other. The rules of the game are so simple that children are able to master them in just a few minutes.
It’s hard to keep from laughing, trying to do the job of the host and to reach the feet or hand to the coveted circle, not buried at the same face in the grass
The beauty of the game Twister in the fact that it’s fun not only to play. Watch as participants try to twist that to take that arrow pose is very exciting and funny.
Each time not to bother with unfolding a large canvas, the playing field for Twister, you can build directly on the grass. To work need:
- lace and pegs for marking the site;
- a cardboard stencil of circular shape;
- a set of strips from cardboard;
- 2 cans of small diameter;
- spray paint in 4 colors.
Circles the playing field in the traditional set of Twister painted in four colors: yellow, red, green and blue. In the absence of such shades you can use any other suitable color. The main thing is contrast looked at the background of green grass.
When choosing paint for drawing circles, give preference to formulations for latex, vinyl acrylic or latex based. They have bright saturated colors and are not dangerous for children’s health.
For the arrangement of the playing field, select a flat area with size 4×2. 5 meters. With the help of pegs and lace mark the future borders of a field and mark 4 lines for placing the rows of colored circles. Then, dividing each line into 6 equal sections, mark the points for placing the colored circles. You should have a field consisting of 4 rows, each of which is placed at the 6 circles of the same color.
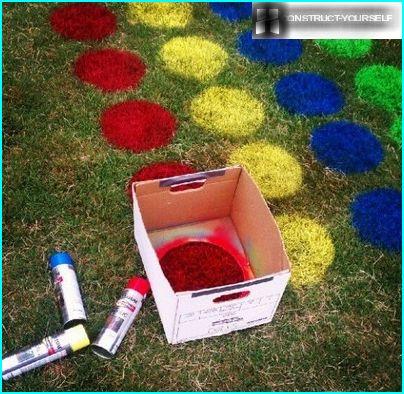
To colored circles turned with smooth edges, and the playing field had a neat appearance, the staining «Islands» use the stencil
Paint spray through a stencil, forming row after row of the playing field. While the paint dries, start making the roulette. It will indicate what position is required to take this or that player. It can produce the same cardboard. But you can do much easier. This will require 2 cans. They will be enclosed strips:
- first Bank strips of the four colors;
- secondly – the white stripes with a picture of the right and left feet, respectively, right and left palm.
During the game the lead will just get out of cans in one lane and form alternately «fresh» the task for each of the players.
An exciting game in the fresh air will be a bright attribute of rest areas and easily turn a normal day into a Jolly holiday
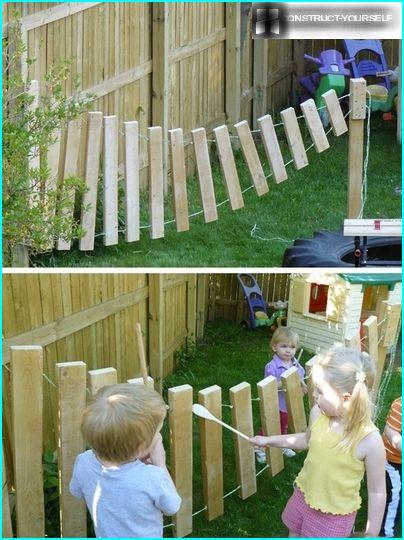
Option #4 — wall music with the xylophone
Percussion instruments contribute to the development of musical and creative abilities of the kids, not to mention the joy it brings the kids organized with their home orchestra. By combining various «noise maker», «Gramercy», «tonelki» in a single design, you will be able to build a music wall.
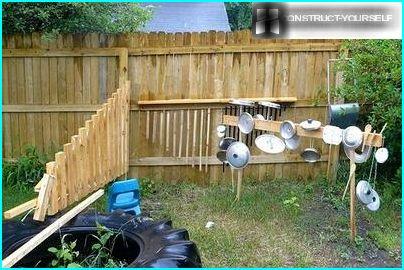
Percussion instruments made from scrap vehicles with their hands, will make the child a new way of hearing the wonderful world of sounds
To create the musical wall you will need:
- empty cans;
- metal cover;
- plastic bottles;
- old Cutlery.
In principle you can use any kitchen utensil that can pull sounds. Plastic bottles are easy to adapt rattle, filling them with old buttons or seeds, persimmon and apricots, and then hung on a strong thread to the shield.
A few hung on an old hanger metal corners and old disks every time in contact with each other will make a sound like bells.
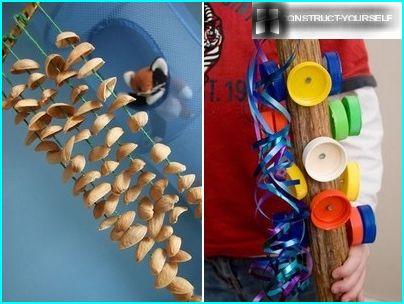
To turn shells of nuts «ratchet», and plastic bottle caps in «Gramercy» you will need a minimum of strength and skill
Varying ways of playing, the baby will explore the sounds, creating a close musical images and making first steps in music-making.
To create more subdued, but not inferior to the melody of sounds, you can not build a xylophone. The tool resembles a small shield, with up to twenty wooden plates connected among themselves in a consistent scale.
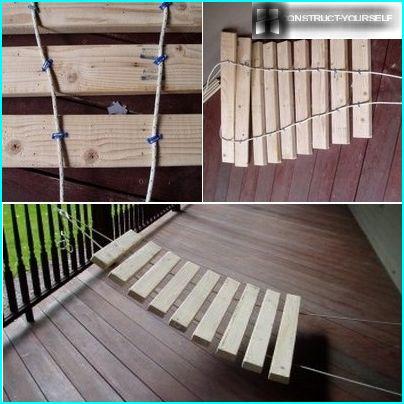
Collect 10-15 of xylophone wooden bars. The long plate can reach 50-60 cm, and each should be 3-4 cm shorter than the previous
To protect young musicians from splinters and scratches, each bar smooth out an emery paper. Each «notes» using the marker, outline the middle. Departing from the centre at 4-5 cm in each direction, plan point holes for fixing ropes. According to the planned outline is attached a rope, fixing it with nails or staples so that the distance between the bars was not less than 1.5 cm.
When hanging xylophone, note the angle: it largely determines the sound of the instrument.
Sounds game – the right way to the beginning of improvisation, through which the child successfully formed figuratively-associative thinking
These outdoor games will help to develop the imagery of music perception, opening kids a wide scope to display his «I».
Option #5 — stone cave «elves»
Without exception, children love to spend time, building different shelters. They can spend hours digging in the garden, building the fairy huts made of branches, blankets and curtains, and then equipping their own homes.
However, such buildings have one annoying fault: the careless movement in the process of active games they can literally crumble in his eyes. Take the initiative and offer to build for young fidget house stronger.
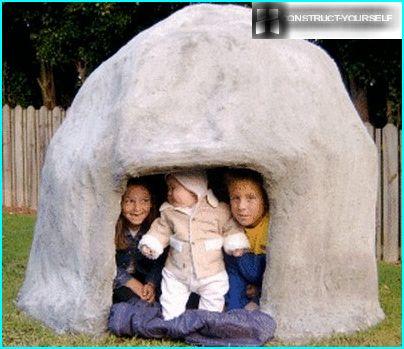
Building a fairy house «elves», you provide the kids their own space and give young dreamers an opportunity to develop imagination
A fabulous house that looks like a stone cave, to do is easy and fun. Place under his arrangement is better to choose on an open and visible from all sides of the site. Its surface is level, clear of rocks and plant roots.
For the manufacture of the elven house will require:
- a piece of tarpaulin or thick polyethylene film measuring 2,5×2,5 m;
- reinforcing wire mesh;
- wire tie;
- plastic pipe d20 mm;
- concrete M300, sifted sand and water.
To work can be used as metal reinforcing mesh, and made of polypropylene.
From the materials you need to prepare:
- scissors for metal work;
- capacity for mortar mixing;
- plastering trowel;
- the spray gun;
- duct tape;
- protective clothing, gloves and goggles.
The prepared base is lined with a layer of tarpaulin. This will facilitate the subsequent cleaning of construction residues and falling pieces of hardened cement mixture.
First construct the circle of the Foundation frame. To do this, cut a piece of pipe with a length of 5 meter and connect its ends between.
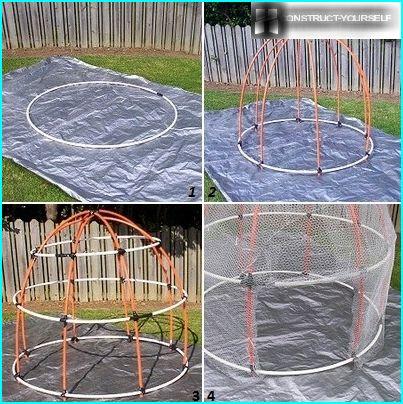
To form a circle the easiest way, having closed the ends of pipe butt weld by means of a connecting tube of smaller diameter fixed docked edge by taping electrical tape
Vertical arch frame erected using the same PVC pipe d20 mm. To do this, take 4 equal segments with a length of 3.5 m. From the segments form an arch, by setting them at right angles to each other. The edge of each segment is fixed to the base, evenly filling the gaps around the entire circumference.
The vertical arches are fixed two horizontal cross-beams: bottom length 4.7 meters, upper – 3.4 meters. Cross member placed on the outer side of the frame, locking them to the arches with duct tape.
To form the walls of the cave, ready frame is wrapped with reinforcing mesh. To ensure secure attachment helps wire ties that need to be performed over the entire surface at intervals of 250 mm To create a more robust design grid is applied in 2-3 layers.
Outlining the space for the arrangement of the door opening using wire cutters, cut the excess part of the mesh and bend the edges. On the same principle, opposite of the doorway, make a small window.
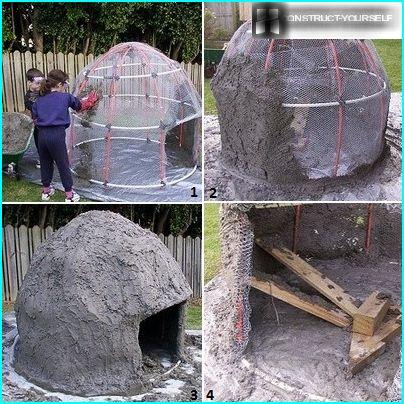
The wall house «erect» of cement mortar, diluted in a separate container, laying it on a grid mesh and evenly distributed over a vertical surface
Applying a cement mixture do only in a protective latex gloves, dense structure which will protect the delicate skin from «corrosion».
Laying the ready mix on the grid, do not press hard, otherwise when pressure is applied it will fall through the cell. To create a solid wall solution is spread in several layers, weathering before application of each subsequent time-span of 5-8 hours. At this stage, don’t hurry. Laborious process can take several days. If the plaster dries too fast, before applying each subsequent layer, rinse the surface with water from a spray bottle or a regular hose.
If under the weight of the plaster mix with a wire base will begin to SAG, until solidification of the solution back wall wooden bars.
Laying each layer of plaster, and waiting until he gains the necessary strength, use a plastering trowel to adjust the surface roughness.

After applying the last layer remains only slightly to align the wall of the cave, carefully cleaning the defects, trying to keep her «natural» view
To protect the building from atmospheric precipitation and make it more presentable appearance, cover external and internal walls oil or latex paint. Yes, to create a cave you will have to put a lot of effort. But the result is fully justified: the children’s happiness will know no bounds. The little dreamers and the young fans of elf will love spending time in your new fabulous «house».
If you wish, you can even build a few nearby caves, creating a small town for role-playing games of kids a reincarnation of a fairy-tale characters.