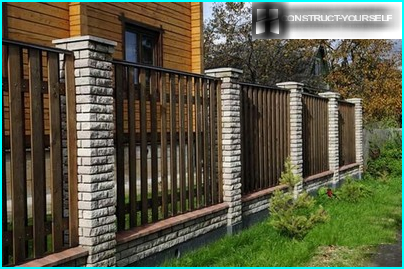
Work on beautification of the newly purchased plot I decided to start with a layout and device garden paths. On hand I already had a project created by a landscape designer. On the plan, but the buildings and plants were marked with curved paths leading to all «strategic» the parcel features. As paving selected concrete paving – material is durable and at the same time, able to create a decorative surface.
The device tracks I started, because I have a strong belief that the construction brigade, even professional, often well enough prepared «pillow» under the pavement. Then the tiles bends, falls… Decided to do everything yourself to certainly follow all the rules of paving. Now when my track is ready, I decided to share my construction experience by providing a detailed photo report.
The contents
Track from pavers have a complex, multilayer structure. I decided to use the following sequence of layers (from bottom up):
- the ground;
- geotextile;
- coarse sand 10 cm;
- geotextile;
- geogrid;
- crushed stone of 10 cm;
- geotextile;
- granite screenings 5 cm;
- concrete paving.
Thus, in my pie, use 3 layers of geotextile to separate the layers of gravel and sand. Instead of gartovka under the paving stones, I used a small stone screening dust (0-5 mm).
I will try to gradually explain the technology that I used when creating paths.
Step 1. The layout and excavation for track
Track my curved, so conventional rope and pegs, as recommended in the literature for layout, use problematic. The output was simple. For the formation you need to use something flexible for me to be a suitable marking material was a rubber hose. With him I formed the outlines of one side of the track.
After I put the hose straight plank and shovel mark the second side of the track. Then «gnaw» shovel on both sides of the tracks pieces of turf cubes, they served as a reference point in further digging of the trench.
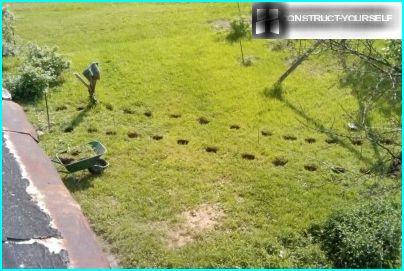
Cutting turf along the contours of tracks
On digging the trench took a few days, at the same time had to uproot the stump 2 and the currant Bush, which to his misfortune got in the way future tracks. The depth of the trench received about 35 cm as the site I have is not perfectly smooth, for the exposure level of the trench was used optical level.
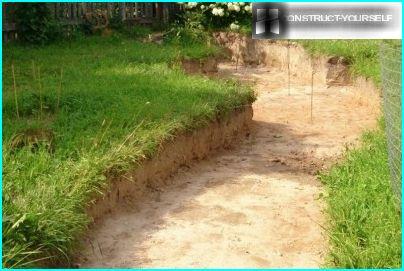
Dig a trench
Step 2. Laying of geotextile and backfilling of sand
On the bottom and sides of the trench I laid geotextile Dupont. Technology is this: from the roll, cut off a piece across the width of the track and laid in a trench. Then the edges of the material will be cut off and covered with earth.
The geotextile performs a very important function. It protects the layers of road pie from mixing. In this case, the geotextile will not allow the sand (which he will be buried) to leach into the soil.
Sand (big pit) was covered with a layer 10 cm.
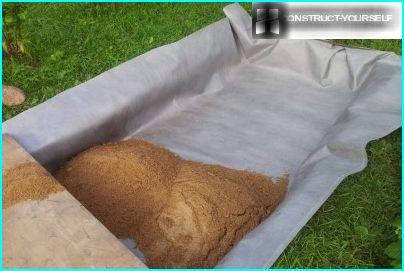
The process of dumping sand on the laid geotextile layer
To ensure the horizontal layer before backfilling the trench across I put a few slats at a height of 10 cm in increments of about 2 m. it Turned out a kind of beacons, the level I put sand.
As needed something to take away sand pile and line them up on the rail, I have invented a device that plays the role of building regulations, but on the handle. Anyway, I took the hoe to attach the rail with two screws, got a universal equalizer for bulk layers. Lined.
But leveling is not enough, at the end of the layer should be as hardened and compacted. For this to work I had to buy instrument – electric plate TSS-VP90E. At first I tried to tamp even not leveled sand layer, as it considered that the plate is heavy and flat – herself all will align. But it was not so. The plate can be constantly strove to stall in climbs and descents of sand, it had to be set aside, to push. But when the sand was aligned with my modified hoe, the work went easier. Unimpeded, the vibrating plate moves easily, like butter.
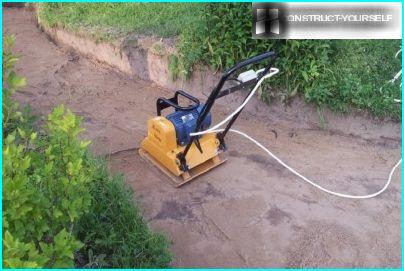
Sand rammer electric plate compactor
Compactors I walked through the sandy layer several times, after each pass of the shed surface water. The sand was so dense that when I went on it, traces remained.
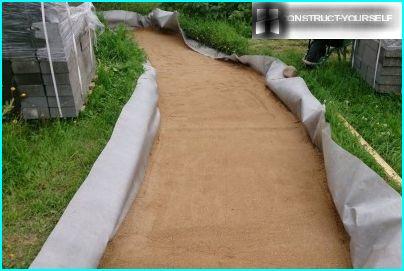
When compacting sand several times to shed the water that it is as compacted
Step 3. Laying of geotextiles, geogrids and installation of the curb
On the sand I put a second layer of geotextile.
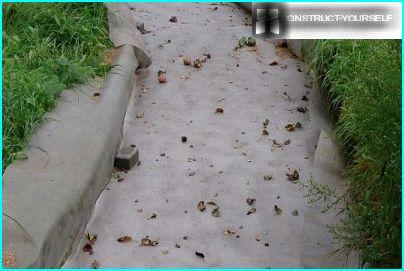
The geotextile will not allow the sand to mix with subsequent layers of gravel
Then the plan goes geogrid, on top of which is mounted a curb. Like all simple. But there’s a catch. Curbs (height 20 cm, length 50 cm) straight and curved paths. It turns out that borders has repeated the line of the tracks, they must be cut at an angle and then joined with each other. Cut and trim the ends I performed on cheap stone cutting machine, pre-measuring angles sipped electronic protractor.
All cut curbs were displayed in a line on the edges of tracks, dock – almost perfect. It turned out that the bulk of the stones were cut into pieces of 20-30 cm, especially sharp turns going from pieces of 10 cm gaps between the stones when the final Assembly was 1-2 mm.
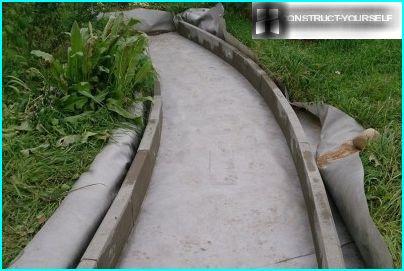
Fit curbs under the curvature of the tracks
Now put up borders to cover the geogrid. Again not to engage in the matching and re-setting curbs, paint-spray, I outlined to them the location of the lines. Then removed the stones.
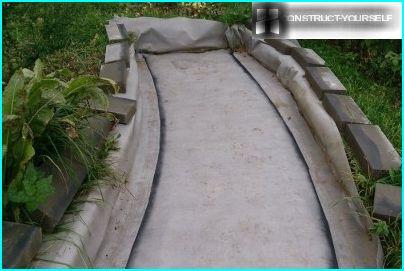
The location of stones marked with paint
Cut pieces of geogrid and put them on the bottom of the trench. I have the Tensar Triax grid with triangular cells. These cells are good because resistant in all directions, withstand the efforts made along, across and diagonally. If it tracks straight, no problem, you can use regular mesh with square cells. They are stable along the length and across, and diagonal stretch. My tracks are not suitable.
On top of the geonet, I put curbs in place.
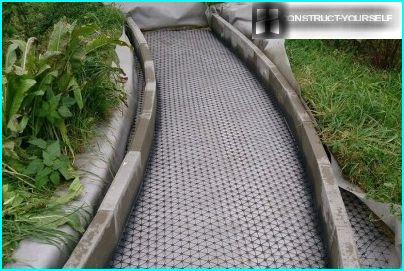
Laying of geogrid and placing curbs
Left to put them on the grout in order to fix the position. This process was complex because of the need to withstand the highest levels, pre-defined on the site plan. Traditionally, compliance with recommended to use a cord (string). But it is suitable only for straight tracks. With curved lines more complicated, here we have to use a building level, a rule level and to constantly monitor the levels of the project.
A solution of the most common is the sand, cement, water. With a trowel superimposed solution in the desired position, then he sits on the curb stone, the height is checked with a level. So I put all the stones on both sides of the tracks.
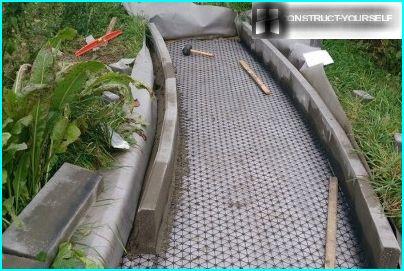
Mount kerb stones in cement mortar M100
Another important clarification: every day after work must wet brush to wash adhering solution from the sidewalls and the top of the stones. Otherwise we will dry and clean it will be more difficult, will spoil the whole look of the tracks.
Step 4. Filling of gravel and laying of geotextile
The next layer is shchebnevy 10 cm Notice that the gravel for the construction of the paths is not used. It is rounded, so do not «works» as a single layer. Granite rubble, which is used for my tracks, is another matter. It has sharp edges that interlock with each other. For this reason, for tracks suitable gravel gravel (the same gravel, but crushed, with torn edges).
Bought the gravel fraction 5-20 mm. If you use a fraction more, you can not put a second layer of geotextile and geogrid use one. It will prevent the mixing of sand with gravel. But in my case is just such a faction, and the geotextile is laid already.
So, I pushed the wheelbarrow gravel evenly across the tracks, and then leveled a modified hoe. Because at this point you have installed the curbs lining the rail for the hoes I redid – cut at the ends of the grooves in which you can rest against the curbs. The grooves should be such that the bottom rails have had on the planned level of filling. Then, by moving the rail on the filling, it is possible to draw the layer, align it to the desired level.
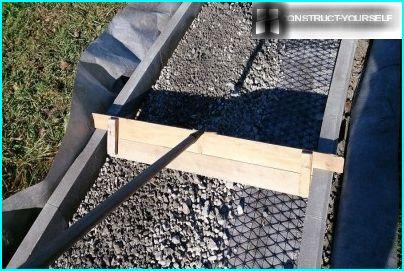
The alignment layer of crushed stone rail with carved grooves
Stamped a layer with a plate compactor.
On top of the gravel – geotextile. This is already the 3rd layer needed to prevent mixing the next layer (fines) crushed stone.
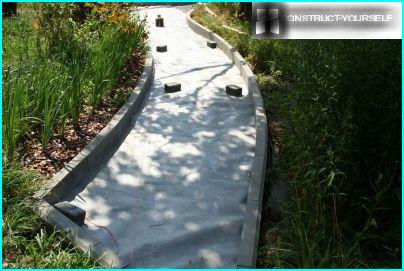
Laying the third layer of geotextile
Step 5. The organization of the levelling layer under the paving stones
Most often, the paving is laid on gartsovku – poor cement mixture, or coarse sand. I decided to use for these purposes, stone screening dust 0-5 mm.
I bought a sieve, peppered, as with the previous layers. Bulk the thickness of the dropout – 8 see After laying the pavers and rammers layer will become less of its planned final thickness of 5 cm Data is that after ramming screening usaget 3 cm, obtained experimentally. The other alignment layer, such as sand, can give a totally different shrink. So before you start paving, it is desirable to conduct an experiment: lay paving stones on a small area of track, tamping it up and see how much SAG dumping.
Alignment of dumping should be approached very carefully using the alignment rail with the slots for the planned height of the layer.
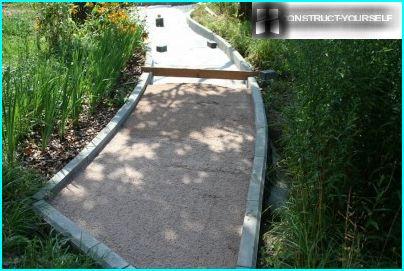
Backfill drop-out and leveling a wooden rack
Step 6. Paving
Height purchased pavers – 8 and see the plan, it should be laid flush with the kerb. To start laying you need with the Central part of the track, closer to the curbs starts trimming. While complex paving pattern to cut a lot. Sawed pavement again, the machine suffered a lot takes time and effort. But it turned out beautifully!
Technology laying paving stones is quite simple. In fact, the tiles just need to drive to the dumping mallet blows. At the same time and backfilling compacted, and the pavement is fixed. Controlled decking stretched cord or string.
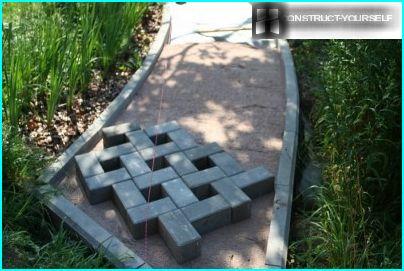
Start laying paving stones — with the Central part of paths
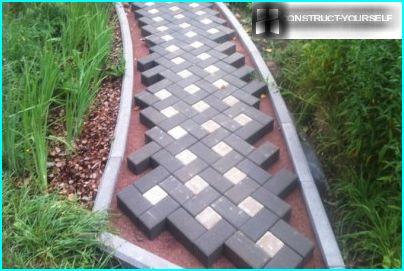
Drawing tracks is already visible, it remains to saw and install pavers near curbs
Laid the pavement I pounded the plate, the rubber gasket is not used – I don’t have it.
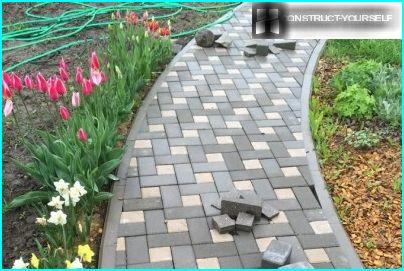
Here’s the track turned out!
As a result, I reliable a beautiful track, almost always dry and non-slip.
Eugene

