Start with the fact that 4 years ago my husband bought a plot of 30 acres for permanent residence. He built a house, moved in. And then I was seized with an irrepressible desire to create the garden of your dreams. What I envision? This garden miloody that does not require obedience on earth. Style – landscape, close to natural forms. There are no exotic, only plants that grow well in our conditions without requiring specific care. This garden, I started to build, slowly, step by step, moving towards their goal. Over the years much has been done, I do not avoid errors and rework in the design and planting.
Much «auditioned for the tooth», and then he proved to be inappropriate and ruthlessly eliminate and replace with something more interesting. The garden was altered, it appeared new functional areas, adapt to me and my family. About how it was created, my garden, about the stages of conversion and the end of my efforts I will try to explain now.
The contents
A preliminary division into zones
Immediately after the completion of the house, we roughly divided the area into zones.
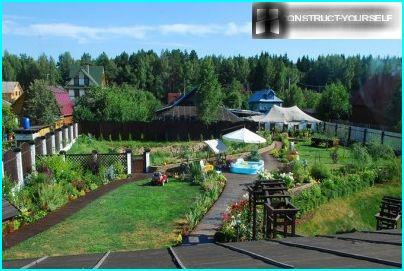
The plot with the height of the second floor — visible in almost all functional areas except Playground
The first area is the lawn, which is located at the entrance to the house. Lawn framed by planting two large flower beds and mixborders. On the lawn we have marked and made the garden paths, first from stone, then redid them on wooden decks.
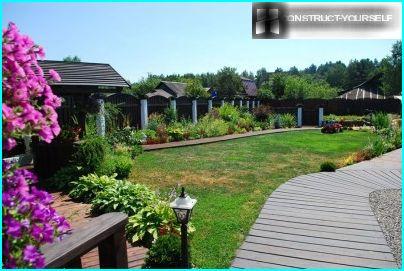
The lawn near the entrance to the house is «the front» area of the plot
The second important part of the garden is a Playground. It is made on the basis of the former fire pond, long since dried up, but remaining on our site.
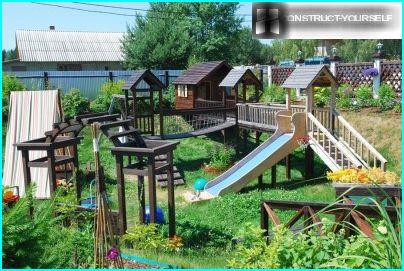
Children’s Playground built in the valley, where once was fire pond
The third zone is a small, made to stay. Was an accident, as was a piece of space near the site. Here we installed a small pond with a fountain and garden furniture. The surface of the earth filled with rubble, and to contour areas made around the track out of wood.
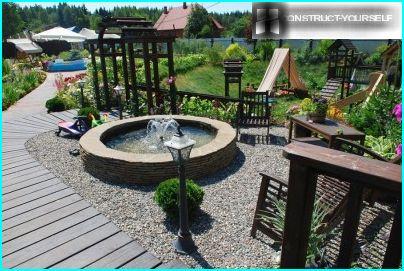
A small Seating area with a fountain — a place for morning relaxation with a Cup of coffee
The fourth area – «kitchen». Here is a fireplace with a semicircular bench, a cart with a mini garden, flower beds with conifers, hosts and fruit trees.
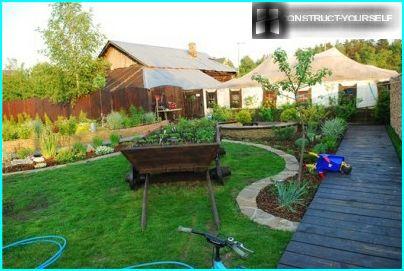
Lawn with a fireplace and a mini kitchen garden on a cart plays a role «summer kitchen» on the site
The fifth area – patio for SPA guests with a pool. This zone is formed by chance and was originally planned as a rose garden. But, unfortunately, where roses grow refused. Blame was a layer of clay, held in the ground at a depth of about a meter, so the water stagnate at the roots of the plants, they grew sickly and not in bloom. So the rosary was demolished and in its place are fitted with wooden flooring, coupled with the tracks.
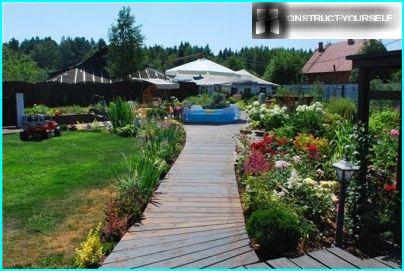
In the center of the plot is a wooden deck patio used in the summer to relax by the pool
In the center left space, where we planted a blue spruce «Hupsi» with beautiful blue needles. In adulthood, she needs to reach 10 m in height, will have something to dress up for the New Year.
For planting spruce had to dig a hole 1,5×1,5 m, to overcome the clay layer and replace it with normal soil. Near if we put an inflatable pool, a large umbrella, garden swing, sun loungers.
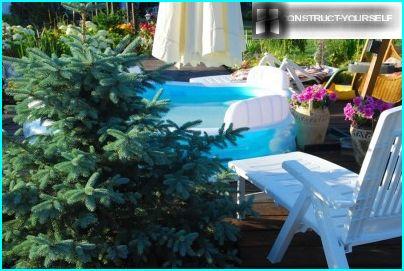
In the Central part of the deck is planted with fir «Hupsi»
There is another area, a sixth, till she improved. This place is the pit dug by previous owners under the Foundation of the house. But we built a house elsewhere, and the pit remained.
Plans to do here Playground. In the meantime, pending global changes, I dropped something on the perimeter. Along the fence in a number of planted multiple high grade narrow TUI «Kolomna». They grow fast, I hope, will soon close the neighbor’s fence. On the left, in our fence, planted lilac bushes – 3 pieces. The left and right of the pit, almost symmetrically organized a small mixed borders of roses, blue spruce, spirea, willow and hazel red.
The area is fenced off from the rest of the plot is a raised flowerbed and lattice fence with a gate. A raised bed I originally planted with roses, but almost all of them died in the first winter. The bed turned out high, so everything is frozen. I had to change the roses in mixed planting of globular spirea, Potentilla, hydrangea, sow-Thistle, creeping juniper.
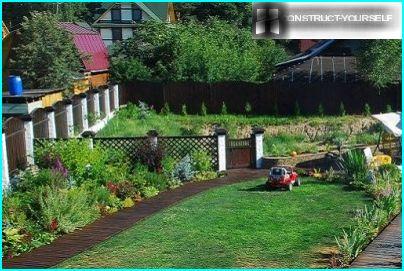
Not yet landscaped part of the garden located behind the lattice fence with a gate
Now that you have an idea of my plot, tell me about the most important objects. I’ll try to explain how they were made, what principles of landscaping and the arrangement used for this.
Children’s Playground
The Playground is arranged in the first hole left from the fire of a dried-up pond. There is always dry, no wind, so walking there is possible, even in very unpleasant weather. For a start we fill up, there is little fertile land, flattened slopes and bottom. Around the perimeter of the pit to put a wooden fence.
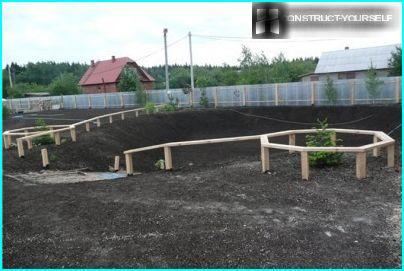
In the first year we brought the fertile land, put it in a ditch, leveled and installed support
The next summer was planted lawn, made the descent from stone limestone. The entrance is decorated by a wooden arch.
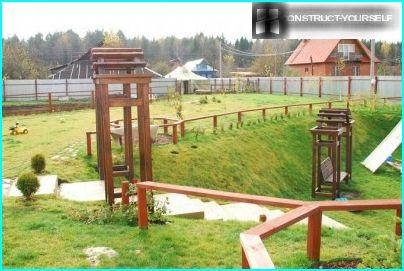
After installing arch and the first play structure Playground was the favourite place of our children
Children’s town I designed myself, and the embodiment claimed by the husband with the workers. Made a complex with houses, slides, climbs, swings, sandpit. Children (we have two) immediately recognized our efforts, and now almost all free time they spend there.
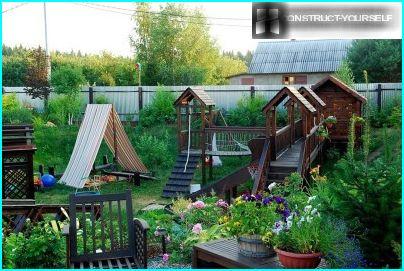
The area has everything you need for play and active recreation for children
Mixborders and front garden
Mixborders was broken in the left side of the lawn, which is located at the entrance to the house. The basis of mixborders – coniferous plants, they were planted first. In the first year of garden improvement we placed pine, arborvitae, blue spruce, willow and a few of the ferns brought from the forest.
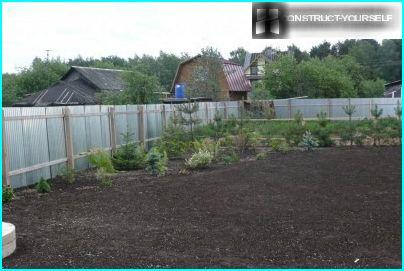
First, in mixborders was planted with coniferous, they create a form, «skeleton» composition
And then annoyed for mass a few perennials. First – the nipponskoy spirea, hydrangea paniculata, Deren white stonecrop prominent, the cuff. A little later, the bushes poserednikiv «Diablo» and «Aurea», Ottawa barberry, maple «Flamingo». Interesting plant for me was the blueberries, which in the summer gives a very decorative and tasty berries, and in autumn the foliage colors in Carmine color.
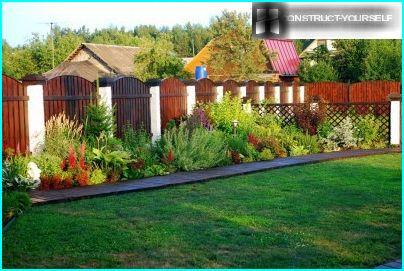
Mixborders in the summer, during flowering perennials
Another group of vegetable – garden — planted to the left at the entrance to the house. Initially in the centre I planted a black pine, then around her formed an arrangement of roses (floribunda and groundcover), lavender, clematis, delphiniums, stock. The trellis started to curl parthenocissus.
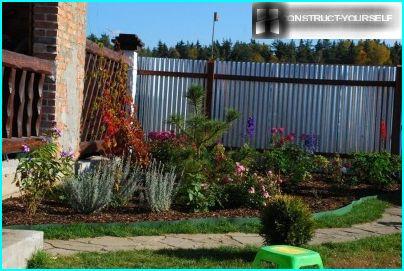
The original appearance of the front garden with a black pine in the center
The following year want more color, I planted it in the front garden Phlox, dahlias and much more. But in flowering I didn’t like it.
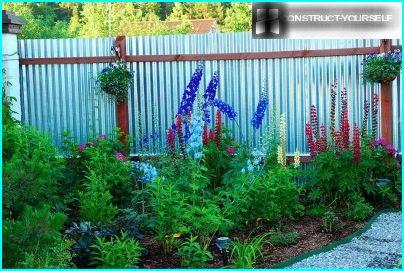
Flowering front garden was too fussy, so I decided to change the composition of plants
And in the fall I took hurt. Removed delphiniums, dahlias. Replaced the black pine on a compact pine mountain and hoisted a few fir trees. Added elimus.
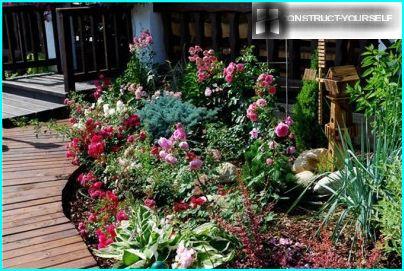
The front garden in a big foam roses — so the composition looks now
To make your life easier and get rid of the weeds, garden and all subsequent landings have been made with the use of geotextiles. First we removed the sod lawn with a bayonet spade, poured fertile soil. Then covered the ground with geotextile, at the landing site did a cross-shaped incision and planted the selected plants. On top of the geotextile were mulching pine chips. That’s all. Chips looks very organic, and almost no weeds.
The plants of the garden and flower beds are not crawling on the lawn, the edges of the landings was limited to the plastic border tape. A very practical thing – not rot, warp.
Other flower beds
Flower beds in my garden several. I will mention several of them.
The lawn near the house is framed by two flower beds. One near the well, she had planted several large host, weeping larch, shrubs, sow Thistle, stonecrop, willow on the trunk, betulinic.
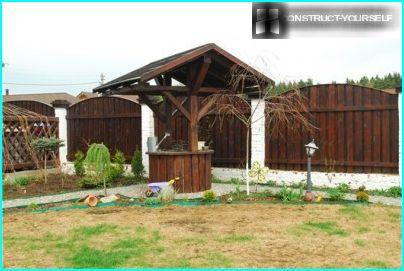
The beginning of the creation of the semicircular flower beds, located on both sides of the wooden well
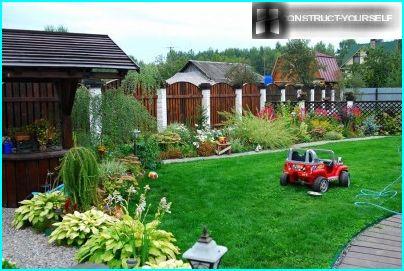
Semi-circular flowerbed limits «the front» the lawn and creates a harmonious composition with a well
Similar semi-circular flower bed broke on the opposite side of the lawn, adding to bearded irises and large boulders.
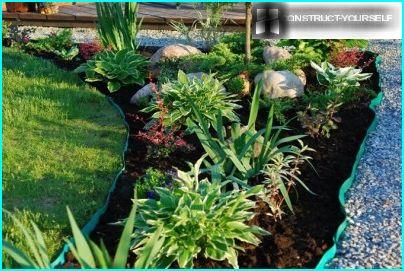
The second flowerbed with hosts, bounding the lawn on the opposite side
Two beds located on the lawn with the source (in «kitchen» area»). The first semi — circular flowerbed in the shape of a horseshoe wraps around the bench. Here I have a lot of host – green and variegated. To them replanted irises, dogwood, yellow-white, TUI, sow Thistle, spirea. On the right side of the flower bed grows a young Apple tree, and the left – Kalina on the trunk.
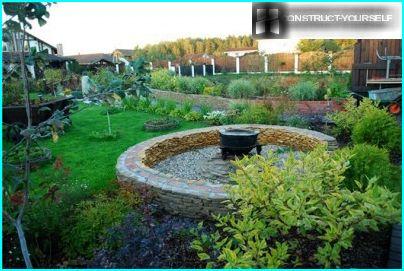
Hearth, surrounded by a stone retaining wall, the back framed by a flower bed in the shape of a horseshoe
In front of her broken another flowerbed flanking the lawn, with wavy edges. Then planted cherry felt, tulips, Euphorbia, fir, junipers.
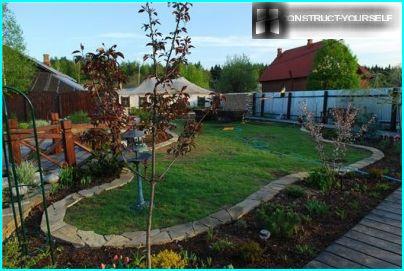
Flower garden with an undulating contour in the opposite direction from the hearth of the lawn
First flower beds were sheltered from lawn with border tape, then I changed it to a number of rocks-boulders, and then – on the borders of crushed stone Sandstone.
Rockeries — «stone motifs»
It is a miracle of landscape art I have. It is located on the edge «kitchen» zone and is adjacent to one side of the wood carpet-flooring.
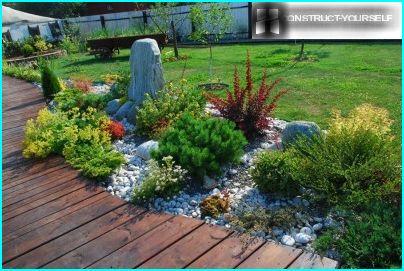
Rockery flowerbed with stone dumping and «mountain» landscape
Probably every owner of a suburban area, passionate about design, not averse to create a piece of stone garden. The problem is that they are difficult to logically tie to the area. In many flat areas seem rather strange nowhere who had taken rocks, stacked in a hill. So I decided not to make eye noticeable elevations, that is, slides, and lay the stones of different sizes in natural clutter. And among this carefully crafted chaos for planting.
I’ve been thinking how to write a rockery in picture of the garden. And decided to make it part of the composition along the walkway flooring. On the one hand it needs «fall» in a raised flowerbed with hydrangeas and conifers, and on the other hand in a regular flowerbed in the shape of a horseshoe, surrounding «kitchen» area with a hearth. In order to associate with a raised rockery flower bed, planned to put between them a wooden bridge.
A rockery was created in the following way. On the lawn we delineated the shape of rockeries, removed the turf on the two bayonet spade. Then filled in the resulting deepening of good soil, covered it with geotextile. Planned the landing and made a cross-shaped incisions in the locations of the plants. Put Karelian birch, milkweed, barberry Thunberg, the English, the cuff, juniper, thuja. On top of the geotextile poured granite gravel on top of it scattered pebbles and laid out large boulders.
The bridge between rockery with raised flowerbed, the garden added a note of some Japanese flair. But that he didn’t look like a separate element, it was necessary to fit into the landscape, to beat the pebbles and greens. I came up with the following. To the right of the bridge on a raised bed are already growing sow Thistle, and below it on the lawn I planted a dwarf tree «Lucky strike». Very much I liked his clumsy, sticking out branches, giving it a Japanese chic.
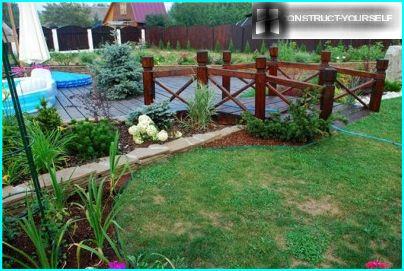
Tree «Lucky strike» located on the lawn on the right side of the bridge
To the left of the bridge, closer to Romario, I planted a Bush of Elymus (grate burs) with blue long leaves.
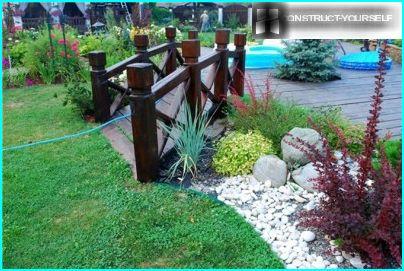
To the left of the bridge successfully blended the grate burs from a distance resembles kamyshi
Garden paths
I think what can be interesting device paths in my garden. I will write about them too. We started to make them out of stone. Posted on half of the plot, but appearance we do not like.
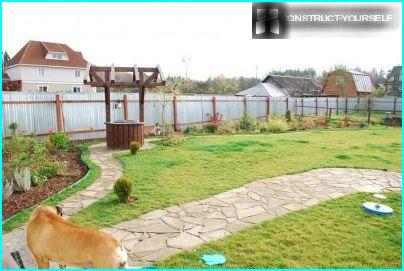
A stone path at first thought it was a good decision, but in the overall composition looked rough
Decided to redo it. Removed the rock, removed the layer of turf on the bayonet spade. Put sand about 10 cm, and top with crushed granite. These tracks looked pretty good! And some time spent in this form.
The only minus crushed stone paths for my family were in a difficult travel on them children’s transport – cars, bicycles, wheelchairs. So we decided to remake them on the track-the floorings are made of wood. Cemented in gravel lags, covered them with black tar to prevent rotting.
The joists are sheathed with pine boards, the lower side which were treated by impregnation from rot. Board polished, sanded, thus aligning their surfaces and removing sharp corners. Then, painted flooring composition for wood wax-based «The Belinsky library» dark color in 2 coats.
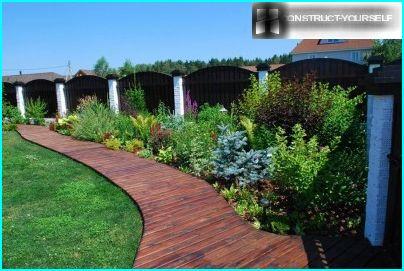
Every year or two tracks need to be painted again, then they will not have any problems
It turned out that the wooden walkways have many advantages. They are not slippery and even if you fall, it hurts not to hit. Wood is always warm and dry – we made boards between the gaps through which got on deck the water immediately goes into the gravel. As such, our paths are already 3 years – no rot!
At this stage I will finish the story. My garden, as a living being, will continue to grow and change. But the basic elements already exist and yet I am satisfied. Most importantly, the resulting pleasing to the eye. In addition, daily care for such a garden is not too complicated, handle it myself, sometimes connected husband. What is required? Watering, pruning where needed, fertilize, and sometimes transplanted. That’s all you need to have a garden will stay healthy, loved and were comfortable vacation spot for my family.
Alina

