It’s time for a happy childhood consists of many facets. Loving parents strive not only to provide the child with healthy food and beautiful clothes, but are concerned about its development. It also includes physical and psychological component. Equipped playgrounds contribute to a pleasant pastime of the child, simultaneously forming multiple vital instincts. Banal children’s sandbox is no exception: patience, spatial reasoning and the ability to communicate with their peers – not the whole list of traits generated during the game. It often happens that the children’s stay in summer is outside the city limits, away from prepared sites. So to make a nice sandbox have their own. What variant of the scheme of the children’s designs to stay and how to organize the whole process, explain in detail.
Determine the location ↑
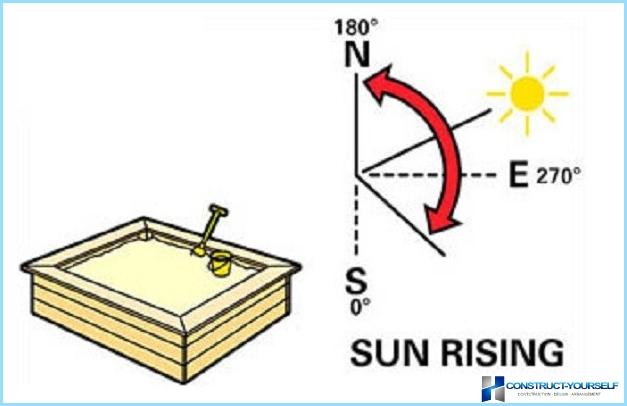
In addition to examining the possible schemes and prepare their own drawing, should wisely choose the place for installation of children’s sandboxes. In considering this question take into account many factors. Priority placement of a child’s sandbox, the sector between the North and the South-Eastern part of the site. A logical explanation is the influence of the ultraviolet rays. For the first half of the day is typical clear air and soft UV radiation, after lunch, the picture changes, ultraviolet is getting tougher and tougher, so the formation of a shadow over the children’s sandpit required. The diagram below demonstrates the described idea.
In addition to the reference to the sun, there are several factors that determine the place of installation of children’s sandboxes:
- Good view from the window of the house and most visited points of the plot. Children’s unpredictability is common, so the sandbox should always be in the field of view of the older generation.
- To arrange a children’s sandpit in the shade of trees is not recommended. In the best case she gets dirty with bird droppings and other debris in the worst – the child will fall caterpillar.
- Also, you should avoid drawing the children’s sandbox, focusing on the nearest location of moisture sources, it may be an artificial pond or regularly watered bed. Such places can fancy spiders, and meeting with them in the children’s sandbox, the child does not seem pleasant.
- The North side of the building will also have to be deleted – constant presence in the shadows impedes good warm-up sand.
Having defined the place, go directly to the charting of a child’s sandbox.
The stages of the design ↑
Work on mapping involves several steps: design of the boxes, starting from its shape, the drawing complemented the project cover and canopy. What will be the basis of a child’s sandbox, depends on many factors:
- Do you plan to purchase new material or to use leftovers from previous construction.
- Your professional skills when working with wooden structures.
- How much time you can devote to the creation of a children’s sandbox.
The most common scheme is the standard square shape with side dimension of from 1.2 to 3.0 m. the Height of a child’s sandbox in the range of 25-30 cm, it can be equipped with bottom. Filling design a 2×2 m will need about 1 mThree sand. When you are finished drawing the Foundation, move on to designing the cover.
Options caps ↑
To doubt the necessity of installing a protective element for a child’s sandbox is silly. The reasons why the scheme should contain a cover design to, the following:
- Appeal for dogs and cats to arrange a latrine. To children’s rest did not end the treatment, to observe the rules of hygiene should be continuously, and the sandbox is no exception. The purchase of expensive mixtures containing odorants to scare away animals does not always solve the problem for a long period. First, the substance quickly disappears, and second, the harmlessness of its impact on the child’s body in question.
- During heavy rains the cover will protect from excessive absorption of moisture by the sand, and as soon as weather will improve, the child will be able to begin your favorite games in the children’s sandbox.
- You can save money and not to include installation of a cover, but protection in the form of polyethylene, crushed pipes or bricks is not aesthetic. Moreover, to remove such protection from a child’s sandbox, the child is not under force.
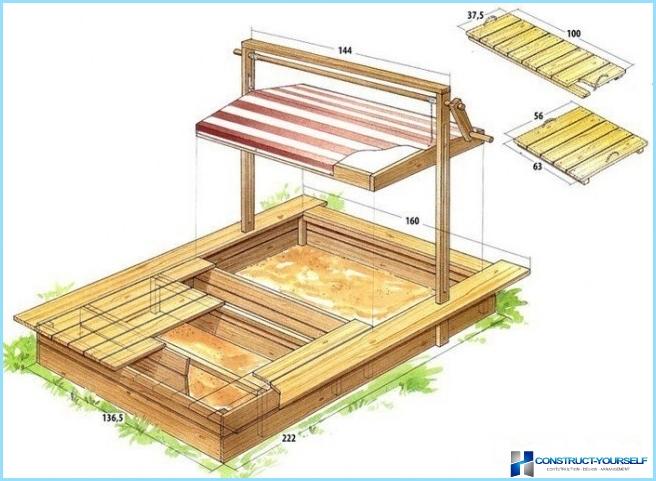
Leave the options of drawings with complex designs in the form of an opening fan cap or equipped with a lifting mechanism to the side. The easiest option for a child’s sandbox is an ordinary removable shield of the boards shown in the drawing below:
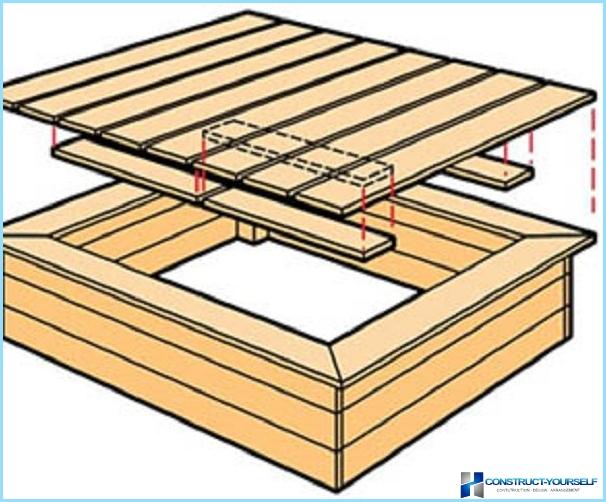
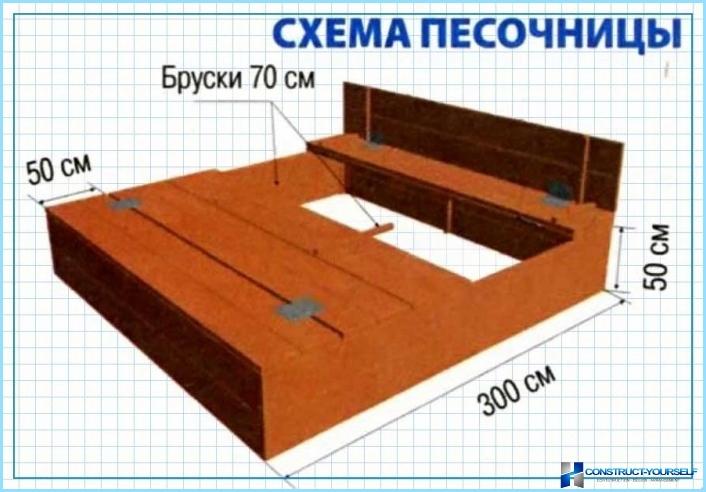
But this is not a good solution, because of possible child injury in the desire to remove it yourself. Very popular the last time I use a model of children’s sandboxes, equipped with a folding cover easily transforms into a bench. The design is depicted in the following diagram:
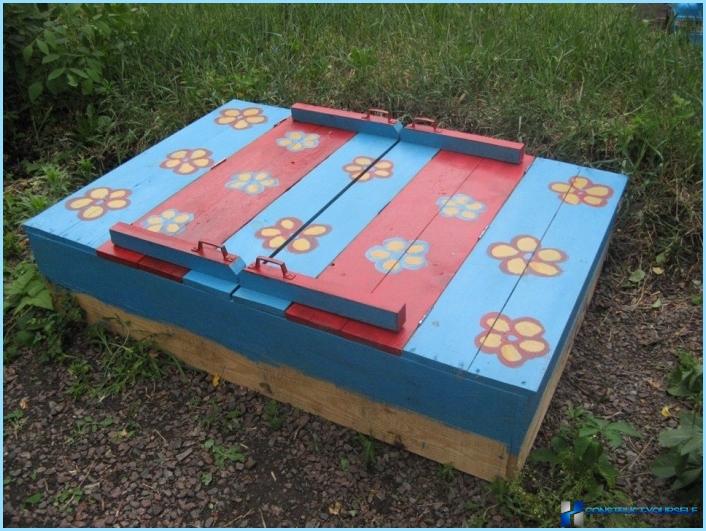
For convenience, it is open equipped with handles, as in the following photo:
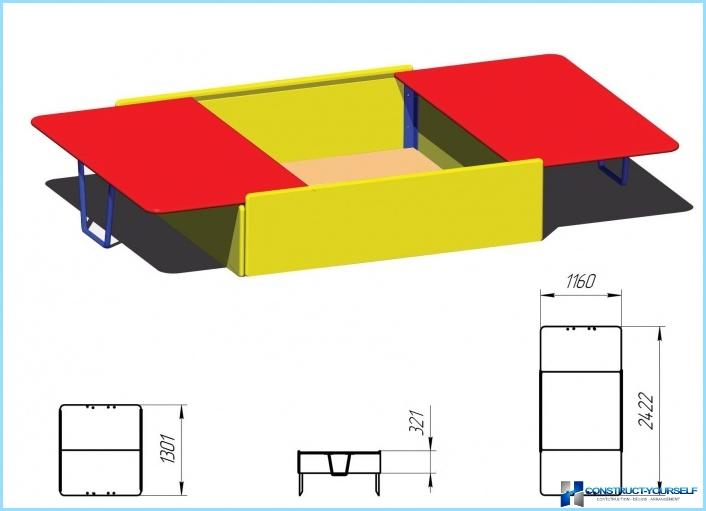
For children’s sandboxes it is possible to use the scheme with a sliding lid, which then plays the role of shelves or benches without back. Convenient bottom stand provides ease of opening and contribute to the stability of the structure.
Equipment canopy ↑
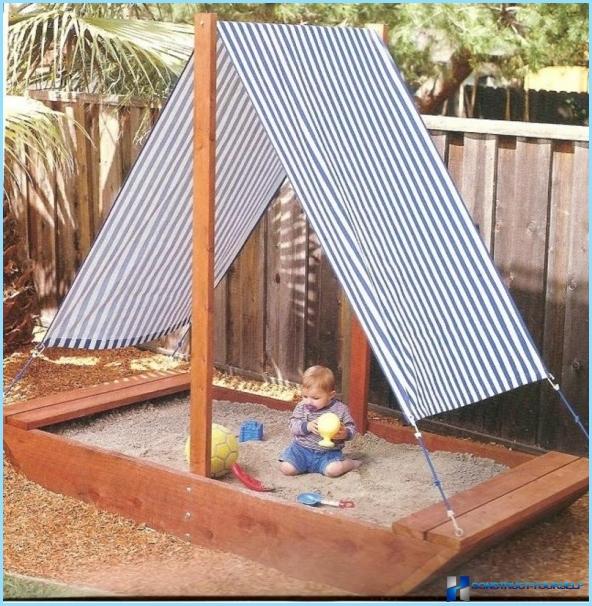
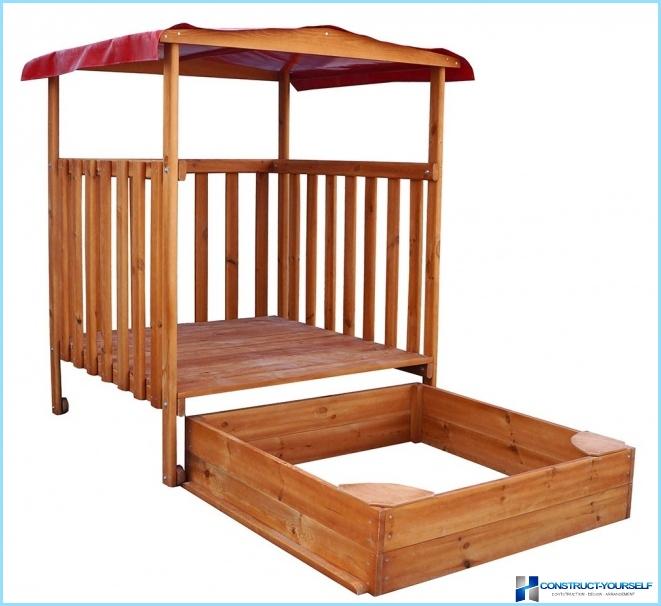
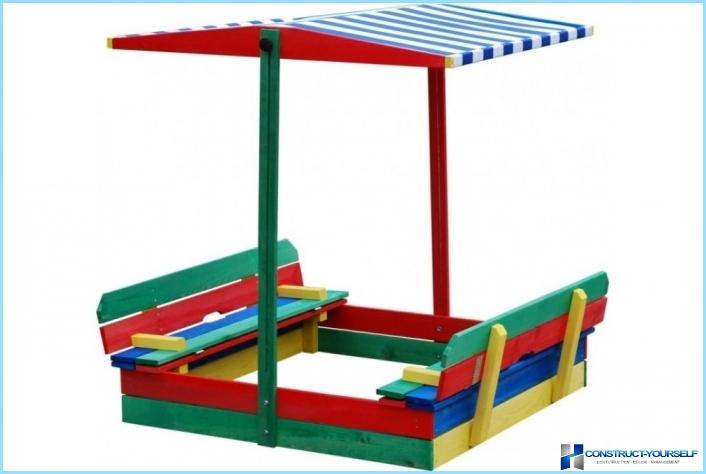
The scheme of the canopy also has many variations. Depending on the planned period of operation the children’s sandbox as material, you can use a thick cloth, plywood or thin boards. Mount choose based on the overall size of the design:
- For small children’s facilities only two poles with cross bars and the stretched awning.
- You can stay on familiar to the child and to create a drawing with the fungus. But such protection from the sun it is better to leave in the extreme case, because the pole in the middle of a children’s sandbox often brings continuous discomfort, and the shadow goes away.
- For large structures it is recommended to install four support post. The canopy may be flat or in the form of a gable roof.
The following drawings and photos will help to determine the necessary schema for your children’s sandbox to form a canopy.
Prepare the area ↑
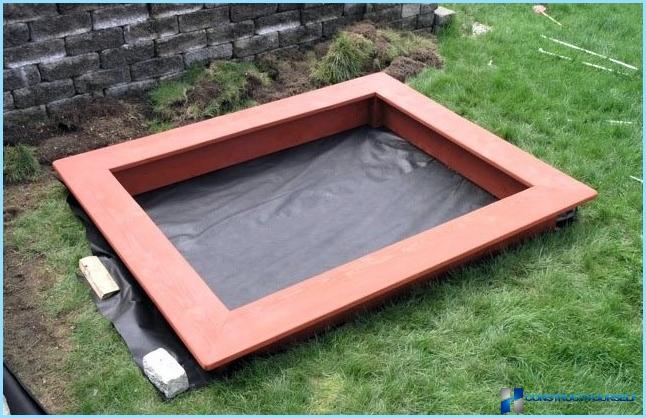
Very rarely they use the schema structures, which are removed in winter or equipped with rollers for movement on the site. In most cases, the sandbox is set on a regular basis, so you need to take care of the site preparation. The process consists of the following steps:
- Land for the future children’s sand pit deepened 20 cm.
- After leveling the soil at 5 cm of sand and treated with rake.
- As a drainage basis for children’s sandboxes it is optimal to use a geotextile or agricultural fiber. With a modest budget to fit tight polyethylene or polypropylene matting, which they spread with the stock at the border to 30 cm It will prevent the germination of weeds and the entry of pests, at the same time speeding up the process of drying sand.
- After installation of the box not occupied around the children’s sandbox recess covered with soil and tamped, and the excessive edges of the film are cut.
The approximate scheme of work look at the photo below:
The nuances of the construction process ↑
Carefully check a child’s drawing design, according to the selected scheme, are transferred to the purchase, cutting and preparation of material.
Material ↑
Wood is the most commonly used material for the manufacture of children’s facilities. With proper treatment and timely preventive care wooden sandpit will last more than 10 years. The parts, cut according to prepared drawings, double-coated with a water-polymer emulsion.
If long-term operation of the children’s sandbox is not planned to manufacture you can take the aspen or alder. To increase the period of service will help conifers. For the construction it is convenient to use a quarter or floorboards. How to collect them from the box, clearly depicted in the following diagram:

Build boxes ↑
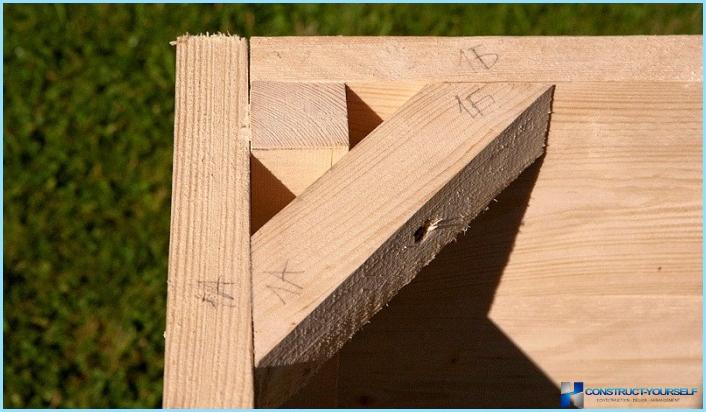
Focusing on the drawing, the box children’s sandboxes gather together. Boards are fixed to timber 50×50 segments using screws. If the side of the Assembly exceeds 1.8 m, in the scheme it is necessary to provide additional fastening of the beams in the middle of the wall. The height of the timber for the permanent children’s design according to the drawing should be 30-40 cm Angles children’s sandboxes need additional reinforcement. How to do it, see the diagram below:
Next children’s design requires the installation of bumpers that performs the function of the shelves. For this purpose the ends of boards should be cut at an angle of 45on.
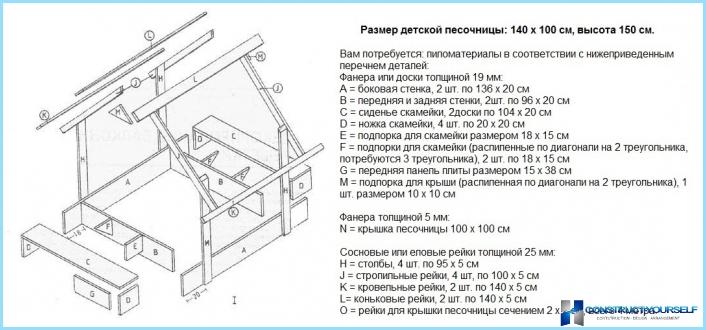
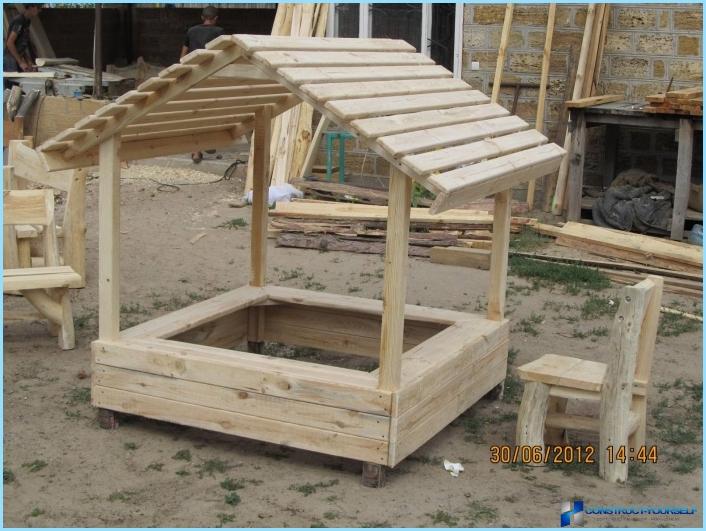
We considered the most simple in execution option box sandbox. Experience and free time allows you to improve the design. After the base transferred to the equipment cover and canopy according to the prepared drawing. The following diagram will help to build a Dollhouse sandbox that will appeal to your child:
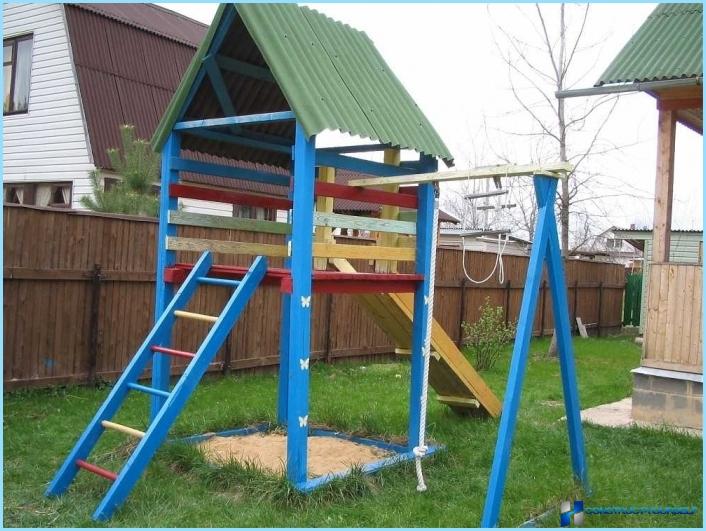
Also interesting is the children’s building, where sandbox are connected together with a slide:
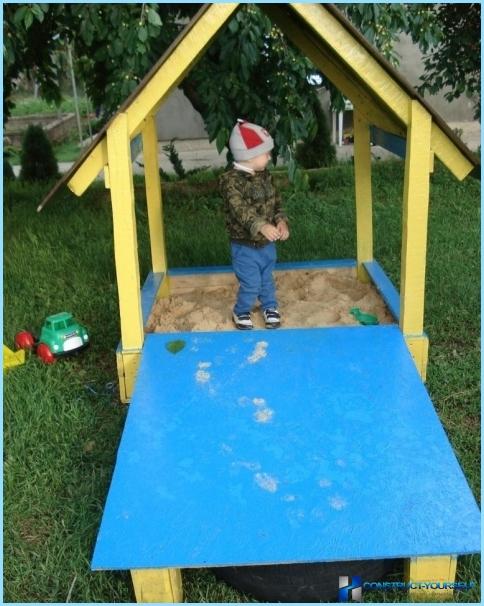
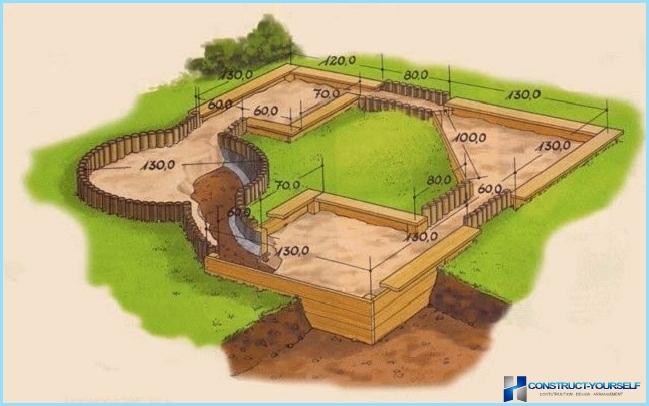
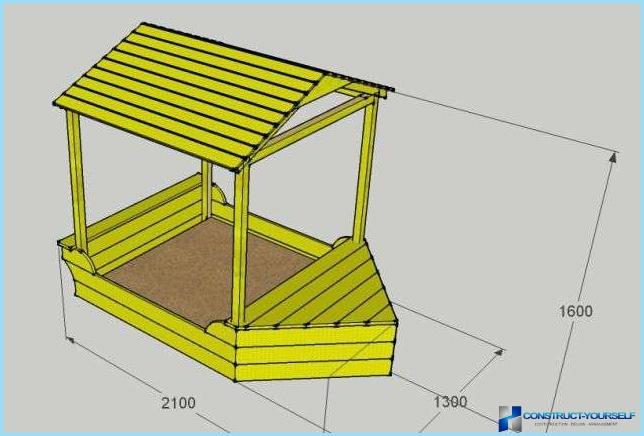
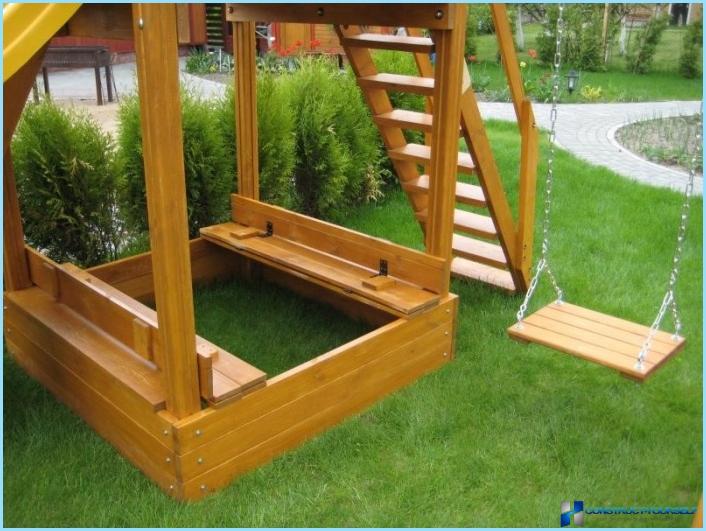
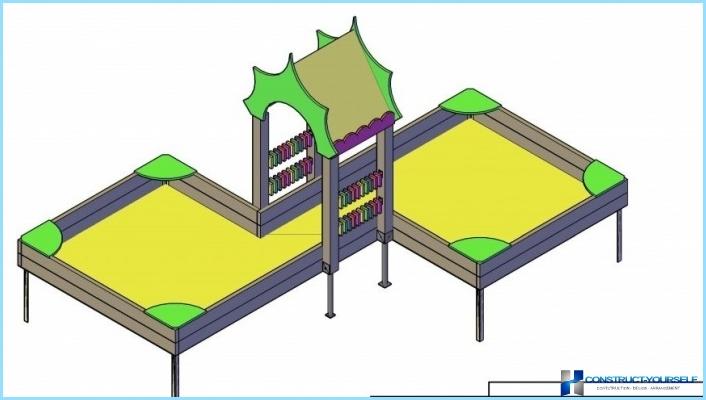
And finally, a few interesting ideas that will be useful when creating your own drawing:
Success in work and creative inspiration!

