Sandbox equipped with a fungus, is an essential attribute of a carefree childhood of a child. In the city array on well-maintained Playground for children needs to take care of the control of the company. But sending a favorite child in the village to the grandmother, or planning a joint vacation in the country, should take the initiative and make a nice sandbox with his own hands.

The planning phase ↑
Playing in the sandbox is not just an interesting pastime. They contribute to the development of creative thinking, improves fine motor skills, shape steadiness. It is therefore important to make the design sandbox for the baby the most practical, taking care of safety and comfort.
The easiest option is to make a square or rectangular wooden sandbox, for the manufacture of which would take several hours. But to be in it will be possible only in the absence of the scorching sun, so is better to provide protection. To make a tent or fungus is quite simple, but the extra element of the sandbox you simultaneously solve several problems.
An important aspect is the location of the construction: it must be in the zone of visibility from many sites, including the house. The second condition – the absence of close trees which would contaminate the sand fallen leaves, and the caterpillars much joy the child will bring.
Make a sketch and calculate the material consumption, to choose a place on the main stages of the planning finished, you can go directly to the construction process.

The manufacturing process ↑
Basically a sandbox with the fungus established for several years, so to make all work thoroughly it is better not to needed the following year to eliminate defects.
Site preparation ↑
The process of site preparation includes the following steps:
- Mark the perimeter of the future sandbox fungus or canopy, then soil is removed to a depth of 25-30 cm.
- Take care of the drainage in the cushion of a large gravel with the addition of sand. A well-compacted layer of material provides rapid absorption of moisture in the soil, promoting rapid drying of the sand after rain.
- In the sandbox with the fungus, it is recommended to make the base. In his capacity there may be a variety of materials: dense polyethylene, plywood, or paving slabs. The first two options for the sandbox is not very good – the film is almost moisture, and plywood quickly deteriorates. They are used in the acute need for cost savings. In any case, you should make holes for drainage. Optimal base for the sandbox with a fungus to make the geotextile, providing unimpeded passage of moisture.

The formation of ducts ↑
Box – a key component of any design solution, regardless of whether she will be fitted with a canopy or not. The most common solution is to make a square or rectangular shape. Typical projects propose to stop on a square the size of the structure with sides of 2.5-3.0 m, Showing concern for environmental safety, the sandbox is better to make from pine boards with a thickness of 2.5 and 3.0, see Creative parents can do an imitation of a boat, or made into a circular design. Installation standard model box consists of the following steps:
- In the corners of the installed bars. The optimal size of wood products – 45/5/5 see About a third of the timber (about 15 cm) will be placed in the ground, so in addition to the antiseptic treatment is necessary to make a coating with bitumen. Dried up the score boards at the marked angles.
- Further into the future the sandbox with the fungus is necessary to make the sidewall. For their formation select a few narrow boards connected to the shield, or record one wide. The number does not matter, the average height of the edge of the sandbox with the fungus is 30 cm.
- After mounting the sidewalls are transferred to the equipment seats. Make it easy – enough to beat horizontally to the skirting boards. They are usually installed around the perimeter of the sandbox in the amount of four pieces, with a lack of material to make two benches. In the future they will serve as convenient supports for demonstration of sand cakes.

Construction of shed ↑
When you are finished working on the box, move to the second important element of the design – the canopy. Make it possible different forms, but most often stop at the option of the fungus. In addition to decorative role, he copes with a protective function, be it scorching sun or small summer drizzle. An interesting solution is to arrange around the fungus a small table that serves as additional storage space for toys in the sandbox. The sequence of actions is:
- To prepare the pit for the supports of the fungus. To ensure the stability of the canopy sandbox is capable of deepening the legs of the fungus in the soil at least 1 m.
- Foot fungus is recommended to make a beam of cross section 10 × 10 cm As in the case of boards for the sides, the wood of the fungus need to be processed antiseptic, preventing the defeat of rot or insects.
- To make the hat of the fungus, you need from boards to form triangles. The inner side parts is fixed on the support, an external part is desirable to sheathe with plywood or thin boards. The material is fixed with nails, and next detail is nailed so to hide the nail heads on the previous Board of the fungus.
- To protect the quality of the size of the cap of the fungus must match the settings of the sandbox.
- After connecting the cap and the stem, the fungus can be installed in the prepared pit. To make the fixation structure by wedging the legs of the fungus stones and falling asleep loam.
- If you wish to make a more solid mount for fungus in the sandbox, on the bottom of the pit is prepared a bed of gravel. Foot fungus is installed to a depth of 0.7 m and filled with cement mortar.

After connection and installation of all elements, you can go to the design sandbox. What a decorative ornament to make depends on the creative abilities of the parents, most importantly, to finishing the material was safe, and the idea of the design of the sandbox like children.

Useful tips ↑
For filling wooden sandbox is usually used river sand, it is well polished with water and contains almost no impurities. Any sand, river or purchased at the Mall, in need of preliminary screening. Now you can find a special mix for sandbox with clay content and specific fragrances. Such a filler is ideal for modeling figures, and deters from the sandbox insects.
To further protect the place for you, if you make a sandbox cover. This improvement solves simultaneously several tasks:
- Fully or partially protect the sand from rain and reduce its leaching.
- Prevent ingress of debris in windy weather.
- Creates a barrier against unwanted visits from cats and dogs.
Most just make a removable cover for the sandbox canvas. To handle the power of even a child. More looks attractive wooden cover. Which option to choose depends on your abilities and availability of the material.

Gallery of interesting ideas ↑
On the market there are many interesting ideas for the sandbox. Some models are made of plastic which does not fade in the sun and does not emit harmful substances. The original shapes will appeal to inquisitive babies.

The practicality of different design of the sandbox-transformer where the cover transforms into a comfortable benches for the kids. If you have the desire and skills, this option can be done by hand.

Original looks round closed sandbox where every child can be placed in a separate compartment.


Any kid likes to feel like the captain of the vessel or driver of the vehicle. The structure in the form of sailing ships, boats, and various cars with creativity, easy to do yourself.


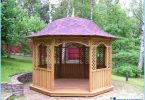
And the sandbox model, combined with a gazebo, overjoyed mother, which is convenient to observe the offspring.


You can take the options presented or create your own, the main thing – that the child was safe and fun and you are comfortable watching it.