The contents
Frustrating when such «stronghold» a comfortable life as the toilet begins to behave inappropriately, regardless of the nature of the problem: a blocked toilet or leaking it. But since both topics are quite significant, it is necessary to choose one, which will be explained in the article. Here you can find information about the course of the toilet, the causes of this condition and options for mending and repair of its components with his own hands, so he did not flow after flushing. Quite a large number of emerging problems are typical, especially their repair is not complicated and can be implemented even by non-professionals. Also before reading the article I can advise to see the video:
A brief overview of possible issues ↑
Often problems with the discharge starts due to the failure to work one part of the toilet. To solve the problem, you can DIY repair, some don’t even have the presence of tools, but this applies to small problems for which it is necessary to replace a small plastic part or something like that.
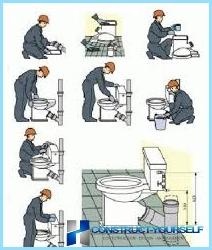
Problems with the toilet when it is leaking after flushing, can be such:
- The continuous flow of water from the water in the toilet flank;
- The flow of water from the tank into the toilet;
- The discharge of water from-for problems with the float valve;
- Failure of the float crane.
- The failure or gradual wear one of the many details.
Faulty reservoir ↑
The most popular problem which needed repairs. Fortunately, almost always during the repair all you can do with your hands. You need to remove the lid and lift the floating arm. Find the rod attached to the ball that floats on the surface and which is to control the water flow from the pipe into the toilet. The rod is called a floating lever. Lift it up – and if the water stops flowing, it means that the problem is in that water «typed» at a sufficient height, and mechanical system «gets» the signals that you need more water. Not to gain water may due to mechanical damage plastic/rubber/ceramic parts. Therefore, the easiest solution during a DIY repair – inspect for damage all components of.
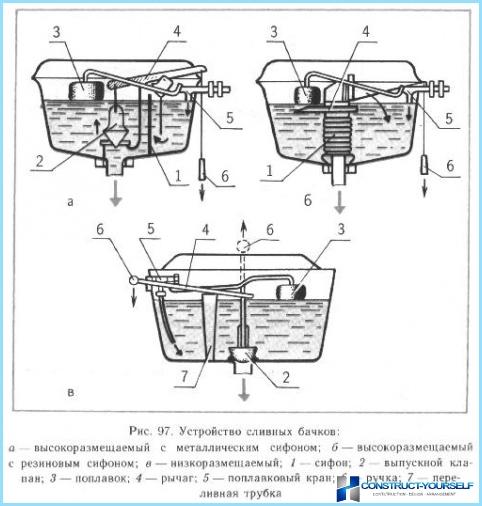
During the search of possible problems during a DIY repair you should test the operation of the floating lever on the accuracy of the location. He can bend so that the ball clings to the ball lever or the side of the tank. To test this version it is necessary to lower the water and see firsthand the correct version. If the ball really clings enough with their hands to bend the lever so that if the ball freely up to the required level.
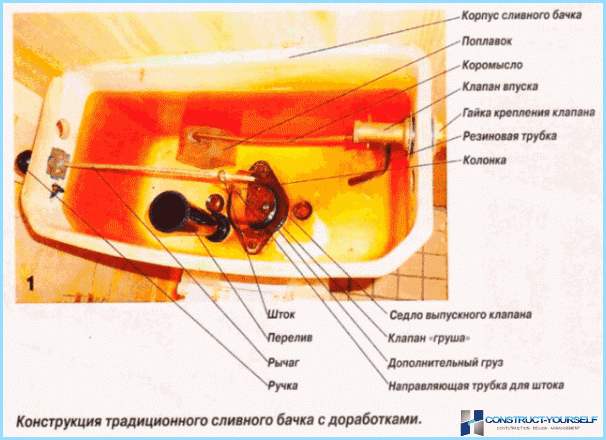
Prolonged use of the Orb or the use of defective parts inside can get water, which aggravates him and does not fulfill the functionality in full. In this case, it must be disconnected from the lever in a circular motion counter-clockwise, drain the water and tie back. Before you screw it on the lever inspect for cracked or other mechanical damage. If they are having a ball with the DIY repair is not covered and must purchase a new one, as repair the old unsuccessful.
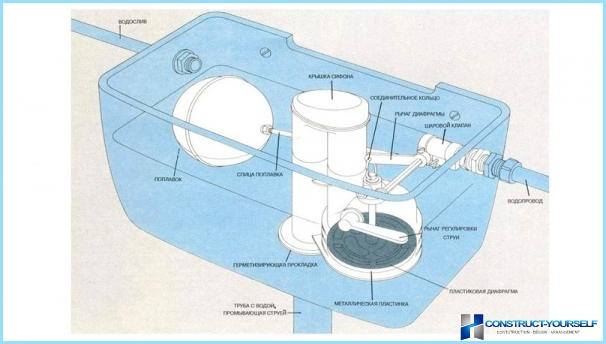
May be, and such during repairs on their hands, that neither a raising lever or the regulation and setting of the floating lever does not give the desired effect and the water continues to run. Then the tank could be another option – the problem creates the reinforcement flap is used to create a seal at the bottom of the tank. In this case, the sequence would look like this:
- You need to pull water from the toilet to shut off its supply.
- Check the valve for debris or corrosion. In case of detection of debris you need to clean it all out, bottlenecks can be cleaned with the help of a pen knife. If there is corrosion, you must remove all traces of it. After cleaning you should see if tightly close all reinforcing flap.
- If water still leaks, inspect the ribbon wire connected to the toilet handle. The wire should be aligned and give the throttle plate is free to fall and close the opening. If all is not as it should be, then tape the wire should be bent with your hands into the desired position to closed.
- If the water still runs, replace the ball cock.
Malfunction of the float crane ↑
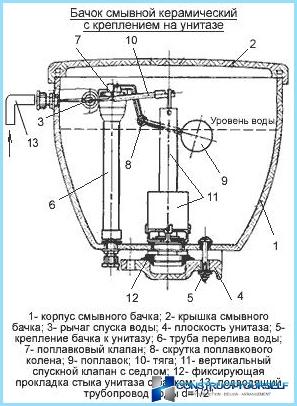
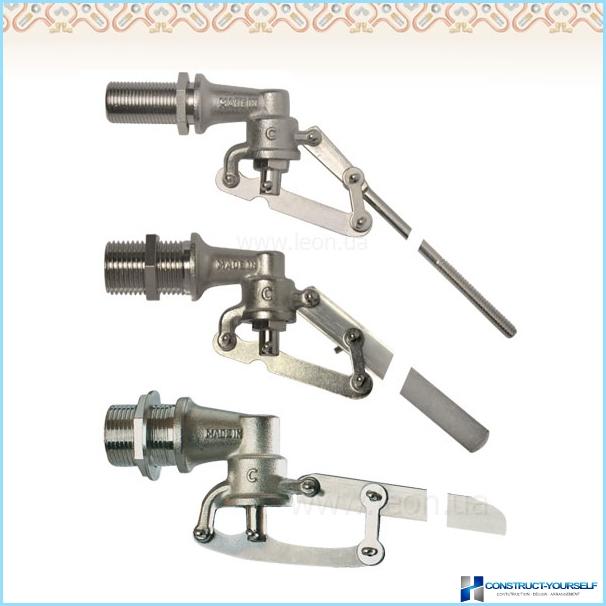
In toilet repair with their hands use a plastic or metal float valves. Replacement plastic taps when DIY repair is more simple for replacement of the metal:
- To shut off the water supply and release the tank from it.
- Remove ball cock.
- Install a new ball cock, plastic.
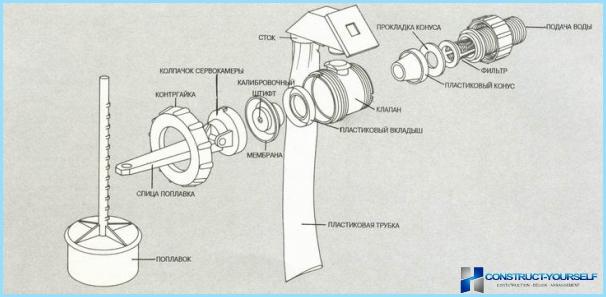
Replacement metal tap when DIY repair is more long lasting due to the use of metallic parts for fixing it:
- To release the tank from water and to block its flow.
- Unscrew a couple of screws that hold the valve and inspect them. If the screws are old, worn or just damaged, they can leak water, then to resolve the problem, you must replace them.
- To replace the float crane it is necessary to Unscrew the lock nut, and inside and outside of the tank. When installing the float valve should be taken not to have been disrupted all the other parts, and to make sure nothing shifted.
Fault with the filling and other causes of leaks ↑
May occur due to the when the toilet is fed too much water, much more than it should take. Fortunately, this problem can be solved by DIY repair. Excessive water flow, as a rule, guilty of 4 main problems:
- The work of the floating lever.
- Work the drain valve.
- Work water ports.
- The flow of the hinge connecting the tank to the toilet.
Correction of work of the floating lever mentioned above, you can only add: to fix the repair with your own hands it should be until, until the water will gain at the optimum level. After bending of the lever should always check how the water is dialed and fixed the problem and, accordingly, whether to complete the repair.
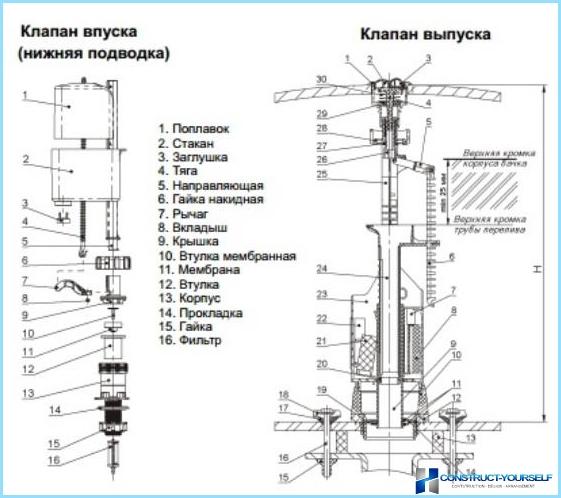
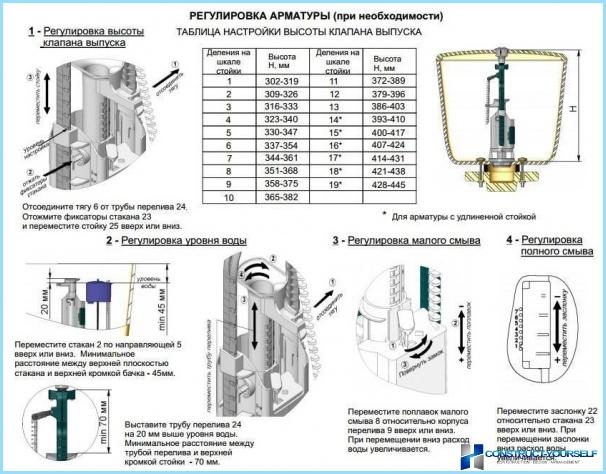
When checking the toilet or during DIY repair you should pay attention to fully closing the drain valve during use of the toilet. Customize it to make it work correctly you can with your hands. This should be adjusted in the repair of the floating lever or chain. As a rule, in the toilet, you can configure three or four types of operation of the discharge valve, so you should try different variations of settings in the repair while the valve is working as it should, completely closing the hole of the toilet after using it. This is due to the fact that the universal drainage system design for different models, and each toilet is fitted separately. But over time, the valves can have a little break up and should again set in place.
Pay attention and water ports of the toilet bowl on the lower part of the rim of the toilet. Rust and corrosion processes have a negative impact on their ability to pass or hold water. Check their status by using mirrors. If you see that they are damaged, they should be replaced or cleaned to the ports of the toilet could work properly. Due to the design features of the various products universal recipe to replace no, but you can try to clean the rust with the hope that its removal would be enough to ports started working properly. For cleaning use a brush and the appropriate tools, and to reach the necessary locations, you can use a harness wrapped around the brush.
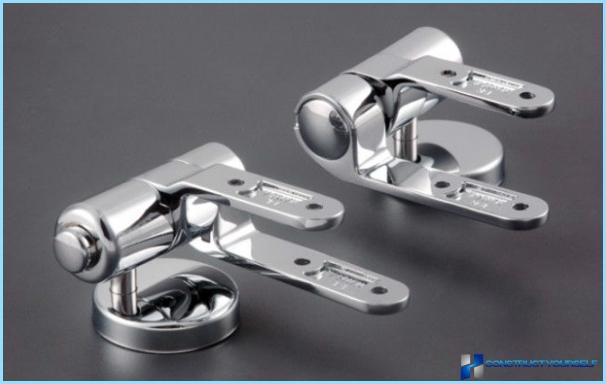
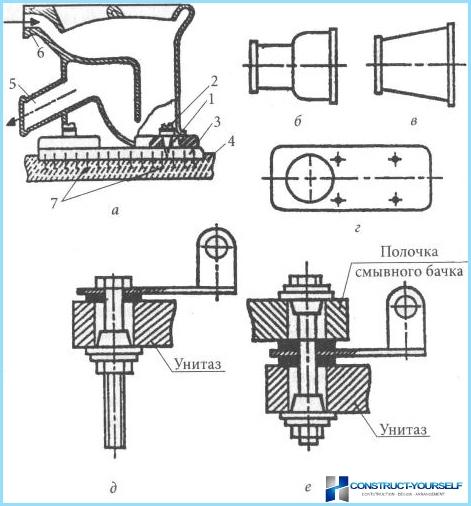
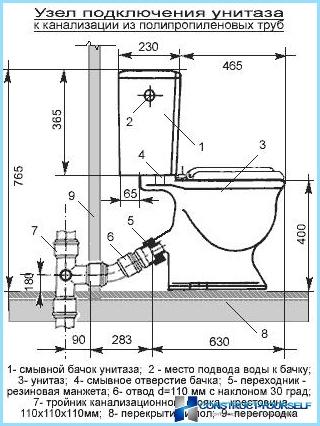
In the case that leaking is not much, but literally «drops», the reason may lie in the hinge connecting the toilet tank by the toilet. Inspect it, and the result of the examination to take action – or simply tighten it, or replace it with a new hinge. It may be true that the toilet is cracked in the area of location of the hinge in this case, it is necessary to replace the entire toilet. And in the end a small video on the device of the toilet, which will allow you to better understand what is done:

