The contents
Shower cabin is a popular and an important part of bathroom modern style. It significantly saves space and performs the functions of the main elements of bathroom design.
Installation of shower cabins with his hands is a real and attainable goal. How to install and connect the shower to the water supply, Sewerage independently, so it lasts a long time and did all the things?
You must be familiar with the basic rules and steps of Assembly that are characteristic of the most modern models and carefully study the manual.
Equipment and Assembly of cabins ↑
First, you need to check all the necessary fittings and glass. In the warehouse of the supplier necessary to ensure their integrity and security. If some items or parts are missing, we Supplement them. The presence of the instruction is necessary, as the shower will be done independently.
Assembly technology may be different for showers of different design and manufacturers. There are simple devices but there are devices with a variety of functions, installation of which will be more difficult and take more time. For starters, you need to determine what are the main parts consists of a shower cabin.
Main parts: ↑
- pallet
- panel rear;
- side part (panel);
- vertical uprights
- the roof (ceiling);
- the door (one or several);
- apron and screen.
To properly install the cabin for a shower with their hands need to have special tools:
- screwdriver (set),
- the wrench;
- water level,
- nail gun,
- drill,
- hoses,
- sealant (silicone),
- FUM-tape or tow.
The Assembly process consists of two stages:
- Need to choose free and a spacious pre-Assembly of the cabin for a shower, without the use of sealant. This will help:
- to understand how to properly and correctly install a cabin with his own hands,
- to check availability of all items, parts, and holes,
- faulty parts to be replaced,
- to gain experience, to then assemble it in the room the bathroom where less space.
- Installation of shower cabins directly to the bathroom.
Water connection ↑
How to connect shower to water supply, Sewerage independently? To do this:
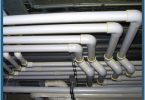
- The use of flexible hoses which is convenient and easy to operate.
- To purchase the hoses have sufficient length, which simplifies their installation.
- Where is the connection for hot and cold water, it is necessary to designate special labels.
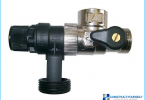
- You need to install a tee for hot and cold water, which will be connected shower. For good sealing of joints you need to use special sealants, FUM-tape or regular tow, buying them in a regular hardware store.
- When the functions of jets you need to determine the strength of the flow and pressure of water to ensure the implementation of this procedure. Especially on the upper floors of a multistory building, the pressure is not always sufficient. It will have to install additional fixtures, pump and water tank.
Drain pan installation ↑

How to install a shower tray yourself?
- Install the lower part of the cockpit on the legs. You need to take the long bolts and tighten the seat until it stops.
- You then need to install nuts and washers and tighten. To wear special supports made of metal on the base.
- Next, align horizontally and vertically with the help of braces and adjust the set screws and insert the mounting of the screen.
- If the pallet is missing the legs, you need to align the floor with cement screed.
When you install acrylic pan, special attention must be paid to the frame. The technology of Assembly of the cabin with a pan of acrylic provides the following package, in which there is a pair of crossed support beams, and a fifth leg, located in the center of the pallet. If there is no this frame, the need to build additional fastening to securely fix the shower with concrete special pillows.
Install panels and enclosures ↑

The next step is to build and install panels and fences made of glass. You should carefully check the glass for defects, to determine the top and bottom (the upper part is always more holes). Then you have to deal with the lower and upper guides: the lower is narrow and has notched cutouts, and the upper, usually wide.
Further, the glass is inserted into certain slots guide, joints are pre-lubricated with a sealant, after which it is necessary to tighten the screw on the presser foot. With screws, guides connected with the stand (top and bottom), and glass is put on the sealer. Next, apply the sealant under the bottom rail, and inserted glass.
Installation of shower cabins with their hands complicated process, but it is feasible, which allows you to save much cash, because you do not have to pay for the services of professionals. You can take the help of another person, then the work will be done much faster.
While installing, when there is no specialist, it is necessary to pay attention to the following important points. So, for example, so as not to cover the desired depressions in the tray, you should gently apply a layer of sealant below when operating the shower, the water flows without obstacles.
With screws and small washers to attach tray side panel, the holes in the pan. The joints promazyvaetsya with silicone. Further, the rear panel is fixed by means of screws and is treated with silicone.
Further, a shower is at the time that the sealant is completely hardened.
Check the operation of electrical appliances ↑
Pre-checked fan operation, radio and backlight, powered by an electric current. Assembly of the cockpit is not just connecting the pallet to the communications, and ensure the correct operation and connectivity.
It is important to remember that:
- in the bathroom there is moisture, therefore it is impossible to place electrical and patch panels, choke and other devices;
- for good safety from electric shock and sound equipment, as well as protect it from power surges, you need to install special machines to cut the power in an emergency,
- outlet better to set a hidden type with an external (reverse) side of a shower enclosure. She must be protected from moisture and dust and have IP44-index.
- Shower should have a good grounding, very often metal sump acts as a grounder.
After the main part of the Assembly is done, need to leave for curing all fastening materials.
The installation of the door leaf ↑
After curing the sealant, installation of the doors:
- The upper and lower rollers are well fastened.
- Then put on all the seals.
- Doors are set in place, and they are adjusting to all the doors were well closed.
- Plastic caps are placed on the screws which fix the clips.
- Final check of work and adjustment of doors.
Installation of shower cabins is almost complete. It remains to establish the top (roof), it will not be much difficulty.
The installation of the roof and internal elements ↑

Roof is installed with fasteners into the holes and there is fixed. All joints and seams are treated with sealant. Then, the front side panels fixed decorative panel for installation on its dynamics and the fan and other components. On the other opposite side is connected to the fan and speaker with screws.
Then there is the installation of all internal parts and components accessories: handles, shelves, mirrors, etc.
Commissioning ↑

After final installation, you need to start a shower enclosure:
- To check the adequacy of the tightening clamps on the flexible hose shower.
- To check the adequacy of clamping of the nuts.
- To ensure good operation of the Sewerage.
- Check the tightness of the cab and its strength, if at the entrance to the cockpit of the pan begins to squeak or pop, this indicates that not all legs are in one plane.
- For good strength, set at the feet of sealant and self-tapping screws to fix them.
Speed and build quality depends on your skills and level of preparation of the necessary communications to install a shower enclosure. Need to make the right choice: install your own shower, or to seek the assistance of professionals.
How to install a shower cabin the hands, will help the following video: