The contents
Installation of a hood in the kitchen can be done in different ways, everything will depend on her type, and they are as follows:
- Suspension, which are fixed under the Cabinet, located above the plate;
- Embedded – their installation is inside the hanging wardrobe and because of this, they perfectly fit into the interior space;
- Wall – mounted on the wall above the stove;
- Angular – these are the hoods that are installed in the angle;
- Island to mount them in any place of the room, hanging from the ceiling.

It is very important to understand one rule – set the cooker hood can only be lower than 70 cm above the plate, and if the gas stove, this distance should not be less than 80 cm Is necessary to ensure that the work of extraction was effective.
Also drawing different ventilation modes are flowing, the principle of which consists in pulling the dirty air. This method is very effective and it’s called withdrawal.
The second kind is ventilation hoods, the air is passed through carbon filters, then the output is clean air. The installation is quite simple, but as the vent for it is not needed, the efficiency of air cleaning lower compared with flow hoods.
Quite importantly, what will be the performance of the hood, measured in cubic metres in 1 hour. When buying be sure to consider how much the hood will make noise when cooling. Models that make noise higher than 50 DB become not worth it. Instead, it is better to buy the hood with 2 or even 1 fan, they are the same and not make any noise, plus have the equipment pads that absorb sound.

Before you figure out how to install a hood in the kitchen their hands need to remember about electrical safety. Very carefully it is necessary to connect the hood to the network, since the kitchen is such a room, where there is always something that can get inside (it can be fat that has accumulated inside the moisture) that can lead to bad consequences, namely to electric shock.
That’s why the exhaust connection to the network should be 3 wires – 1) phase; 2) land; 3) zero. Standard ground wire is colored yellow, green stripe. Before installing the ground to use it as safely as possible.
If your room has a Euro socket or the grounding, the problems should arise. It may be that the technique no connector for grounding, in this case to make it not to be yourself, only need to fasten the wire to the metal housing.

But many who may not be Euro-sockets and ground in the kitchen. Then the question arises – how to carry out connection? You can do it yourself, that’s just the first thing not to do is to try to connect the neutral wire on the pipe or the battery. Connection must hold to a dull neutral.
It is important to know that if the vanishing of the already connected wires, do not try to turn them off, because you may be electrocuted. You only need to tighten your wire on top of those already there. If not, it is necessary to strip the pipe and secure the contact wire.
Ventilation in the kitchen ↑
To make the connection hoods in the kitchen ventilation should, of course, correct to do the installation:
- For mounting ventilation in the kitchen, the best option would be to install a duct having a valve-cracker. It should be 2 holes. When the valve is in the horizontal position, it means that it is closed, the air coming through the window will provide excellent ventilation in the kitchen;
- In the case when there is pressure during operation of the fan, the valve closes the first window and therefore ventilation passes through the hood. This scheme has quite a big advantage in the fact that there is no reverse thrust, and preserves natural ventilation, and it will be even with the hood off. Adjustment of the valve you can use a thin spring.
??
Make a variety of duct ↑
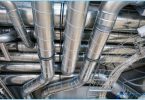
Kitchen ducts can be divided into the following:
- Corrugated duct made of aluminium – it is a fairly easy material and installation of a hood with his hands in the kitchen using it will not be difficult. All this is due to the fact that the material is easy to bend to any size, and also worth noting is a plus as no vibration, can not be said about hard boxes. But if you want the duct were perfectly inscribed in your room, you will have to consider options like you can hide it, because it has the disadvantage of ugly form;
- Another type of ductwork – the ducts in PVC in the first place, it is worth noting its lightness, strength and quietness, this is achieved at the expense of their smooth surface which gives almost no air resistance.
Installation of exhaust ↑
Of course, everybody wants to know how to install kitchen hood, first and foremost, it should be noted that the mounting will depend on where is the vent shaft. One of the most popular options is the installation of extraction in a closet, we now consider.
If you want everything to be done efficiently to begin with, you must have a box of crackers. Body without problems can be made of such material as aluminum or galvanized sheet. Also you can buy a valve that is opened like a butterfly, which is placed at the ventilation shaft.

For convenience, the casing is put over the stove on the wall Cabinet, then seal all the cracks with foam, so there was no resonance.
Initially, it is only necessary to try the case of the firecrackers and the wardrobe and make markings for holes. You can then remove the Cabinet and using the jigsaw to make the hole. To it was carefully drill the first drill hole inside, and then with a jigsaw cut out the shape you need in the wardrobe.
In the same way, the holes and the internal shelves under the air duct, if they are of course, and in the upper wall need to do a square hole, so it would have a 3-5 mm margin under the swatter.
Connect the duct ↑
The duct connection will split into these stages:
- For a start, do the following – corrugation it is necessary to stick to the holes in the upper wall of a locker, bend it in the shape of a square, and then crop it to left margin, to fold the corners to the outside;
- Further, you can begin attaching the locker to gofrey on the wall, thus be sure to treat all joints of the duct with silicone, in order not to lose power;
- The next step will be pinning directly made his own boxes in the wardrobe, it is done with the intent of connecting the corrugations with the ventilation shaft. If there are large cracks, they must be filled with foam;
- We can now begin to consolidate the hood in the Cabinet. For fastening you can use screws;
- Corrugation using a clamp should be fixed very reliable, the connection with sealant can not be repaired, but for higher reliability it can be done;
- If the connection you want to make directly, the duct it is necessary to join the shaft, and that is to make, it is necessary to use special bars having a round hole;
- Plan to use PVC ducting? Here then also all will simply pipe should connect with the accessories of the corners and to hold to ventilation;
- If you need installation of a hood in the kitchen in a private home with a maximum quality, be sure to know that when installing ventilation try as much as possible to prevent bending of the pipe, because it is necessary for a good draught of air. After each bend, the power will be lost somewhere in the 10 %.

Fasten the hood to the wall Cabinet ↑
Proper installation of the indents in the kitchen is not at all associated with the hanging wardrobe, it is due to the fact that many people simply do not want their wardrobe quickly became ugly from excessive moisture in the kitchen and polluted air. Also, it often happens that you want to install the hood more, and inside the Cabinet you can put a hood is not so large.

Therefore, in order to hang the hood on the wall without a Cabinet, first you need to attach to the wall of the U-shaped frame parts on the stud, this mount will support housing.
But can happen and so often, that using conventional dowels wall mounting of the hood will not happen. Then the question arises, what in this case? This can happen, as a rule, those who have the kitchen gas stove, in this case, the pipe and will prevent the normal mount.
For such a case is unable to fit long size screws-studs, one side looks like a thread with a nut and the other as a screw. They just need to be screwed into the wall as anchors, and then fasten the housing of the hood, I step back a little from the wall.
The last step is only to hold the correct connection of the drawing to the network. Exercise is possible by connecting it into a power outlet or to make a permanent connection using a fuse. It is very important to connect the neutral earthing, so if the fans work, it will remove the tension that may be on the case.
Now you only decorate the hood and enjoy the kitchen atmosphere, and most importantly – clean air.

It is also important to remember that a couple of times a year just to do the cleaning of the exhaust from the steam to prevent ignition. As you can see the installation of the hood in the kitchen with his hands is not such a complicated matter, the main thing is just stick to the essential safety rules with electricity and you eventually will succeed.