The contents
- The application of self-leveling floors
- The types of screed
- How to pour self-leveling floor with their hands
The modern repair is not just a way to freshen up a room, and the opportunity to Express their imagination. Talking about the walls and ceiling we won’t, it’s a lot easier to realize your design fantasies, and talk about leveling the field. Why about him? Because it is becoming more and more popular, and linoleum and carpets gradually recede into the background.
What kind of flooring is and what is its design
Bulk floor – it is a special blend that evens out the surface. When using special decorative items you can create on the floor the whole picture. Design self-leveling floors we have the following:

The application of self-leveling floors ↑
This coating is popular not only among the owners of premises used or supermarkets, exhibition halls, warehouses, and even in the garage. Since in these areas to the flooring, very high requirements for wear resistance, no dust and spark, then the polymer self-leveling floor there will be the best choice. In addition, the use of self-leveling floors and even on the street.
What to look for when choosing a self-leveling mixture:
- Resistance to vagaries of the weather – such a mixture has the appropriate marking on the bag.
- The mixture should have increased the waterproofing so that constantly contacting with moisture is not accelerated lifetime.
- High strength, since it will be a permanent chemical and mechanical effects. Also the mixture should be strong enough to withstand deliberate attempts to damage the surface.
- The surface should not be in the end moving.
- A longer lifetime.
- Appearance. This floor should not only be high quality and durable, but also attractive.
- Quick gripe – the main quality which should have a floor filler for exterior use.
- Drying under any weather conditions.
The types of screed ↑
Since this flooring is used in different areas, the requirements will be different. For example, in the supermarket need to be more resistant to mechanical damage the floor than the apartment. Therefore, each type of self-leveling floor has its own characteristics.
So, depending on the coating:
- Matt and semi-Matt.

- Glossy and semi-gloss.


Dependent on the dimensions of a pattern and color palette are:
- Color, monotone or two-ton
- With any kind of painting (stains, drawings, use of ornaments, etc.)
- Large or so-called 3d floors – the drawing looks like «live»


According to the method of manufacturing floors are of the following types:
- Epoxy self-leveling floors, manufactured based on epoxy resins with high resistance to mechanical damage and chemical substances.
When working with these and other types of flooring, it is necessary to use protective equipment: mask, gloves, etc. - Polyurethane self-leveling floor. Widespread use when carrying out construction works got polyurethane floor coatings, characterized by practicality in operation. The advantage of this technology is the high resistance to temperature extremes, chemical attack and vibration, allowing their use in areas with negative temperatures and large mechanical loadings.
- Metilmetakrilata. A characteristic feature of metilmetakrilata flooring is quick drying applied mixture, while preserving all the technological requirements for this type of flooring.
- Epoxy-urethane. A combined composition of an epoxy-urethane polymer flooring is characterized by high abrasion resistance, and finds wide application in the construction of public transport infrastructure. The use of this technology allows you to keep the flooring of the metro stations, railway stations and airports in its original form, in the presence of high mechanical loads.
- Acrylic cement coatings are recommended for use in damp conditions or directly exposed to hot or cold water.
- Policement. Different from other types of coating high strength, which provides quartz sand.
So in the end, self-leveling floor had enhanced resistance, it is necessary when pouring alternating layers of polymer and policement mixture. In addition, this combination of compounds makes the flooring less slippery more resistant to very strong loads and absolutely no dusting.
Epoxy, polyurethane and cement – those polymer floors, which are recommended for use in industrial buildings. Their difference is that in the mixture you can add a variety of components that increase frost resistance, antistatic, fire resistance, water resistance.
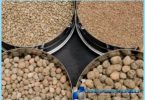
In addition, design decisions can use a variety of lighting and decorative effects, to even industrial self-leveling floors was interesting and not boring. Floors with light, the image plane, the use of decorative elements (stones, photographs, coins, etc.), provide an opportunity to create an original floor that will adorn the interior space.
To have a visual representation of self-leveling 3D floors, view an interesting video tutorial and all will become clear:
And here you can see the features of various flooring how to create a simple 3d drawings:
How to pour self-leveling floor with their hands ↑
Now let’s move on from theory to practice, let’s talk about how to fill the floor and not common, and decorative self – leveling floor- 3d. You have decided what coverage you want, now is the time to calculate what the flow will be filling the floor for your room.
When all the nuances are defined, we pass to the calculations. This is done very simply:
- 1 mm of the screed without any fillers, consumption bulk sex m 1Two be about 1 liter of solution.
- Then multiply by the density you want, for example, 1.3 kg/l, then the flow you have a 1.3 kg/mTwo, with a thickness of 2 mm – 2.6 kg/mTwo etc.
3d leveling floors and so you can still calculate. The mixture for filling the floor, consists of two components, base and hardener for her. This kit is Packed for 12…16 kg. the Average consumption is set at a coating thickness of 2 mm to about 10 mTwo. Now, depending on the floor space in the room and the thickness of the coating, you will be able to accurately calculate the required number of sets.
The tools you will need in the process:
- angle grinder (Bulgarian);
- drill with low speed and a special nozzle for mixing;
- plastic bucket or other container, where it will zameshivaetsya mixture;
- conventional vacuum cleaner;
- roller for priming – like fabric;
- the raclette for laying floor filler (needle roller with a long handle);
- spatula – it is best to work a wide;
- krasnostup (have needle-like soles);
- scissors;
- brush.
Manual: step-by-step pour 3D floors
Before installing the 3d floors to align existing floor and prepare concrete screed. Consider two options, if the tie has serious defects, and if defects are not significant.
The first option. Screed with swings, chips, deep cracks – use special mixtures, which have the property of self-levelling. After this procedure the individual work stage «alignment» not required. The floor and Foundation leveling floor, must be securely coupled to each other, if you want to get a durable floor that does not require special care. For this purpose, it is necessary to sand the surface of the screed, remove the gloss and give a matte finish. Through this process «sanding», removes excess uncommitted particles affecting the quality of the clutch.
How to pour self-leveling floor, video tip
The second option. If the defects are minor, fix them with cement mortar or epoxy resin. With orbital sander, remove the corners of all the speakers of the particles, thoroughly clean the remnants of the dust.
For floor leveling can be used in almost any self-leveling compound. The ratio and quality I would like to advise of Bergauf bulk floors. In the video below are instructions on how to choose and how to work with this mixture:
But for complex surfaces, where there is work to do, you can use a self-leveling floor Prospectors how to do it look at the video:
When installing self-leveling floor in an apartment, remember that for some time, the house may settle. From the appearance of cracks at the corners of the perimeter is attached damping tape (material – expanded polypropylene), which thickness should be more self-leveling floor.
The primer surface ↑
After surface preparation, thoroughly primed to fill all the cracks and pores of our sex. To use for this case can be any primer of deep penetration.
It must be applied evenly over the surface of the screed, using a cloth roller with a long handle. When the soil dries out a bit, about 2-3 hours, you can apply another coat if necessary. The primer dries quickly to 4 hours, you can give her a dry day, no longer need.
The application of the base layer ↑
When the first coat completely dries, do the following:
- check the humidity in the screed, rate of 4-9%, not more.
- In any case, protect wall film.
- Do the kneading. In a plastic bucket pour kit, a colorant to impart a desired shade, and stir with power drill at low revs. Then in the center add the hardener and, of course, stir a few more minutes.
- Pour egg mixture into pan and evenly smoothes on all surfaces wide roll.
- Since the suitability of the composition is not more than 40 minutes, the cooking process must be discontinuous.
- After pouring and leveling, it is necessary to walk on the surface of the spiked roller to remove air bubbles present in the mixture. To move on the floor use krasnostup.
The basic process is completed, now the floor needs to dry. How many dry screed? If the humidity is not more than 60% and t° of the floor is not below 10°C, not less than 7 days.
Now comes the fun part, creating the 3d drawing
Once the base coat dries, apply the desired pattern. Running this work is acrylic or polymer paints. The second are more resilient and not afraid of ultraviolet rays. Still applied by airbrushing, which involves drawing with atomization.
Unfortunately, not many people are artists. In this case, a photo of the floor of the inlet is selected in the web or ordered in print shops.
Material for figures, i.e. the substrate, is a vinyl film or banner fabric, where there is thermal. The drawing is glued with glue or primer, here already at will.
The surface is initially primed. The so prepared base layer. The primer consists of a topcoat with solvent 646, which are mixed in the ratio of 2:1. Primer applied with a roller or a simple brush. If you are interested in flow, 300 gr. per square meter. Within 24 primer dries. Only then you can carefully glue the selected picture. Care must be taken that no bubbles of air under the vinyl film. This roller smooth surface.
Finish line: the finishing touches in the creation of unusual sex
If the picture on the banner fabric, glued it on the finished topcoat. It is created in the following way. The thickness of finishing layer – 3 mm and for it will need 4.5 kg of polymer. The necessary components are mixed using a drill, and the mixture is poured, gently smoothed. After that, on the surface of the rolled spiked roller to eliminate air bubbles. The procedure is performed no more than 30 minutes. When the finish layer is applied, it is necessary to cover the floor with plastic sheeting that will protect the surface from dust.
Applying a protective layer – the last stage in creating the 3D floor. Floor finish dries and it is applied a special varnish. It is not just protection, but also will provide the original look of the surface. Gender does not absorb dirt, easy care. To date, produced a large variety of varnish, which has an even non-slip effect. This work on the creation of self-leveling floor is considered complete. Overall, difficulties in installation should not be. If you follow the recommendations of experts, then the result is the original surface. Epoxy flooring will be the pride of your home. Special care does not require.
Another interesting lesson in how to do self-leveling floor with their hands. Videos are always more useful words:
The approximate price for self-leveling floors in Moscow ↑
If you can do everything, then you need to only purchase the materials. Remember that the price of epoxy flooring and related materials varies to a greater extent on promoted brand, read the composition and do not overpay for the name.
So, what you’ll need:
- Tools from 300-400r for all the necessary.
- Primer of deep penetration from 230r for 10l.
- Self-leveling – 110R from the bag. The price will depend depending on the manufacturer, the composition and weight of the bag.
- Floor filler – from the 250R for a bag.
- Decorative items and fillers for filling the floor. The price here depends on the material (sand, shavings, chips, paint, etc.).
The total amount that you need it’s hard to call, because apart from the construction materials, there are other factors: the desired thickness of a layer of future floor, the humidity of the concrete, materials for 3D drawing etc.
The price for 3d floors, ordered from the experts will depend on the types of self-leveling floor material for a 3D pattern, set building materials, etc. About it will be from 5000 thousand rubles per 1m2.