The contents
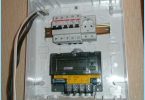
Almost all the houses and apartments used hidden wiring, and switches and sockets are located inside the walls. In order for the whole system have also been hidden need to install-mounting boxes for sockets or switches.

There are quite a few reasons why the installation of enclosures is very important. First, it is necessary for safety. After correctly installed, the box can protect it from ignition. In addition, such a device is an additional electrical insulation. Second, except for the outlet in the wall, there are cables the length of which is calculated with the stock. This is necessary if you suddenly need to replace the outlet. All these wires need somewhere to hide, otherwise they are not protected from oxidation through contact with air. Thirdly, it is impossible to concrete the entire socket with wires, as it will lead to ignition and burnout of the whole transaction. Considering all these factors, the most practical to use special boxes for mounting sockets. Similar case with the installation of the box under the switch.
To install enclosures are not difficult. If you install junction boxes in walls made of wood, PVC or drywall you need to cut out a necessary aperture and the escutcheon to lock the screws to the legs. If the installation will be made in concrete, silicate or brick wall, the escutcheon coated with plaster, putty or plaster.
Necessary tools ↑
- The puncher or a drill with a nozzle with a crown 5 mm larger than the mounting box to the socket;
- chisel and hammer;
- roulette;
- spatula;
- plaster or stucco;
- Bur to punch (diameter 10 mm approx.);
- box for sockets.
Installation of the boxes under the socket in the concrete ↑
For the escutcheon in the concrete is cut out a hole. This can usually be done using a drill with a special bit or a hammer.
To all the outlets you were at the same distance from the floor, make the appropriate mark for the center of the crown (this recommendation is fully applicable in the case when the house is a flat floor). You can also mark with a pencil on the bar level, which will be leveled all enclosures in all rooms.
There is also the possibility to install the easy way out and not use crowns, but just to knock niche the right size. For this you need to attach the junction box and cut around it with a pencil. In order for the escutcheon sat tight in a niche, do a little inventory space, but don’t overdo it. It should be noted that in this case the work will not look as neat as when working with a hammer.
So, let’s get to work. Perform the following steps:
- after selecting locations for outlets, using a hammer drill exactly in the middle make a hole with a depth of approx. 6cm;
- using punch with column cut the slot for the mounting box, starting from the center drilled drill;
- remove the remaining plaster. To do this, use the chisel and hammer;
- in the place where the box includes a power cord, to make it a need to deepen. Usually this hole make the top or bottom, so that later the cable can be easily entered in the box;
- liberally douse the hole with water for better contact with the plaster, which will be mounted the box under the socket;
- prepare a thick as sour cream solution (less ½ Cup). If it is too liquid, you can use the rubble, the remains of the wall and stir all with a spatula;

- apply gypsum mortar on the walls of the hole, passing the places where they will be arranged in a cable. After this you need to install a mounting box for plug socket with a cut-out for cable clearance in his place. Gypsum putty must dry a few minutes later.

Insert the cable into the installation box in the cut place and fill the remaining voids.
Additional recommendations ↑
In order to install multiple outlets or light switches next to each other, it is best to buy an extended installation box under several, two or more, connectors. This is particularly appropriate if you are a novice electrician. Because if you install a few ordinary boxes in a row, it is possible to miscalculate or to break something.

If this socket will connect with others by using the cable and the input cable has a large cross section, it is recommended to acquire an in-depth box for the outlet. However, it should be noted that it will establish, if permitted by the thickness of the wall. Using in-depth box, easier to hide all the wires.
Read more the entire installation process can be seen here: