The contents
Ceramic tile for many centuries used for decorating your home. She has changed in that time beyond recognition, while continuing to be one of the most popular finishing materials. The material is not cheap, but the ability to successfully perform a decorative, hygienic and protective functions.
The selection of ceramics produced by Russian and foreign manufacturers, is striking. All possible sizes, color and texture options. Becomes the usual material, which is difficult to distinguish from natural leather, fabric, wood. Application of the method of printing enables to print on the surface of three-dimensional image. For implementation of the most striking and unusual design ideas it is up to «small» – the right to revet the walls of this wonderful finishing material. This cannot be dispensed with and the usual repair when you just «refresh» wall. The technology of facing of walls ceramic tiles and will be discussed.


Packaging of ceramic tiles, designed for walls are marked with the symbol with the palm of the person.

The calculation of the amount of material ↑
You can calculate the area of the walls divided by the area of one tile of the size you chose for this room. Just? Yes, but the discrepancy with the real number will be quite significant. Better to work a little with the calculations, so you do not buy or think about what to do with the surplus.
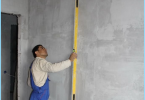
Tape measure measure the area under the lining. We pay special attention to the corners in the room. Check them by applying the construction area. Angles (in our new homes rare) – our task easier, no right angle – it will take stock of the material on the trim.
Draw on paper the projection of each wall, noting the places where the tile will be laid. Apply on the drawing the position of the borders and other decorative elements. Select the version of the installation that will be used (traditional «a seam in a seam», diagonally or «vrazbezhku»).

At this stage it is necessary to ensure that the corners don’t have to lay a narrow strip of tile. And remember that half of ceramic tiles in the drawing, in life will have to be considered as a whole.
Counted? Feel free to add at least another 10% – cutting, marriage, correcting inaccuracies in the original calculations.
Surface preparation of walls ↑
Before beginning work on laying the prepared surface of the walls in the room. Concrete and brick walls cleaned from traces of old plaster and dirt. Pay special attention to the potholes and bumps and the corners. A layer of mortar seals all irregularities and try to fix the curvature of the wall. On smooth walls 90° angle tile looks great.

The rough surface improves the adhesion (adhesion) of the material with the wall. So on the plaster wall finish is not applied to the alignment layer, but rather the chisel, make small notches.
Tool for work ↑
For work, we need to prepare a set of spatulas (smooth, toothed, rubber, including a semi-circular alignment of joints), a level, a plumb, a tape measure, a metal ruler, a pencil, a container for the adhesive. Hard brush and sponge will be needed for grouting between the tiles. Tile will need cutting ceramics, drill – for drilling.

From materials besides ceramic tiles, we need a special glue, grout for joints, plastic TIC-dividers and corners (internal or external).


Cutting and drilling tiles ↑
For cutting use a tile roller, which in small amounts can replace good glass cutter. On the surface of the tile proposed line and insert into the tile, making the movement of the handle «myself». Hold the glass cutter along the line, then puts a tile on the surface, that it is the part that needs to be cut, had no support. Take the free edge of the palm, and energetic movement «bendable» down.
For drilling ceramics use a special pen drill (the drill has a form of spear). The ring or annular drill crowns are used, if needed to drill holes of large diameter.


When drilling ceramics, you can moisten the surface with water.

The walls ↑
Start with marking on the walls. Work on laying starts from the bottom, so reglementary the current sanitary code and rules 3.04.01-87 and common sense. Tile first, the lower number applied to the wall at the base (floor covering yet) and hold the top edge flat horizontal line, checking the horizon level. The first row will be glued later, after lining the whole wall. This line (bottom of it) is attached a metal profile, which will keep the glued ceramic tiles and will not let it shift down.

Use for work the tile adhesive. It will simplify and facilitate the process. In addition, special adhesives increase the bond strength the wall surface tiles. Manual on breeding of glue is on the packaging.
Start working, causing a layer of glue on the wall and distribute the layer evenly with a toothed spatula. The thickness of the layer of adhesive depends on the tile size and the characteristics of the adhesive. For ceramics of small size, for example, 150×150 mm, the layer may have a thickness of about 5-6 mm. For pottery larger the layer thickness increases up to 8-10 mm.

For rooms with high humidity it is recommended to apply the adhesive both on the wall or on the back surface of the material. It will be enough to put a layer thickness of 1-1,5 mm.

Experts advise to start gluing ceramics from the center to the edges of the room. This center a vertical line. With this method the trimmed tile will be located in places where it is not evident. If you have placed an integer number of tiles in a horizontal row and trim to be done, you can start from the doorway or from the corner.


Between the tiles are laying plastic cross spacer the right size. When the glue is grabbed, we will remove them.

Don’t forget to lay internal plastic corners in the corners of the room. At the junction of the vertical rows of ceramics on two adjacent walls in this case look a lot better. Plastic parts it is recommended to lay on top of the last row of ceramic tiles, especially if this number is at eye level of an adult and is clearly visible.
After the glue is grabbed, back to the first row and tape it. We have to do the grouting. Grout it is advisable to buy at the same time with the tiles. In this case it is easier to find the right combination of colors. Experts recommend to buy the tile and grout in the same color scheme, and use grout the lightest or the darkest shade, which is present in the coloring of ceramics. White grout is considered to be universal. For bathrooms grout you can choose the color of the plumbing items. In rooms with high humidity use epoxy grout.

After the grouting material residues are removed from the surface of the ceramic with a brush and sponge.

These are the main points in the facing of walls with ceramic tiles. To clarify some details of this process, you can view instructional videos on this topic.