The contents
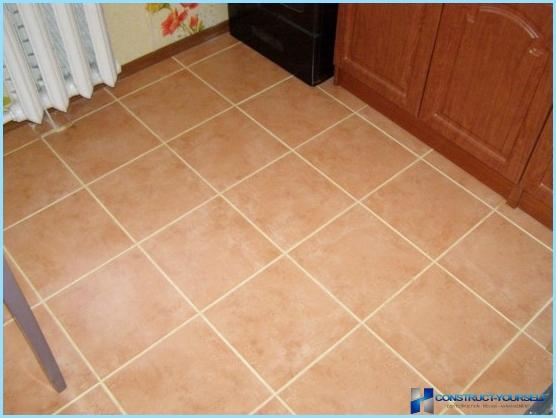
Grouting ceramic tiles is carried out after curing of the adhesive mixture, which elements are fixed to the base. Otherwise, a high probability shift when you remove the crosses, SVP systems. Depending on the color of the grout mix can be achieved:
- the selection of stitches this is lighter compared to the colour of the ceramic color
- selection of tiles – in this case, the most suitable dark color joints
- create a single background – grout matches the color of ceramics
The selection is made at the design stage in accordance with the interior space, operating conditions. When laying porcelain tiles, tiles, mosaic, it is recommended to remove from the joints the extra solution is to facilitate finish decorating.
Types of grout for ceramic tile ↑
On the market today are dry ready mix of several types:
- cement diluted with water, packaged in two-pound Kraft bags have a high zhiznestojkostju, color stability during operation
- ready to use – for example, the Finnish Kesto, more expensive than dry mixes, however, they complied with all the proportions increased resilience
- cement-sand for wide joints in areas of heavy traffic, the sand increases the wear resistance, no coloring (white, grey)
- polymer – quickly seize, require immediate removal from the cladding, since, after curing, is removed, together with enamel, scratch the top layer
- epoxy – always ready to use, harden quickly, increase the water resistance of seams are used for wide joints (4 mm), have a wide range of shades
Grouting ceramic floor tiles can hide the imperfections of the lining, to correct the deviation of the geometry. Under the budget repair outdoor ceramic granite is often overwritten with a glutinous mixture, which is fixed at a sufficiently small fraction of aggregate.
Consumption of grouting mortar ↑
Material is consumed depending on the width and depth of cracks (takes longer for a thick porcelain tiles), relief decorative layer (on a smooth surface there is less of a solution, lower the consumption). Maximum flow rate (400 g per square) is observed in the grout of tile (the area of the seams approaching the square facing), minimum (200 g per square) when completing mates large items.
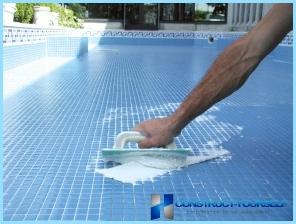
Per unit area of the relief surface is required per 100 g of solution is greater than for smooth tiles with the same format of the material. Some mixtures (mainly cement) can then collect from the surface with a spatula be diluted with water and used repeatedly.
The choice of color grout ↑
Visualization of the planned interior design allows you to adjust the color of the grout consistent with the selection in the graphical editor to achieve the desired design of the covering. Grouting ceramic tile on the video provides a contrast highlighting the geometry of each element by the lighter grout against the granite.
With sufficient experience tiling can be qualitatively match the color of the grout for a complete match with the texture of terracotta, the contrasting color of the bright/dark colors. Glass for mosaics is manufactured of transparent grout, there are glowing (fluorescent) modification, luminescent (glowing) model.
Tools for grouting ↑
For decorating the seams, the wizard will need the tool:
- holder with sand mesh/cloth
- foam
- spatulas (metal, rubber)
- capacity for the mixture
- pliers
- knife or spatula for cleaning the joints
All the necessary tools most often present in the Arsenal of DIY, it is cheap, without causing significant costs budget.
The technology of grouting ↑
Filling cracks tile adhesive efficiency of decorating grout is sharply reduced – a thin layer wears out quickly, dye during use and cleaning. Therefore, the work begins with revision joints, if necessary, widen them, and remove high system SVP, TIC. Then remove dust from the surface with a vacuum cleaner, preparing the place of work. Further, the technology of grouting of ceramic tiles as follows:
- preparation of solution: dry mixture mixed with water, twice with a 7-minute interval, the volume of the batch is governed by the viability of the mixture
- coating the surface with a metal trowel or Malka solution is applied to the tile
- filling the joints with a rubber spatula solution vlasovych little effort in stitches, evenly filling their mass, the excess removed by longitudinal movement of the
- cleaning – a damp sponge is removed the rest of the mixture from the surface of the veneer
- sanding – after curing of the mixture on the spatula is worn emery cloth, the seams are rounded to increase the aesthetics of perception
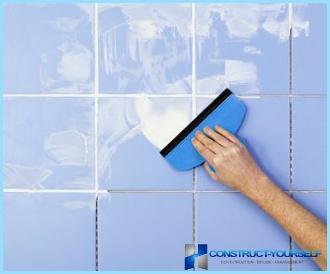
Before applying the solution on the tile it is recommended to moisten the entire decorated surface with a damp sponge. This would avoid excessive drying of the mixture, increase its viability. Unglazed tiles (low cost options for toilets) is painted from the Fugue, therefore, the solution is administered into the joint with a syringe.
The diameter of the joint should be greater than the width of the seam, the tool is not sinking in. Epoxy materials should be cleaned immediately after decorating 3 – 2 squares, otherwise they are difficult to scrape off. A fine line between hardening/adhesion can catch only professional tilers, quality work which is always higher than the self-grouting.

