Due to its operational qualities, ceramic tile has long been a popular finishing material. In order to stick to do not have to use the services of professionals, it can be done independently. But in order for the whole process was successful and the tile was glued securely and neatly you need to know how to do it and follow some specific rules. And talk about it in this article.
When any tile is selected, the necessary amount of material is designed and purchased, you can begin preparing for the process of gluing.

Preparatory work ↑
First you need to stock up on the necessary tool. In the process of applying the tiles you have to cut it, so you will need to get a tile. In addition you will need:
- Level – to ensure that the tile was glued smoothly;
- Plumb – for the first vertical row;
- Spatulas – with comb for applying the glue and silicone or rubber for grouting;
- A drill with a mixer – for mixing of the adhesive, although if you want you can do without it.

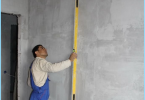
Before you start gluing the tiles to prepare the surface you intend to decorate. This surface must be clean and smooth. The bumps on the wall will lead to the fact that the tiles will not be properly docked and will look not attractive. Ideally, you should align the wall in the corners, so they were 90 degrees. To align the walls can be used plaster, Vetonit or a special wall plate. If you decide to plaster the wall, then gluing is possible not earlier than in a month after applying the plaster.
On the pasted over surface it is recommended to apply with the aid of a chisel, shallow, but frequent incisions that will contribute to stronger adhesion of the tiles to the wall.
After that, the wall is treated with special elastic emulsion for improving coupling with the ground. This emulsion is applied on clean, dry wall with a large paintbrush.
Then proceed to the dilution of the adhesive solution. Now there is a large selection of adhesives that are manufactured by different manufacturers. We will not survey the entire range of available adhesives for ceramic tiles, important note the instructions for use of the selected tools and in accordance with it to make the solution.

The process of laying tiles ↑
Before applying the mortar, the surface should be wetted with water. To apply the adhesive solution should be an even layer with a spatula or trowel.
Next, you need slight movement applied to the surface with glue and align using a level and a mallet. Between the tiles are installed with special plastic crosses, which are needed in order to make them feel equal interval.
While the glue has not hardened, it is often recommended to check level how exactly you installed tile because it can a little slide, travel, etc. in order to in the process of gluing was easier to determine the evenness, it is fashionable to draw on the wall a few vertical lines.
As to where to start to glue the tiles, here the main thing to keep in mind that at the end of a series usually has to cut, so you need to start with the side that is more visible to the mind in a greater degree was the whole tiles. But regardless of which side you are going to start to glue, anyway it have to do with the bottom of the wall. From the bottom you want to attach the area of wood or plastic, which then will draw a number of tiles. This area should remain a space for another row that you paste to complete the work.
Jointing ↑

After laying the first row you need to wait until the glue a little clutch, that will be much easier to put further ranks.
When all the tiles are laid, it is not necessary to start the grouting (the jointing), you need to wait a couple days and then wipe the seams. For grouting use epoxy and silicone materials. In their selection must take into account the colours of the tiles. Generally grout is not particularly different in their properties, but they can differ significantly in its application. So you need to carefully read the instructions before you start work.
Before planing you need to clean the seams between the tiles. For these purposes, good podhodit a vacuum cleaner. After the edges of tiles you need to paste over with a painting adhesive tape, otherwise the dried mixture would be difficult to remove.
Next, using a rubber spatula, apply a small amount of grout and pressed inside. When the trowel across the seam removed all the excess. Thus it is necessary to put pressure on the spatula, in order to achieve maximum efficiency. Once all the stitches will be overwritten, will just have to remove the tape.