The contents
- The need for the device waterproofing the floor in the bathroom
- Guide to the technologies of protection and types of waterproofing
 Bathroom – an area of high humidity, where puddles on the floor and wet footprints from toe – a common phenomenon. Waterproofing bathroom floor – a necessary measure of protection from constant exposure to moisture on ceilings and walls, from the development of undesirable microflora or chemical corrosion. Even very careful use of a bath or a shower, a very expensive and high-quality appliances may not act as insurance against force majeure.
The need for the device waterproofing the floor in the bathroom ↑
The main burden of hydroprotection takes on the bathroom floor – water will always find «weak» a place to penetrate to the concrete slab and closer «to meet you» with neighbors. Active evaporation, vapour condensation on walls and pipes and, consequently, increased humidity and the risk of leaks and accidents communications major reasons why it is important to pay special attention to the device of protective barrier.
Floor waterproofing of bathrooms performs several functions:
- protect concrete slab from excess moisture and changes in temperature, slowing of the processes of destruction and formation of defects;
- reducing the likelihood «share» water with the downstairs neighbors in case of emergency leaks and breaks;
- protect the base from growth of fungi.
 The standard scheme of the floor in the bathrooms as follows:
- primer on a concrete base;
- the waterproofing layer;
- concrete screed with reinforcing mesh;
- tile or other finish coating.
Waterproofing the floor in the bathroom is performed in a pan with high sides needed for collecting water, and mates with the walls, and can be located under the floor or above it. Cement-sand screed on top of water barrier is mandatory if:
- in multilayer «pie» reason missing insulation;
- system is used «warm» floor;
- for waterproofing you want to use material based on oil bitumen, modified without additives may release toxic substances;
- the uneven rough ground;
- waterproofing performs the task of a separator between the floating flooring and rough ground.
Guide to the technologies of protection and types of waterproofing ↑
Methods of protection from unwanted moisture and water leaks differ by kind of materials used. For waterproofing bathroom floor use roll (gluing) or liquid and paste (daub). You can use them individually or combine together for maximum results.
Gluing method ↑
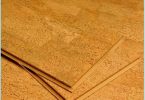
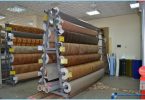
 Running out of roll or sheet materials bitumen based and is a multi-layer waterproof coating. It is possible to distinguish two types of waterproofing roll:
- self adhesive – quick to fit, no need to spread or guide roll, it is enough to measure, cut and paste;
- directed – requires more work for installation requires the use of a gas burner.
Pros:
- reliable and durable protection against moisture penetration;
- after installation, you can start to device a concrete base for a finished floor without technological breaks;
- affordable price
Cons:
- time-consuming process that requires careful surface preparation is the elimination of differences and irregularities, and special care when matching the seams and aligning the corner of mates;
- the use of additional styling products;
- high fire hazard and release of toxic substances during surfacing;
- on top of the waterproofing layer is required, the laying of ties
Coating method ↑
 Allows you to create a water resistant coating with plastic materials, such as bitumen mastic single component or multi-component bitumen-polymer, bitumen-rubber, polyurethane or cement-polymer mixture. Mastic additives crumb rubber or latex called «liquid rubber» and have better elasticity.
Pros:
- can be applied to any, even the unprepared surface;
- excellent ink adhesion with a concrete base and the lack of technological joints;
- high elasticity of coating;
- does not require the involvement of specialists – work can be done independently
Cons:
- an unpleasant odor;
- with the fluctuation of temperatures, cracking of the surface.
- subject to biological corrosion microorganisms;
- lifespan is 5-6 years
Installation of waterproofing concrete Foundation ↑
Way to protect bathroom floor from exposure to water is selected individually by the owner. After choosing materials, you can proceed directly to the waterproofing.
Preparatory work ↑
First perform a complete removal of old ties, until the slabs. Assess the condition of the surface, if necessary, close up the gap at the joints and seams of the cement, eliminate irregularities and depressions, checking the horizontal level. Laying of the waterproofing layer in the bathroom is performed on a clean base, free from dust and dirt.
To provide quality and reliable adhesion of the protective material with the floor slab – the objective of the primer, to cover the base of which preferably several times. After drying primer, you can go directly to the waterproofing of the floor.
Step-by-step manual gluing technology ↑

Roll waterproofing is one of the most time-consuming processes, for which often attract professionals. For independent work it is better to use a self-adhesive strip.
Stages of work:
- The cutting roll length and width of a premise, given the overlap of bands between 5-10 cm and on the wall by 20 cm.
- To the primed substrate bonded to self-adhesive sheets or plain material fused around the perimeter of the bath, paying special attention to the joint areas of the walls and floor.
- Additional seams and joints with silicone or polyurethane sealants.
- The device of concrete screed and leveling of the coating.
- Surface treatment with antifungal drugs and finishing the floor.

Step-by-step manual of coating technology ↑
Obmazochnoy waterproofing the floor in the bathroom does not involve such large-scale works, as roll, but the process is also quite time consuming. Use materials in powder form or ready to use paste or mastic. The dry mix before any work is diluted with water or polymer emulsion depending on the components.
Stages of work:
- Around the perimeter of the floor at the junction of floor with wall is applied to the first layer of coating of mastic to the height and width of 20 cm. After drying, carefully glued corner joints self-adhesive tape rubber based.

- Using the technique of continuous application, cover all areas of the floor two, and three layers of mastic. Each subsequent layer is applied in the direction perpendicular to the previous one, with an interval of a day for sufficient drying of each layer. The neglect of technological break can lead to cracking of the waterproofing membrane after the execution of finishing works in the bathroom.
- In the absence of the mounting of the screed on top of the membrane it is possible to use a reinforcing mesh between layers of mastic – this will allow you to achieve excellent results in the durability and reliability of the protective coating.

The best assistant and consultant on waterproofing bathroom floor – video from the professionals:
Part 1
Part 2
Features waterproofing of various types of floor ↑
The choice of material and method of waterproofing a bathroom is dependent on operation of the premises: the ground floor, availability of the heating system «warm» floor, room humidity, and other factors.
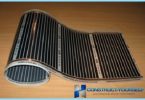
Waterproofing of floor heating in the bathroom, in addition to the protective layer from moisture, the function of anti-corrosion barrier of the main elements of the heating system Mat and pipe system. Before laying the screed, it is possible to use as roll-to-roll and coating materials, or combinations thereof, when the overlaps okleechnoy insulation treated with bituminous mastic. As an alternative, use only liquid waterproofing the floor in the bathroom – on a frozen layer of bitumen or cement-polymer mastic is laid screed and conduct the subsequent installation of the finish flooring.
What if the flooring in the bathroom – tree? Work well in «pie» wood floor roll materials. Obmazochnoy waterproofing wood floor in the bathroom with the cement polymer mortar or mastic based on bitumen should be enough protection. For the efficiency of the membrane using two-component compositions based on rubber – liquid rubber and activator, which provides its hardening.

Walking results ↑
Any of the above methods waterproofing bathroom floors will be an effective barrier against the penetration of water only if necessary to perform the sequence of Assembly works and to follow the recommendations of manufacturers of materials at drying time of the coating.