The contents
- Technology of execution of works
- Prepare the surface
- Priming walls
- Reinforcement and installation of beacons
- The kneading solution
If you need to know how is the technology of plaster surfaces, then you came to the right place. A lot of homeowners are thinking about how to save money on repairs by making it yourself. One of the important stages of construction is a plaster walls. Thanks to it you can easily align the surface and prepare it for the application of a facing layer. Is a technological process which can achieve each. Having studied the working principle, technology and highlights, as well as watching instructional videos, you will be able to cope with the task. That’s what we try to convey to you. AUX video will help you see the technique of the plaster walls with their hands.

The work implementation ↑
In a nutshell, the whole process of wall plaster was reduced to the following stages:
- Surface preparation for plaster application.
- Wall priming to improve adhesion and properties of repelling moisture.
- Installation guide beacons by which to navigate when working.
- Preparation of a mixture for plaster.
- The coating solution and alignment.
This technique is quite simple. You only need to see the details of each stage and carefully follow recommendations. But, it is worth noting that to do the plastering of the walls, you can not only manually but with the use of mechanical devices. Only need a special device for work. The advantage of this method is the fast technique of the solution on the surface of the walls. Using such a device it is possible to do all in 3-4 times faster. Let’s examine each stage of such mechanized plaster, as well as view a series of videos on how to do the plaster walls in a mechanized way.
Prepare the surface ↑
It is very important to prepare the wall surface for plaster application. Why do it? Ignoring this step, your efforts may be in vain. Over time, the plaster will crack and fall off, not having served a year. What is included in this training?
- cleaning of walls from the old covering material (Wallpaper, tiles, paint, lime, old plaster);
- clean the surface from dirt, dust and grease.

To effectively getting rid of Wallpaper, plaster, lime and dirt use various scrapers. Wallpaper and plaster, better to remove with a spatula. Paint can be easily removed with a wire brush. If you want to remove a large layer of plaster from the walls, you may come to the aid of the axe, the crowbar, the Bouchard, a chisel with a hammer or, more reliable, more punch.

It is required to improve adhesion, but such rules do not take into account the primer.
After removing all unnecessary layers, the surface is cleaned from dirt and dust (you can use a broom). When in the wall there are deep gouges, they should be to cover the plaster. You are now ready for priming.
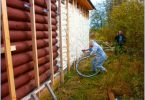
Priming walls ↑
An important activity is the priming of the walls. If before the prepared surface is moistened with water, now it is covered with special compounds that enhance adhesion. It is clear that to make a sweep of seams of the brickwork will be more economical than to perform complex work related to the priming of the walls. But, first, do not always have to putty the walls of brick, and second, the hygroscopicity of building materials for masonry walls can lead to the destruction of the layer of plaster. How? Quick vlagopoglascheniem will lead to the fact that water is absorbed much faster than hardens the mixture. In the end the layer will become unstable or cracked. But thanks to the primer of deep penetration this will not happen as it will protect the surface from rapid absorption of moisture.
But, you have to be careful not to create «glass», surface which will not absorb moisture.

The ground mixture is applied to the surface of building a roller or a wide brush. This is one of the easiest types of work to make that even a child can do. There is another way, which is even faster. We invite you to watch a video on how to Prime the surface before plastering of walls this way.
Reinforcement and installation of beacons ↑
To plaster cracking at corners of door and window openings establish angular profile. It will protect the corners from mechanical damage.
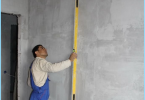
To perfectly align the wall used the guides trackers. These profiles can be bought in any hardware store. They represent strips of perforated steel (see photo) with a length of 3-4 m, with a cross section of 6-20 mm. the longer it takes, the harder will be the guide. It is convenient and you can increase the layer of applied finish.

Beacons is aligned with a plane that can be mounted on the wall with a solution that will be used to plaster walls or plaster. There is another way – mount the profiles on the plugs. It is an innovative way that will save you time. How to do it? View a video detailing about it
But not enough to fix the beacons on the wall, they must be placed so that they created a perfectly flat plane. The technique is quite simple – first, the level set extreme bars. Then between the wall and them screwed the screws with dowel. They will be tied to the thread that you should pull horizontally. In order to precisely level the plane, you can add all of the diagonal threads. How it looks, look at the diagram.

It is important to consider the distance between the bars. It depends on what your rule. The size of the partitions should be 100-150 mm smaller than the size of the rules. What to do so? Beacons serve to rule rested on them, slipping and evenly distributed layer of plaster. If the space is smaller, the tool will not reach to the lighthouse. This will lead to uneven wall.
The kneading solution ↑
It is time to prepare the mixture for application to the surface. When you want to work manually, the solution is mixed in a bucket or other small container. It is worth noting that plastering the surface with cement-sand mortar or plaster. The first is suitable for outdoor use and for rooms with different humidity. The plaster mixture is often used for interior work.
Instruction on how to mix plaster mortar shall be indicated on the packaging. Standard procedure is the following:
- the amount of water is poured into the bucket;
- then poured the dry mixture;
- the content is thoroughly mixed to the desired consistency;
- putty leave on for 10-15 minutes, so she is ripe;
- the mixture was again stirred.
When ready, the solution is applied to the surface of.
Mortar for plaster stations ↑
And if we talk about mechanized way, then everything is a little bit different. Immediately it should be said that to apply the putty on the wall in different devices. There is a special apparatus that he knead the mortar – plaster station. All you need to connect the machine, fill it with dry mix and apply ready-made plaster on the wall. This station is automated, and it can help very quickly to plaster the wall. Looks like the device works for plaster walls, you can see from the video.
The solution for hopper ↑
Another way is to use a hopper or plaster bucket. This apparatus is easier and everyone can afford. By design, it resembles a spray gun. It consists of a compressor, hoses, spray gun and reservoir of ready mix.

The principle of operation is quite simple – a bucket is typed in plaster and pressure applied to the wall. The mixture required to prepare in advance in large quantity, as the rate of application is higher than manually. As you empty the bucket, scoop up the solution again. When the solution is ready, you can begin to work.
Mechanized plaster walls ↑
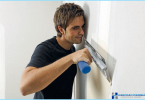
All that remains to do is to cover the wall of a sufficient layer of plaster and levelled on beacons. Using the device to maximize the speed of applying the solution. It was shown in the video on the plaster walls of the compressor.
The principle of operation of installation or hopper is simple: a mixture of smooth movements of the gun applied in the space between the beacons. It is important to attend each section of the wall. To start you need to work top-down. The gun is held at a distance of 20-30 cm from the wall perpendicular to.

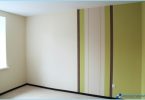
After applying the wall you want to align and clean the excess putty. And here the rule is used. Since beacons are exhibited, the work will not be difficult. Movement from the bottom-up solution shrinks uniformly and evenly distributed over the surface. The excess removed with a spatula or trowel. To align all at once does not work, so the operation is repeated several times.

So all that remains is to treat the wall with a trowel and polutorki and they are ready for further works (plaster finish and a decorative layer). Thanks to mechanized method, time is reduced to work, and saves power.
Summary ↑
You see the General principles and technology of plastering the walls in a mechanized way. If desired, one may perform such work in house or apartment. So you can save money on repair facilities and spend it on something useful. To consolidate the material, watch the video, how is a quick plaster walls.