The contents
Today finishing internal and external walls “under a brick” is no longer something exotic. Such a method of decorative finishes have gained popularity all over the world. However, it is not always the amount of space allow the use of decorative finishes real brick. In this case, help may be a great alternative – decorative plaster under a brick.

The advantages of this technology ↑
Among the main advantages of stucco walls “under a brick”, it should be noted:
- Affordable materials. Ready plaster mix per 1 square meter of the wall will be several times cheaper than bricks.
- Relatively simple to operate, especially in comparison with the construction of this masonry. Simulated masonry can easily be made with your own hands, provided initial skills of painting and decorating.
- A huge range of colors and textures. In today’s construction market you can find any version of the decorative plasters with different technical characteristics and intended for both internal and external works.
The imitation of brickwork: the options and their characteristics ↑
Before you begin applying the plaster with your hands, you need to determine the type of brickwork you are going to recreate on the wall. In the Arsenal of masons there are several varieties of decorative masonry, which differ in texture of the brick, its colour, options pointing. It may be “street” clinker, facing, even fancy stylized ancient walls from the Roman period. Applying a particular kind of masonry, it is possible to greatly vary the interior of the room, giving the wall either deliberately rude, or stressed neat and geometrically precise.

Tools for applying plaster with their hands ↑
If you decided to do all the work on the plastering of the walls with your hands, you may need the following tools:
- Or a simple laser level.
- A set of spatulas.
- Trowel.
- Falcon.
- Grater and poluterok.
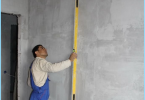
- The rule for alignment of walls.
- Plaster mesh.
- A bucket or trough for mixing mortar.

Also during the preparatory work to align the walls may need kirochka or a small hatchet. All this simple tool is inexpensive to purchase at any hardware store.
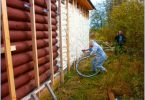
Preparing walls to work ↑
Before you begin applying the plaster on the walls, you need to make preparatory work. First, from the walls, removed old plaster with Wallpaper and other finishing materials. Once completely naked wall, it is necessary to assess for different defects: curvature, cracks, potholes, etc. For sealing and elimination of such defects of the wall is usually applied cement mortar that can be cooked with his own hands or buy ready-made mixture.
After alignment of the walls, they must be treated with special primer for cement and masonry surfaces. This will provide an improved coupling mechanism of decorative plasters with the wall surface. Professional plasterers recommended to add to the primer a little PVA glue. This will greatly improve adhesion (penetration, adhesion) with the wall.

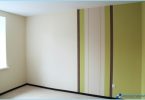
Marking the wall ↑
Is made in the case if you plan to apply the plaster not on the entire surface, and some part of it. In this case, with a pencil marked the boundaries of “laying” on the wall, and the rest of the walls insulated with masking tape.
The application of decorative plaster ↑
For preparation of solution it is best to use a dry mixture, which is diluted with water. To do this, take the room temperature water and add it to the dry mixture in the proportions specified in the instructions for use. A guide, usually available on the packaging and reglamentary as cooking ready-made solution and the technical conditions of its application.
The resulting mixture should be thick enough consistency to tightly stick on the wall surface without forming drips. To best simulate masonry in plaster, you can add color color – red, yellow, grey according to your preference. So the future of masonry will look more realistic.
If the substrate acts as a brick wall, then it is advisable to apply the solution in thin layers. So you can save a relief structure that will facilitate the formation of separate “bricks”. For applying the solution used a wide spatula to which others, narrow, evenly with a spatula applied plaster mix. After that it smooth, sweeping movements distributed over the surface of the wall.
To achieve a particularly smooth surface of the walls is not necessary – rough surface is best able to capture the texture of the brickwork. Where were you planning only a few blotches of masonry, paste over the wall surface with masking tape, after applying the solution it is removed.
The formation of separate “bricks” ↑
After the plaster mixture on the wall slightly dry (but only slightly to remain plastic enough!), you should start forming bricks masonry. To do this, mark on the plaster of the wall with a tape strip from the top down. It will continue the “seams” of our “brickwork.” The width between the bands to do the same – usually the height of the building brick is 8 cm Approximately of this size should be followed when marking for a more realistic resemblance to a real brick wall. However, the size here is not critical. What matters is how it will look in the total volume of the wall and in relation to specific interior spaces. Of course, if you make too big bricks, there is a risk that they will look like painted cinder blocks.

Then we get a straight, thin object about 1 cm thick to extrude “seams” on the wall. This can be a thin metal rod, tube or a wooden stick. Perfect wooden window glazing bead, which is normally used for fixing window glass in a wooden frame. With it, squeezing the horizontal “seams” along the lines of markup, slightly AutoPlay it flat in the plaster.
After the horizontal seams on the wall will be ready, you will need the same way to do the vertical joints. It should be note that the vertical seam of a laying should be applied in a checkerboard pattern, repeating the pattern of the “dressing” of the bricks in this masonry. Typically, the length of the brick is 24 cm, therefore, the distance between the vertical striations on the wall should be about the same.
Finishing ↑
After you have finished the work on the formation of individual bricks in the wall, you should start finishing our “masonry”. Here you are provided with a wide scope for improvisation. “Seams” for most of the bump can be painted over dark colors or Vice versa – to highlight them in white. The latter option is recommended if you wish to simulate noble facing brick. Prior to this, masonry can be treated with sandpaper to make them more smooth.

Paint the wall in all shades of red, brown or gray (if you did not add dye to the plaster mixture). Painted wall can be covered with varnish – this will make it more dressy, but at the same time will protect the paint from fading. In imitation of the rough wall you can use several types of paints, slightly different from each other shades. It will make a wall more natural.
As you can see, to do with their hands pseudoterminal the wall is not that difficult task. For greater clarity, the whole process is shown in the video.