Flooring is one of the most memorable and luxurious flooring. It can turn any room into a area of wealth and comfort. No matter how difficult was the process of laying the parquet, the end result will justify all of them with a vengeance.
The parquet is made from different wood species. Each has its pros and cons.
- Oak. Has a gorgeous figure, resistant to moisture, great colours, but can slightly darken.
- Maple. As strong as oak, but yellow over time.
- Cherry. Brown with a faint pink tinge. Also using slightly darken. Easily handled.
- Beech. Has a nice yellowish or reddish tint, but is afraid of humidity and temperature fluctuations.
You must choose the flooring depending on the room where it will be used. Do not use in places with high humidity, such as in the bathroom, outside, poolside and so on.
Not required gender of one species of wood, as they can be combined.

Straps come in different sizes, if the room is small, it is better to choose small as they visually increase the space.
Often buy strips of width 5 see Also check, what is the junction of the planks should be smooth and without gaps.
Preparation of material and grounds ↑
In advance a few days before the start of work, put all the materials in the room where it will be repaired, so that their temperature is the same.
Because how well made the base for parquet, depends on the period of its operation.
Preparation of the concrete base ↑
If the room has a concrete floor, you should check it for irregularities. This can be done with a metal ruler. If you will be caught between it and the floor clearance more than 2 mm, it is necessary to eliminate (a special mixture or grinder).
After the surface is leveled, cleaned and dried, is laid waterproofing membrane. The sheets overlap by 20-30 cm, they also need to close the wall at least 10 cm All joints are glued with adhesive tape. Now filled screed (sand and cement mix with reinforcing) and allow it to dry (the thickness of the screed 4-5 cm). Directly to the coupler will be attached to the plywood.
Next is applied a layer of primer and wait until it dries. The primer will improve the adhesion of the adhesive to the surface, and will also serve as a waterproofing.

At this time, sheets of plywood and cut it into squares (50?50 cm, 75?75 cm). Once the primer has dried, put glue and put the plywood. The leaves fall so that the joints between adjacent rows are not formed «crossroads». For better attachment of the plywood is fixed with screws so that head of screw is buried 5 mm.
The surface is ready for laying parquet.
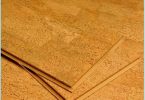
The use of plywood for the parquet, has many advantages:
- the surface becomes perfectly smooth (in which case plywood can be sanded);
- mount the plywood flooring to be more durable than the concrete (make the parquet only on the concrete floor is not recommended, as the destruction of the concrete surface, flooring will start to fall off, and will be low heat and sound insulation qualities);
- improves heat and sound insulation;
- walking on the parquet, laid in this way, it will be much softer and nicer.

Preparation of the wooden floor ↑
Before you start laying the flooring on old hardwood floor, you need to check it out. All boards must be intact, without cracks, rot, as well as properly secured. Be sure to check the logs, not do they require repair or replacement. Floors should not squeak or fail. All the boards and joists must be impregnated with antiseptics.
After checking and repairing the floor thoroughly otchitalsya, it is cleared and begins the process of laying parquet.
If the floor in not the best condition, it is recommended to cover it with plywood.
Preparing the substrate on joists ↑
The floor is laid a layer of waterproofing. Then at a distance of 40 cm from each other are set joists (with screws). During installation be sure that all the lugs were at the same level.
After you install the lag screws to fasten the plywood sheets, leaving between them gaps.
Between the joists, if necessary, can be laid insulation.
The parquet methods ↑
There are several ways of laying:
- floating;
- gluing using parquet adhesive;
- mechanical fasteners (nails fastened).
Floating method ↑
Parquet laying floating method is the most simple option. Because of the strap between fixed only by means of tenons and grooves. To the base, they did not attach.
With this method of installation, it is recommended to lay the soundproofing to the floor did not creak.
Flooring, laid in a floating manner, can be repaired.

Gluing using parquet adhesive ↑
To the technology of parquet laying on the plywood was not broken, before gluing it is necessary to treat the surface with primer for better adhesion with the floor. After the primer has dried, move on to working with parquet.
Glue is applied to the base only with a notched trowel, planks are fastened together by a system of tongue – and-groove or without.
The disadvantage of this method of styling the impossibility of a partial fixation.

Fixing with glue and nails ↑
The most durable option, but the possibility of repair is eliminated completely. Technology laying parquet is the same as when you use parquet adhesive, but additionally each strap is secured by nails (you will need a special gun).
Options parquet ↑
The options of laying:
- «herringbone»;
- deck;
- square, rhombus, rectangle;
- mosaic and so on.
Deck ↑

One of the simplest ways of styling. All strips are laid parallel to each other. The second row starts with a plank for one second or one third less than standard (finally the right size).
You can do laying diagonally the room, and use a parquet from various breeds of wood.
To knock out the planks of flooring to each other need to use a hammer with a rubber tip or wooden planks.
In this simple way you can do the laying of parquet and with his hands, not hiring professionals.
Square ↑

Straps meet in a square and then stacked, the second square set perpendicular to the first and so constantly alternated. Should be in the form of a chessboard.
The lighthouse number in square room starts from opposite the door wall, a rectangular room along one of the long walls.
A parquet pattern can be absolutely any, it all depends on your imagination.
But not to be confused with a pattern, be sure to make the scheme of laying.
Herringbone ↑

The process of laying parquet in a herringbone pattern starts with the definition of the center of the room and holding the line in which is laid the first majachnogo a number.
To the left of the rail line is fixed that it was unable to move. To put strap (three joined together) start to the right of her ship forward (directed to the master).
If laying doing with the glue, then apply it on the area approximately equal to three strips and sequentially install them (in this case the straps can be without thorns and grooves).
Approximately every metre using the second Reiki checking flatness and angle stacking.

Laying near the walls, you should definitely remember about the gap, especially if you need to saw the planks.
The last step is sanding, putty and varnished parquet.
Before polishing you should wait at least 5-7 days so that the flooring is fully sat and dried.
Grinding is needed to completely level the surface, to remove defects and contamination that appeared after installation. The first two times grind large grain, and the last time small. Then the floor thoroughly cleaned with a vacuum cleaner.
Putty will close all cracks and crevices. She covered the whole floor. After it dries, again sanding with a fine grain to remove excess putty.
Now the floor is covered with primer for better adhesion of varnish parquet. Again wait for complete drying.
The final stage is varnishing. It protects the floor from mechanical damage and moisture, and will also give more beautiful look. Gloss varnish will make the floor shiny, the picture will become even brighter. Matte varnish will give a room more coziness and warmth and will make the picture less bright.
Applied from 3 to 9 layers with a roller. After application of the floor is left to dry for a day and a half.
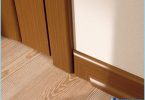
The last layer is left to dry at least a week. You can then install the plinth.

The installation of parquet should be done only after completing all other repairs. To bring the furniture after one month of waiting, and the legs should be covered with a soft material so as not to damage the floor.
High quality laid flooring, will last for many years and will continue to please the eye with their unique beauty.