The contents
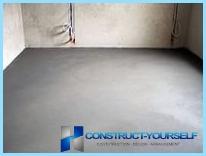
The stages of the device of concrete screed ↑
Regardless of what floor covering is expected to lay a cement designed to create a firm base with the specified surface level. Device quality concrete floor screed is done in several stages:
1. The layout of the floor level;
2. Beacons;
3. Preparation of substrate;
4. Preparation of solution for filling;
5. Fill;
6. Care.
Marking the zero floor level ↑
The most important stage of works at concrete floor screed is the definition of the zero level. If you have a laser level, then no difficulties are anticipated. It is sufficient to set the device in the middle of the room, turn it on and the rays to put the marks on the walls.
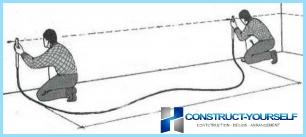
After using paint cord working lines to connect all of the mark. It turns out the line is on a single level relative to the horizon, not the floor. Further, by measuring at several spots the height from the floor to the line, find the minimum thickness of a future tie. The values obtained are different. To find the optimal thickness required from a larger value to take less. However, you should take into account that the minimum thickness of the concrete floor screed should be 7 mm because, if the layer is thinner, then cracks and the concrete will begin to break down.
After determining the thickness, you must subtract it from the height of a broken line.
Example: 150 mm – 45 mm (estimated thickness of the generated base) = at 145.5 mm. From the marked line, held by means of a water level of take at 145.5 mm and spend one more mark, the so-called zero level, which will serve as a guide for installing the beacons and guides.
Beacons or guides ↑
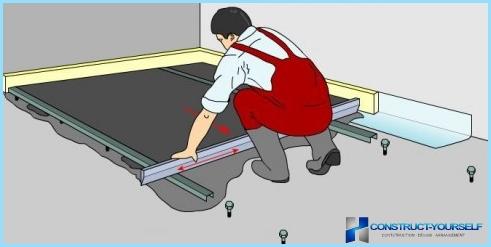
In order to make a floor extremely smooth, while creating use guides or special beacons, which is set in accordance with the zero level. To put beacons in several ways, and here, perhaps, the easiest of them:
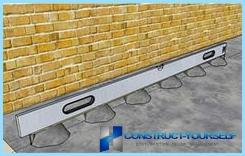
parallel to one wall of the room at a distance of 20-30 cm from it are laid out the so-called brand of small portions of a cement-sandy solution made in the proportions 1:3;
- the locations of brands should be well cleaned from dust and debris;
- the brand from the solution is placed in a standard lighthouse, which can be purchased in any hardware store (if not factory, you can use a pipe of suitable diameter or profile);
- drown beacons in marks, not forgetting to monitor the height and level plane;
- once the beacon is placed, it is fixed with additional solution;
- next, you need to install the following lighthouse in parallel relative to the first, at a distance, 20 cm shorter than the length of the applicable rules, that is, if you use the standard rule is 2 meters, the clearance between the beacons will be of the order of 1.8 meters. In the same way are set other lighthouses all over the place.
Preparation of substrate for grouting ↑
Before you make a concrete screed, for good bonding to be completed to start the preparatory work, which includes:
- Alignment. All existing concrete base and the deepening of more than 20 mm is required to seal the cement mortar, and protrusions and bumps to knock;
- Cleaning. Before casting, the substrate must be cleaned of dirt, dust and oil stains;
- Primer. On the prepared and cleaned the base requires priming, while avoiding omissions.
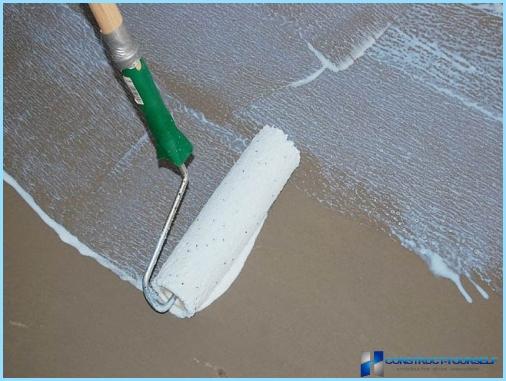
Door jambs and other wood items at the bottom of the subfloor must be protected from direct contact with concrete solution. To do this, wrap them with a film having recorded with the help of drawing pins or adhesive tape.
The subfloor must be closed with plugs all drain holes and other openings in the room.
If the room has a cable or pipe, which are supposed to hide in a concrete screed, they should be recorded in polupodvizhnym condition. For this communication result in the izolon or another soft material and fixed to the concrete base by means of clamps and dowels.
Mixing of mortar for concrete screed ↑
To prepare the solution using self-prepared cement-sand mixture or dry preparations which can be bought in any shop of building materials.
In that case, if you decide to use the traditional cement mortar, for its preparation is necessary to take cement and sand in proportion 1:3 respectively. Cement for concrete ties are required to take M-400 and above.
In the container of dry cement and sand mixed to obtain a mixture of the same color. Further, the capacity necessary to pour water, carefully stirring the solution with a shovel or trowel (depends on the volume of the solution) to the consistency of very thick cream.
For small volumes of solution to obtain a homogeneous mass, apply the construction mixer or a drill with a special nozzle, for large quantities it is best to use a cement mixer. Device technology concrete screed involves mechanical mixing to achieve uniform distribution of all components.
In the result, the cement slurry should be obtained with a homogeneous structure and of the same color. After mixing, you must allow the solution to soak, and re-knead it with a mixer.
Filling of a concrete rod ↑
Care fresh screed ↑
It would seem that this is possible, and to stop, but the drying of the screed takes its shrinkage and possible cracking. To avoid this the first time for the screed must be supervised. Care is the following:
- in the first day after pouring the screed should not be touch and the room is best to obscure and avoid drafts;
- a day after pouring concrete floor screed it is necessary to cover with plastic wrap and wait for complete solidification. It is necessary that in the process of solidification of the screed is not cracked and until tender came gradually.
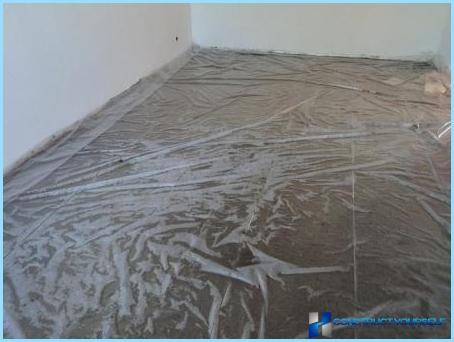
Complete drying of the concrete floor screed, created by your own hands can take 14-21 days, depending on how quickly it will evaporate the moisture.
A few simple secrets ↑
- In order to eliminate the slack of the beacons, it is necessary for two or three hours to fill under them to fill all the voids with thick mortar.
- The solution is required to mix such portions to be able to make a fill and align it until it begins to thicken, which is about four hours.
- Tie in the premises must be performed in a single day, to ensure the homogeneity and strength of the surface.
If you carefully and responsibly in the implementation of all stages of works on the floor, especially to the quality of cement to fill the Foundation under the flooring will be durable, smooth and durable. Device outdoor coverage must be done after complete drying of the base. You can also view the video showing the whole process of the device of concrete screed floor

 parallel to one wall of the room at a distance of 20-30 cm from it are laid out the so-called brand of small portions of a cement-sandy solution made in the proportions 1:3;