The contents
- Stage # 1. Preparatory work
- Stage 2. Production of blanks for the window
- Stage # 3. The manufacturer of the box or frame
- Stage # 4. Manufacturer of window
- Stage # 5. The installation of glass
- Stage 6. Installation of Windows
In recent years, plastic double-glazed Windows surely replacing the wooden counterparts. However, their reliability and the technical indicators are firmly entrenched, time-tested. Besides – it is a budget way to change the window, especially if you decide to do it yourself.
Wooden structures are environmentally friendly and reliable building. About their advantages everyone knows: first, Windows in wood «breathe», secondly, wood is an affordable material, and thirdly – they can be made with your own hands, without the use of sophisticated equipment.
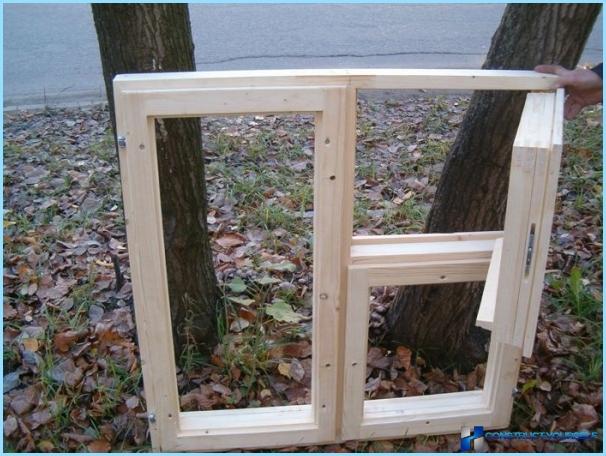
Window to garden, outbuildings or porches can be made independently, having studied a bit of technology. In the manufacture it is necessary to pay attention to the correct calculation of the window size and its geometry. It affects not only the aesthetic factors of operation, but the functionality of the design.
How to make a wooden window with your hands? ↑
The main point in the Assembly of parts of the new wooden Windows is precision. If you are not confident in their abilities, it is best to contact a professional or order a ready-made window made in the production of.
Tools needed:
- screwdriver;
- drill;
- glass cutter;
- elektrorubanki;
- hammer;
- chisel.
Stage # 1. Preparatory work ↑
In order to make the window you want to create a sketch. For this you should know the size of the future window and its functionality, for example, will it be disclosed or not, the number of valves and air vents.
Sketch carticica to scale. This is important in order to correctly calculate the amount of material, location of bolts and hinges, handles and latches. Presented video contains examples of drawings of the Windows, maybe you’ll find here what you need:
In addition, there is a calculation of the material on the window. The calculation should be done with the stock, in case that detail, in connection with the lack of experience, you can spoil
Stage 2. Production of blanks for the window ↑
The important point is the choice of the type of wood. Most popular Windows made of solid pine, in addition, an alternative might be oak.
The Board should be prepared to handle, namely, dried, not to have strains and injuries.
According to the drawing, cut out the necessary details that you will later be joined together.
In working with the milling machine is a necessary skill, so it is advisable to use the planer, and a jigsaw.
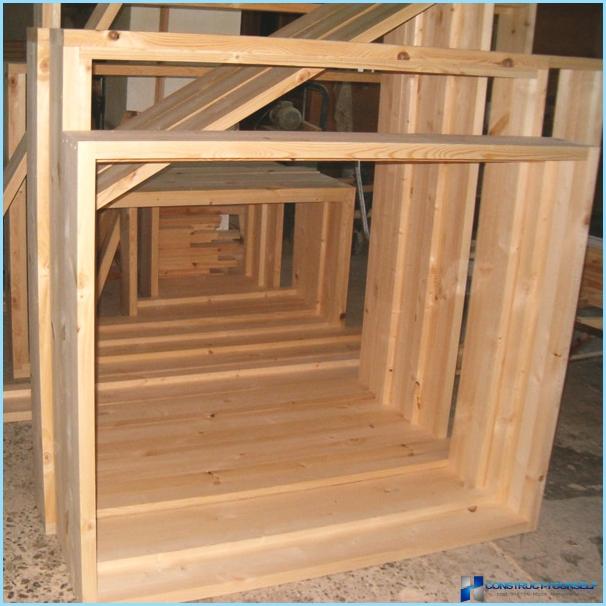
In addition to the array as a working material use laminated veneer lumber. It features sturdy texture and also resistant to deformation.
It will take Board 150х50 mm.
Stage # 3. The manufacturer of the box or frame ↑
The boards of the blanks is a groove or groove whose depth of 15 mm, a groove is a recess in the form of letters, Such parts we will need to make four identical.
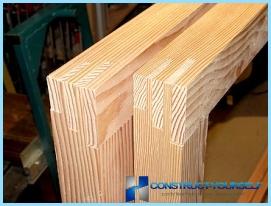
Connect the parts of the box with wood glue or PVA glue. In the finished rectangle drilled holes in the corners and hammer the stem 3-4 cm wedge provides a reliable connection of parts at a right angle.
The box is ready. It is placed in the window opening and secured by dowels. Develop foam around the perimeter of the gaps with a mounting foam.
Stage # 4. Manufacturer of window ↑
To frame the necessary timber 6×4 cm Shape and design depends on the number of compartments, glass and glazing beads size.
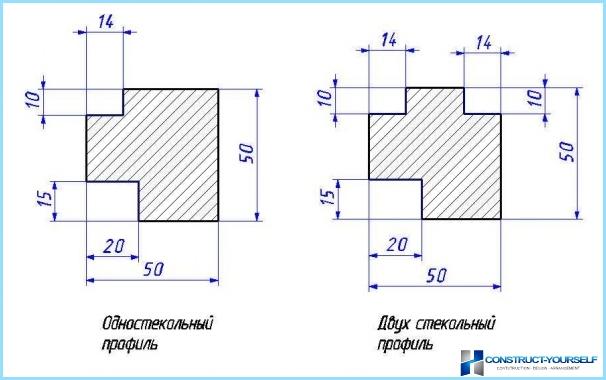
There are two types of profile:
- agnostically;
- dvustoronniy.
Agnostically design includes two slots: one for fitting in a box, and the other for mounting glass.
Dvustoronniy profile – more complex design, with three slots for two glasses and boxes.
Usually used glass thickness cross-section of 4 mm, the size of the bead is 10 mm.
Of the procurement is going to the base of the frame. So the Assembly was easy, the ends of the blanks cut at an angle of 45 degrees. And pre-prepared profile fit method the tongue-and-groove that provides a secure grip parts and the immobility of the structure.
We can also consider another variant of the gain – metal corner. This item is sold in any hardware store. Fasten angles in each corner of the structure with screws. Currently, the builders began to abandon this method, considering that it is not aesthetically pleasing. However, if the window is subsequently painted with paint, this option can be considered.
Stage # 5. The installation of glass ↑
The importance of correct calculation of the size of the glass due to the fact that this factor determines the tight fit of the glass to the frame that is responsible for the thermal conductivity of the window. If in the process of installation gap formed in these Windows will blow.
Cutting glass is a glass cutter, and then the sharp edges of the handle with sandpaper.
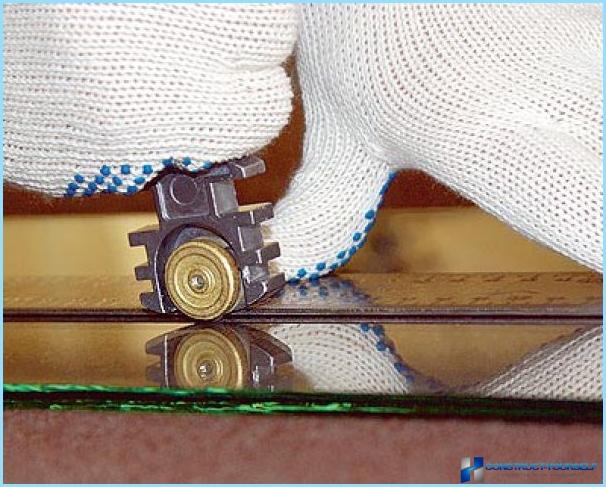
In implementing this process, it is necessary to observe safety rules:
- the necessary work should be carried out in gloves with thick rubber coating to protect hands from cuts;
- on the face is worn a mask;
- protect eyes by means of glasses, as there is danger of falling glass fragments and shavings.
Work the glass cutter also has its own quirks. So, how to cut glass. Movement of the glass cutter across the glass surface should be smooth with a moderate degree of depression. If you are not pressured, the incision will be of poor quality and further action, you will receive a gear chipped. On the contrary, the excessive pressing can push glass, and you risk injury from its fragments.
To cut glass, use the ruler. The material from which it is made does not matter. If you don’t have a ruler, you can use a straight plank.
After processing, the glass cutter, the canvas is extended to the edge of the table, and gently press down with your hand. If you all done correctly the glass in place cutting lines to dislocate. So cut all the glass for the window.
Then proceed to the fitting parts. Each sheet of glass is placed in the frame, and then pulls out.
For on the wooden parts, apply sealer. Means better to take colorless to aesthetically window looked perfect. Next, apply the glass and give the sealant to dry. The top sheet is fixed by a bead. The bead is a triangular rail which simultaneously presses on the glass and the frame. His task is to fix the glass and hide the seam.
The rod is mounted by means of thin nails, at least with screws, if the bead is wide.
Stage 6. Installation of window ↑
The finished window is mounted in a box with screws. The gap between the frame and the boxes are sealed with foam or sealant. Further mounted on the window sill. Learn more about the manufacturing process of wooden Windows by looking video:
The manufacture of the frame in two parts ↑
When you want a window that will open, then the technology changes a little more complicated. This window is made a little differently. In the center of the beam is mounted in a vertical position, which is similar with the frame grooves. The second half of the window is made separately, has a frame a few inches thinner. It is attached to the main structure and represents the «the door».
Manufacturer of wooden Windows – the process is fascinating and useful. Besides, it’s nice to look out the window, created by your own hands, which keeps your heat and soul.

