If required, sheathing of the ceiling in a wooden house, it is best to use a clapboard. This material not only has excellent technical characteristics, but also can emphasize its unique design. To produce the roof lining can easily with your hands.
Selection of material ↑
In order to correctly make the installation of the ceiling lining, you should be familiar with its design. On the ceiling is fixed to the frame. This purpose can be used a metal profile or a bar. The installation frame is made not only on the perimeter, but inside the square ceiling.
If you plan to do the ceiling of the wagon, a photo of which is presented below, with a wooden profile, you will need bars to build the frame. Their size shall be 4×4 inches. In order to set the frame of the plane as evenly as possible, it is necessary to use wooden wedges. Also with this, you can use wedges made of plastic. Proper fastening of hangers to the base of the ceiling can be made only with the help of anchors, which must be purchased in advance. With the aim of mounting the boards to the brackets using screws.
If you decide to use a profile from metal, then you need to make a selection:
- metal profile material the production of which is galvanized steel. Edge of the profile should be mandatory Cavalcanti to provide frame high level of stiffness;
- suspension profile;
- anchors and screws for metal;
- connecting elements.
The choice of lining is also quite a critical point. As raw material for the production of the finishing material can be used:
- metal;
- tree;
- MDF;
- polyvinyl chloride.
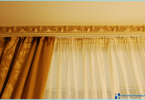
The ceiling lining in a wooden house, a photo of which you can see in this article, will look. During the selection of the material necessary to produce the features of a room.
Installation of the ceiling lining is made using a punch, a screwdriver, a tape measure, level, tin snips, a hammer and a saw on wood. That is why all these tools you need to prepare in advance.
Preparatory work ↑
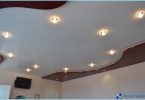
In order for the ceiling of the lining photos in the interior of which can be seen here, was installed with maximum quality, you need to produce preparatory work. The headliner paneling can completely cover the ceiling, but before doing this you must completely remove the old finish from the ceiling. Otherwise, it will eventually be met that will negatively affect the quality of construction works.

The presence of cracks or other problem areas in the ceiling, they should be required to remove. Most often, in this case, a method of plastering. In order to kill malicious microflora and to eliminate the possibility of its spreading to the lining in the future, it is necessary to process ceiling. With this purpose, the most commonly used antifungal composition.
The process of insulating the ceiling covering is made by simply using special mineral wool. In that case, if a heater is used in rooms with high humidity, then the moisture it can sink. So you are pinning, in which the use of polypropylene twine. Fastening the twine to the wooden slats is construction stapler.

On top of the insulation can be produced by laying the vapor barrier. Its installation is carried out with the rough side to the layer of insulation. The ceiling lining in the apartment, a photo of which you can see on our website will take quite a long time attractive appearance, if the preparatory work will be made correctly.
The mounting frame should begin only after full preparation of ceiling surfaces.
Features mounting frame ↑
Before headliner lining, installing a special frame. In that case, if the ceiling will be installed without sheathing, to the naked eye will be visible all the bumps.
Installation of the metal frame is:
- the measurement of the height of the room in each corner and the detection of the bottom point of the ceiling. From it is necessary to retreat 5-10 centimeters. This figure will be the ceiling level;
- the set of initial metal profile around the perimeter of the walls. The mounting profile is formed by dowels;
- the mounting brackets of the profile is carried out to the ceiling. Next is the bending down of the fixed suspensions.
- mount the main sections of the sheathing to the launch profile and suspensions.
- checking and locating all elements of the framework and residual fixing it.


These frames are widely used in rooms with high humidity levels because they are resistant to its effects and deformation.
More suitable for covering a ceiling cover is a frame made of wood. In that case, if your plans do not include lowering the ceiling, then mount the boards can be made directly to him.

Initially the overlap is necessary to attach brackets, which in the future will be planted bars. In order for the bars held maximum firmly, you need to use a nail gun.
Headlining ↑
The final stage of Assembly of a false ceiling is to install a lining. The method of fixing of this ceiling cover is directly dependent on its characteristics. For attaching thin wooden lining or lining of plastic necessary to use clamps. This is a thin bracket that fits into the groove of the lining. With their help, are fixing the siding to the sheathing. These devices are not able to damage to the finishing material, which beneficially affect the appearance of the skin.

In that case, if the paneling is heavy, the mount must make an open way. With this purpose, the nails that have a small diameter cap, but it can adversely affect the appearance of the ceiling. Also, you can hammer nails into the grooves of the lining, if there is a shift of profile.
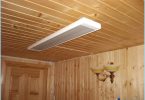
To install the ceiling lining, live pictures below, you can easily own hands. Initially, you must trim the battens on the ceiling. It is applied to one of the corners of the ceiling. In this case the guides of the frame should be perpendicular to the clapboard. The placement of the panel is arranged so that its thorn is drawn to the corner.
Initially, alignment is performed lining. For this purpose the building level. Fixing the panels to the frame may be made on any of the selected methods. Next, you need to take the next strip of siding and insert it into the slot that you have already secured. Next is the alignment of the lining and fastening it the same way as was done fastening the first strip. Using this scheme must be made covering the entire ceiling.

The final stage of the ceiling lining is the installation of ceiling moldings. His mount is in exactly the same way as fixing of lining.
Attach the ceiling lining can be easily with their hands. It is necessary to perform all work in strict sequence and accurately as possible. Video